Veröffentlicht am 2 Kommentare

Christmas pipe cleaner Santa figurines – project ideas and tips

Christmas pipe cleaner ornaments

You can make beautiful and Adorable Christmas Santa figurines by combining pipe cleaner and spun cotton shapes. Below you can checkout a few a of our cutest projects and read about a few tips that we thought were relevant.

Project Pictures:

pipe cleaner santas vintage bump chenille DIY

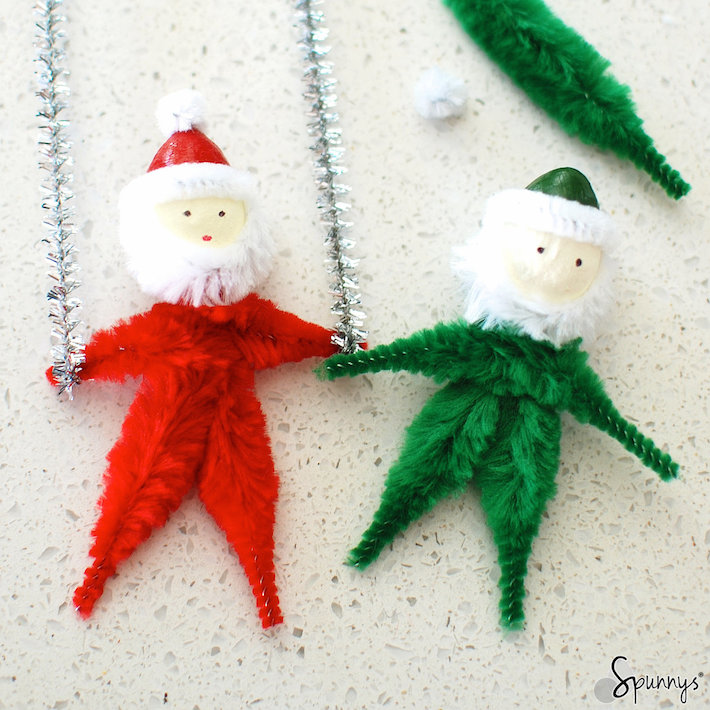
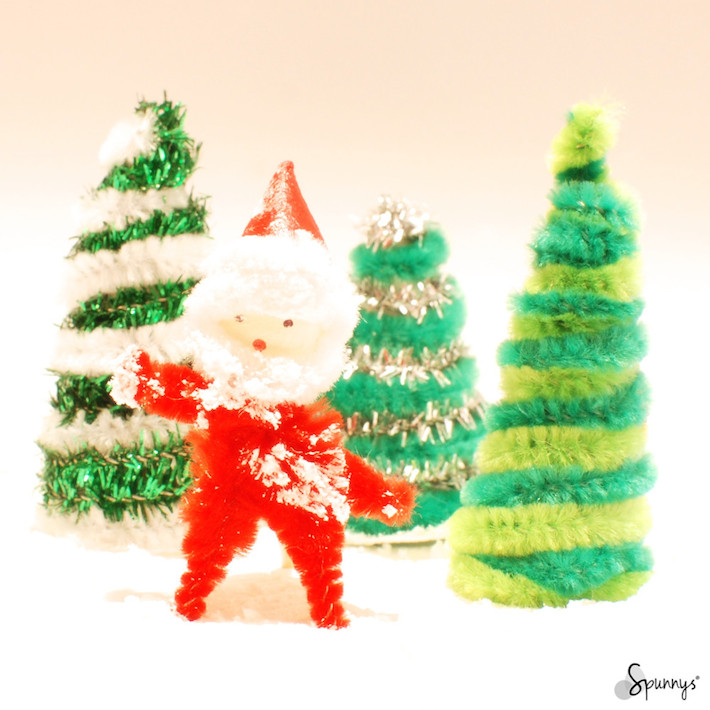
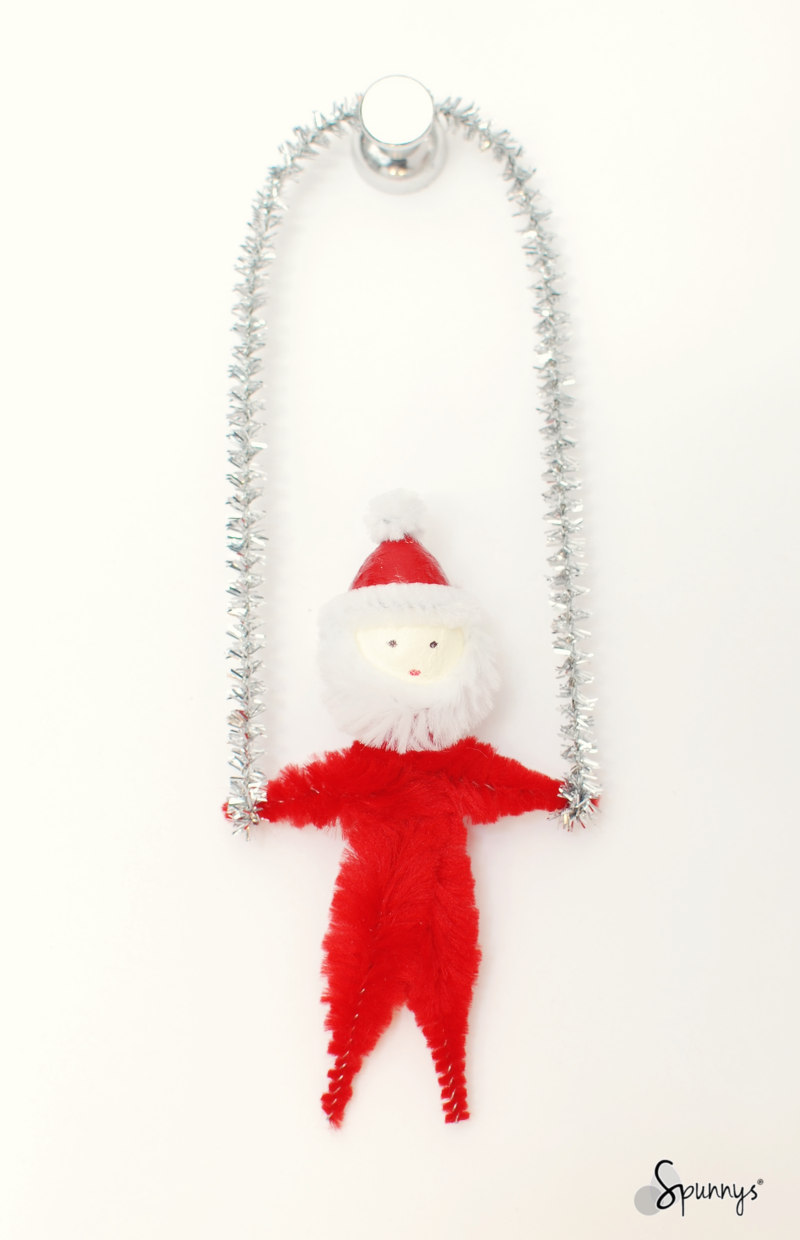
Vintage Santas – Christmas pipe cleaner ornaments
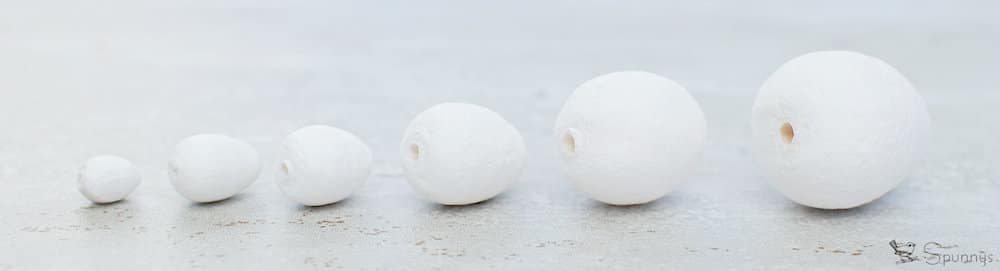
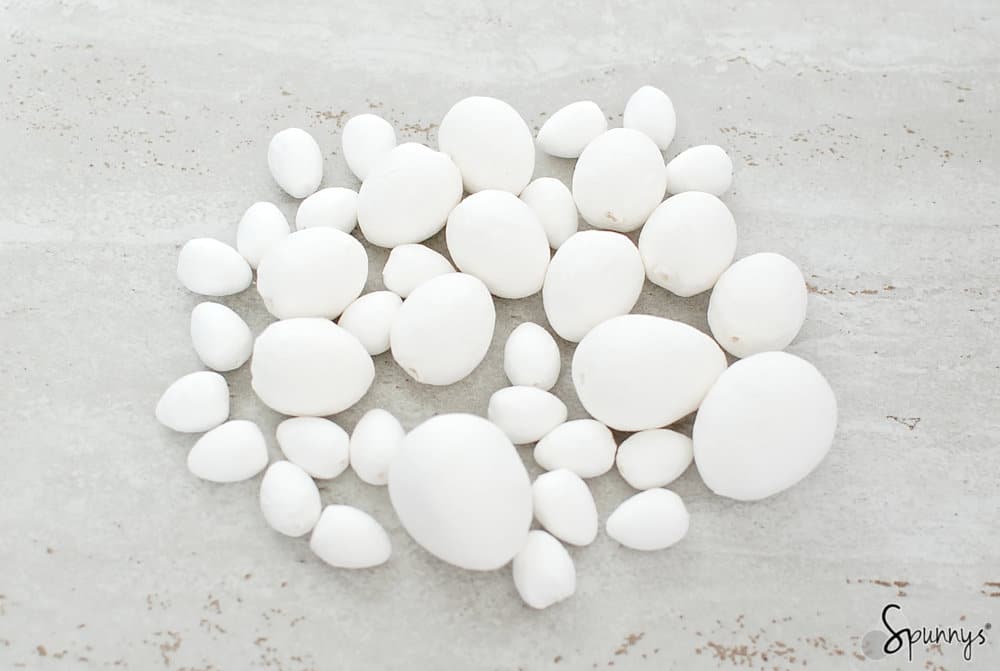
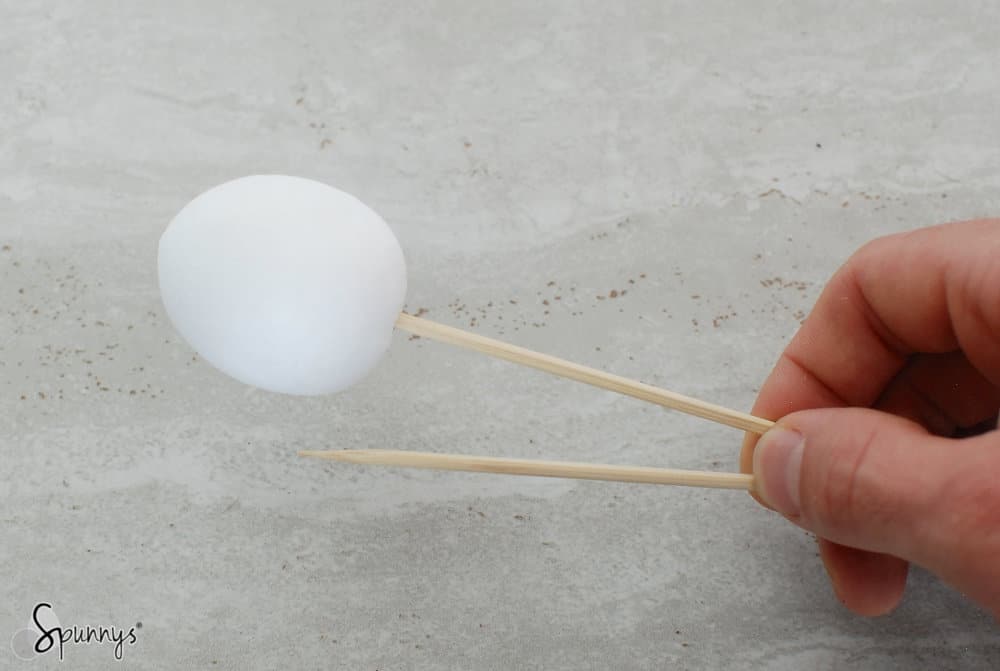
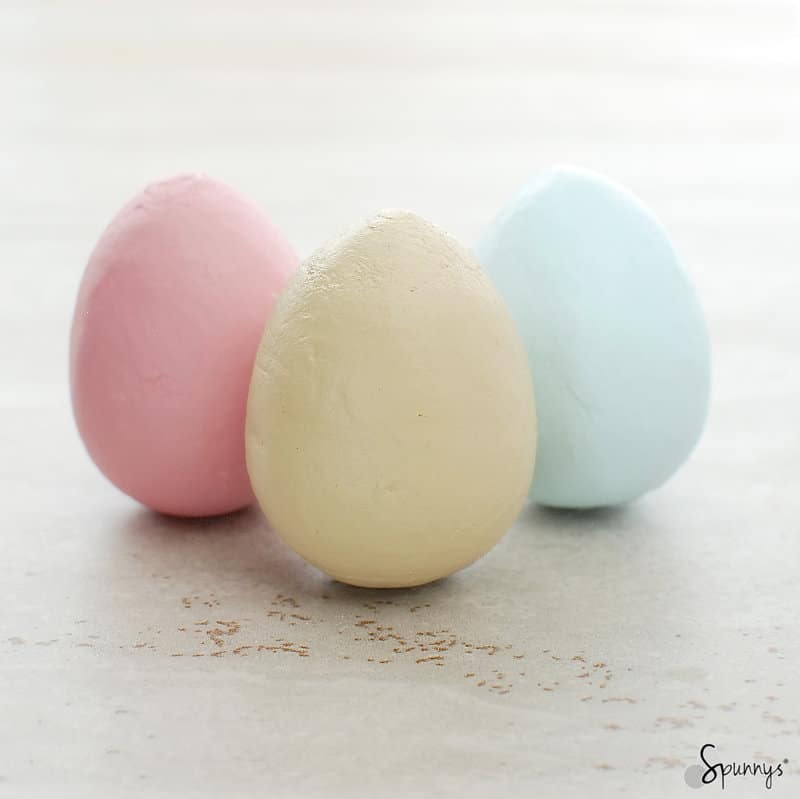
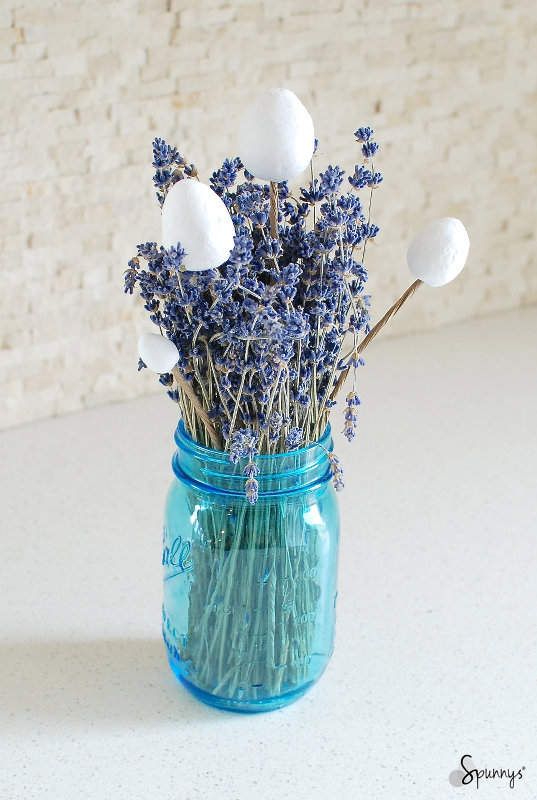
25mm spun cotton eggs, bump chenille, regular chenille

Pipe cleaner santa claus ornaments easy christmas DIY

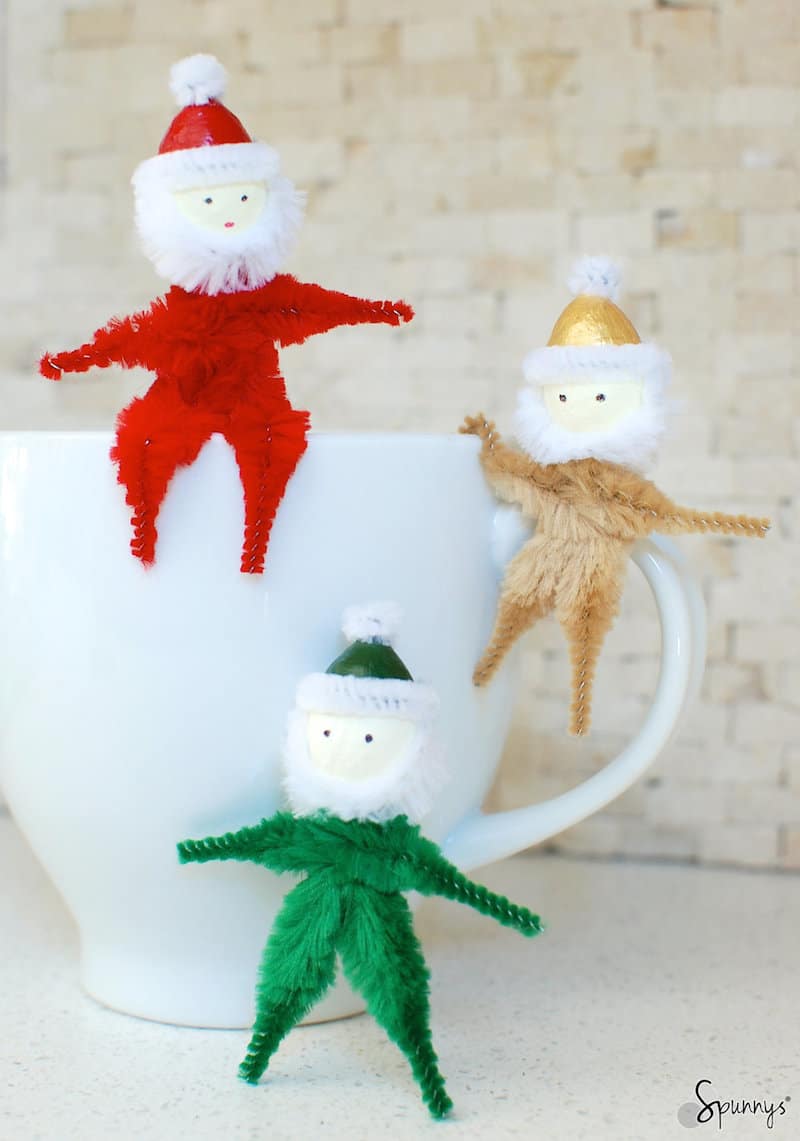
The vintage santa ornaments in three different colors
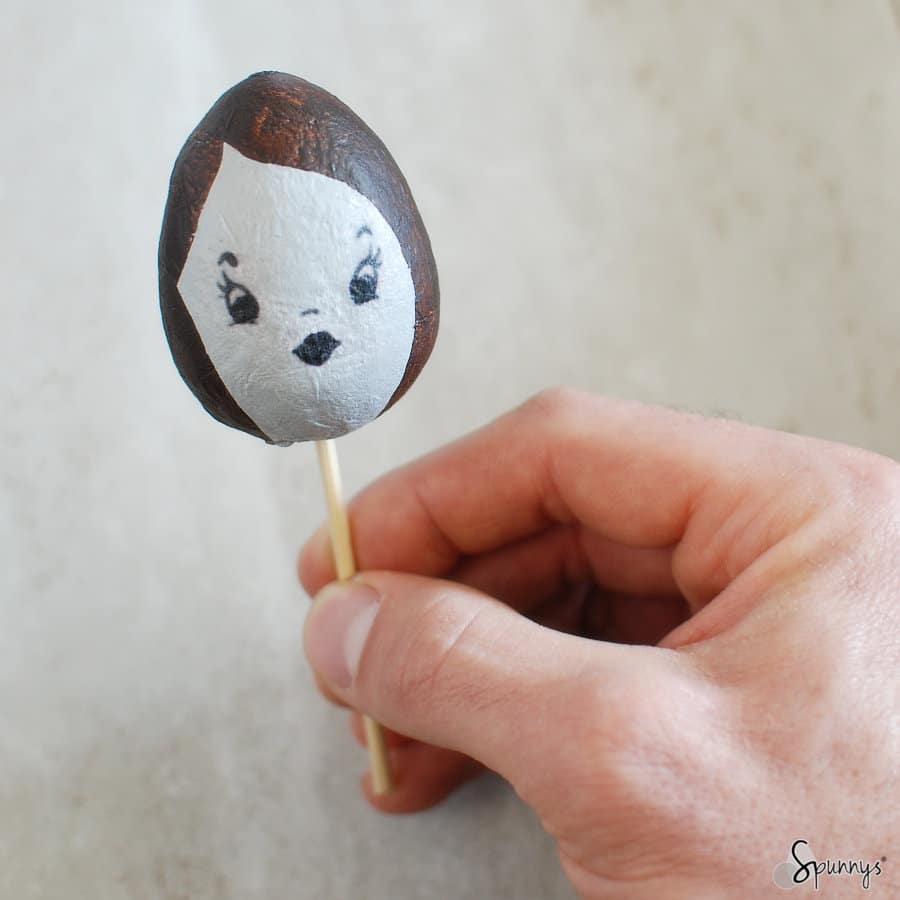
The heads were made with spun cotton eggs (25mm tall)

pipe cleaner santa claus craft project ideas

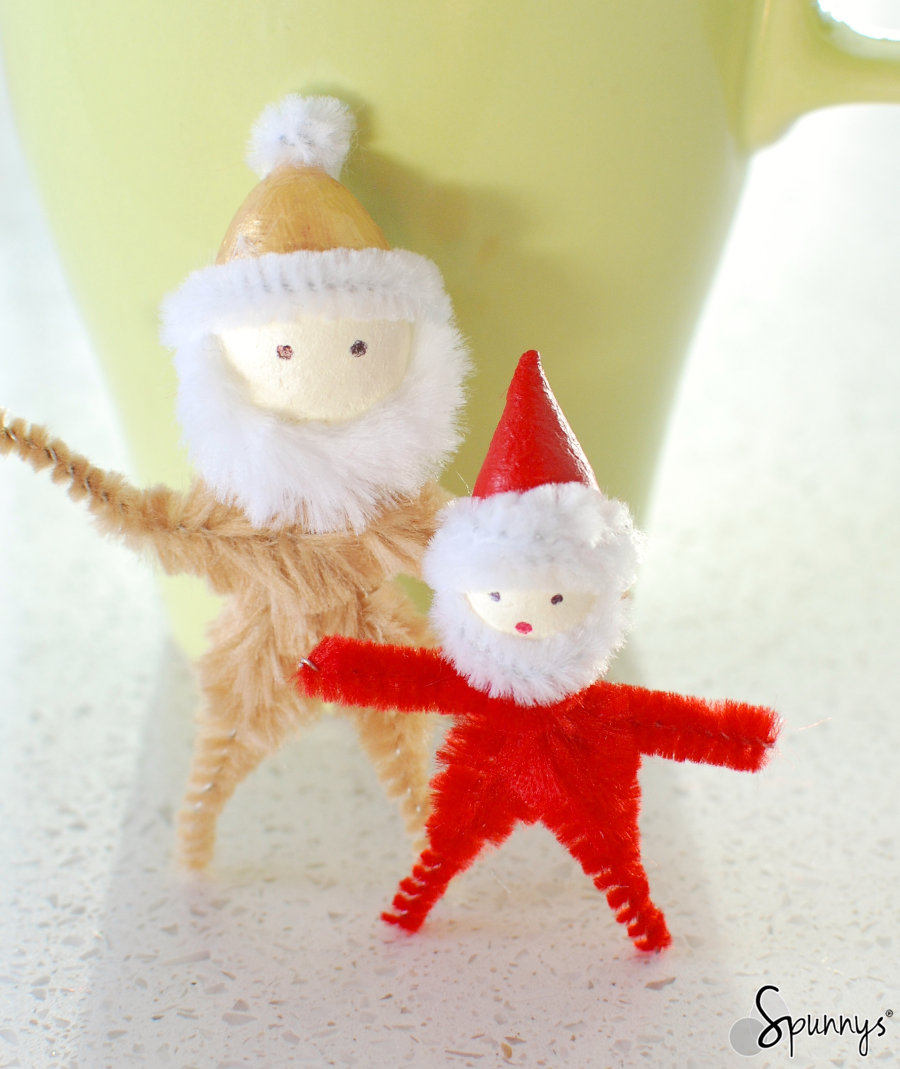
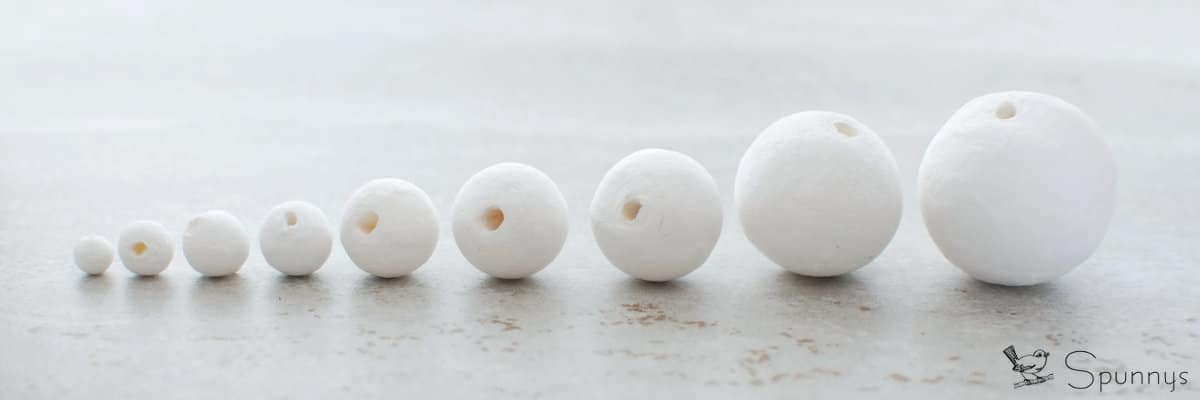
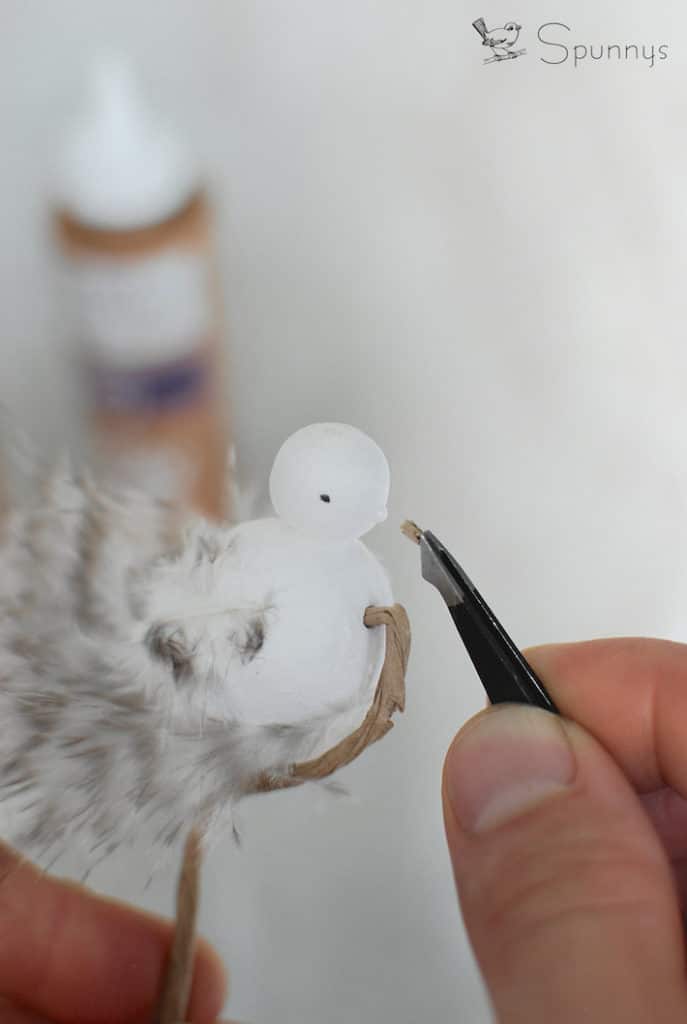
The head of the miniature Santa is made with a spun cotton cone (15mm) glued on top of a spun cotton ball (15mm)

vintage inspired santa ornament pipe cleaner folk art

Vintage inspired Santa

Santa Claus Christmas pipe cleaner ornament

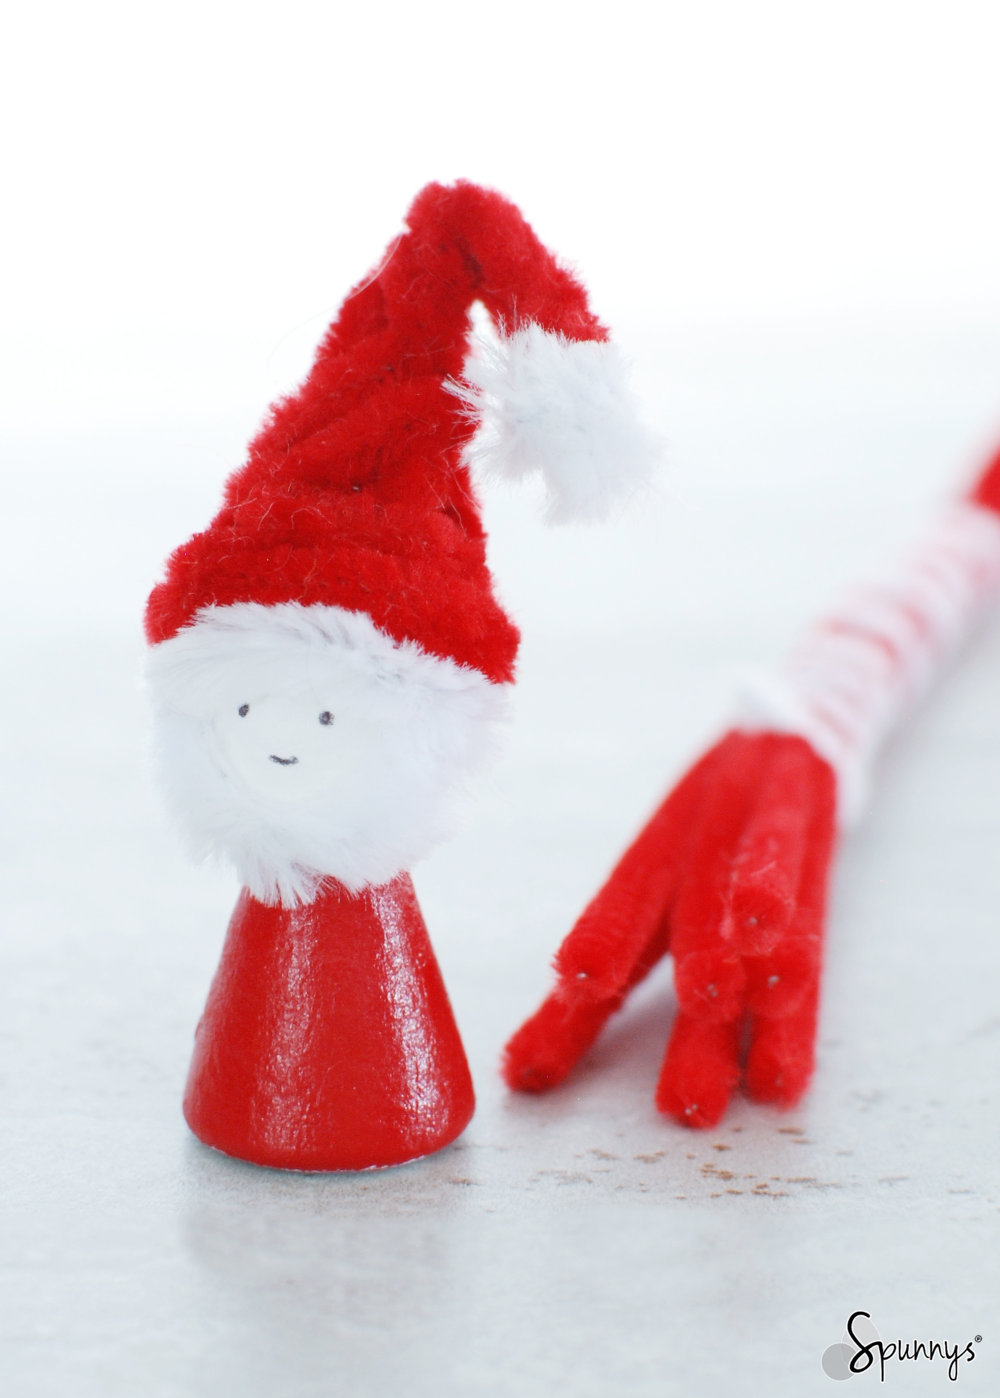
Santa Claus with a pipe cleaner hat. 47 mm tall spun cotton peg doll. 

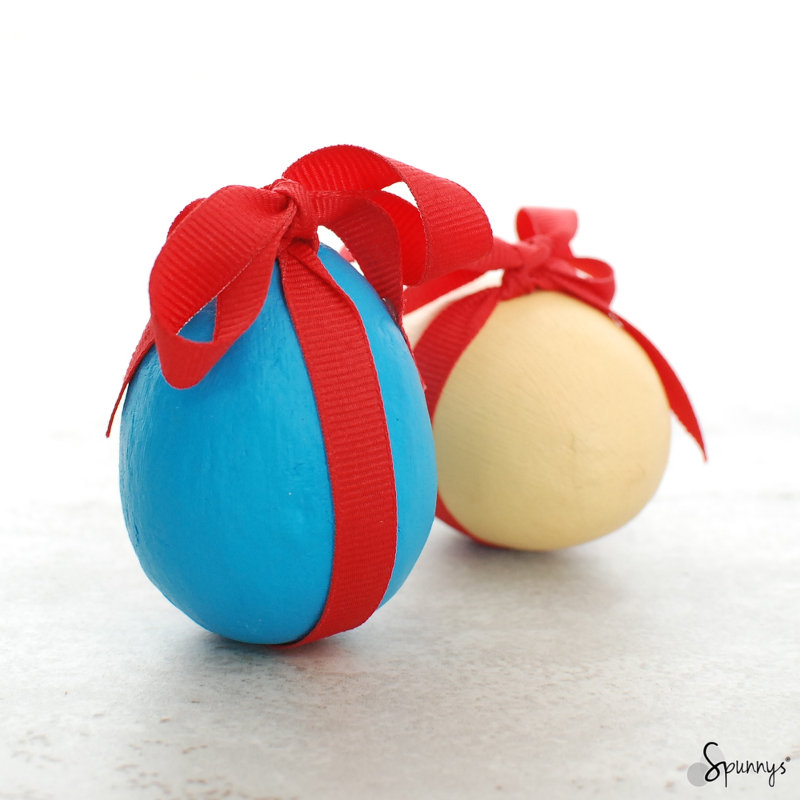
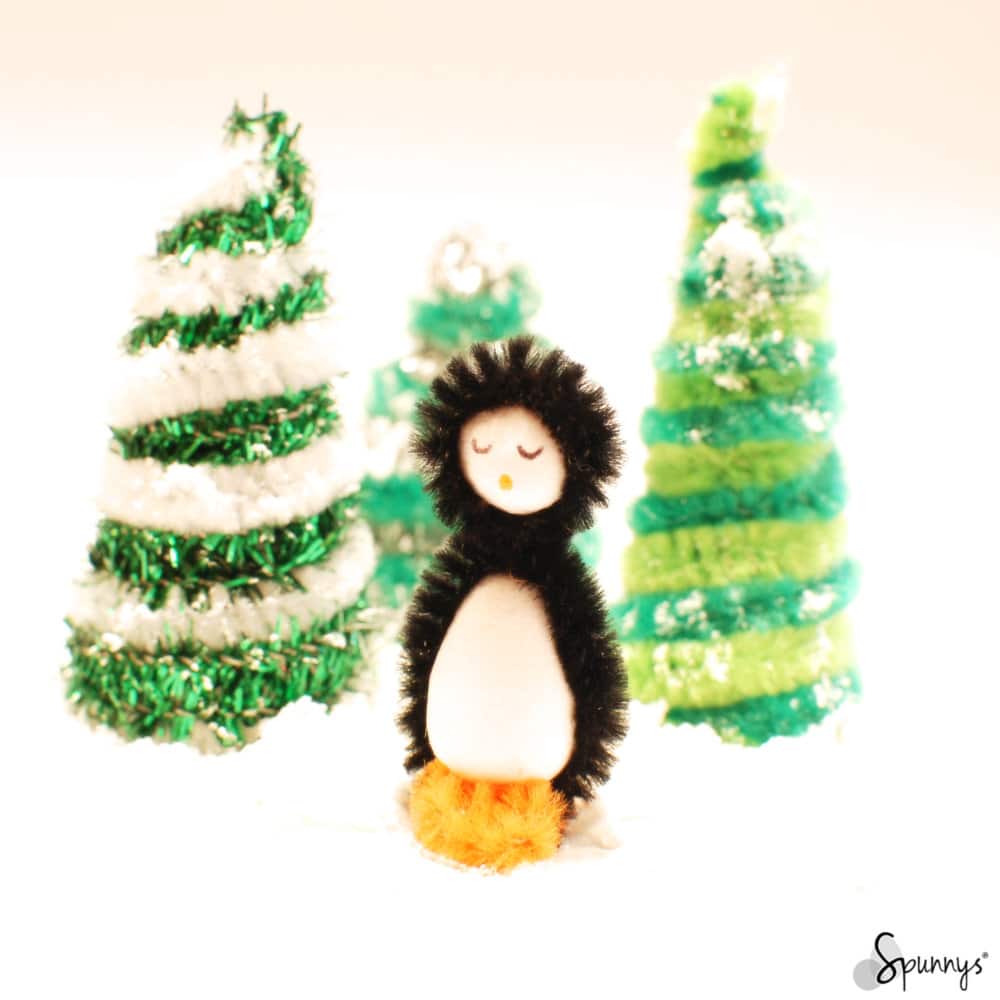
More Project Pictures – Christmas angels, elves, and snowmen

Vintage style pipe cleaner angel ornament Christmas

 Angel – Christmas pipe cleaner ornament
Spun cotton peg doll, lace, bump chenille, gold pipe cleaner

Christmas gnome pipe cleaner ornament

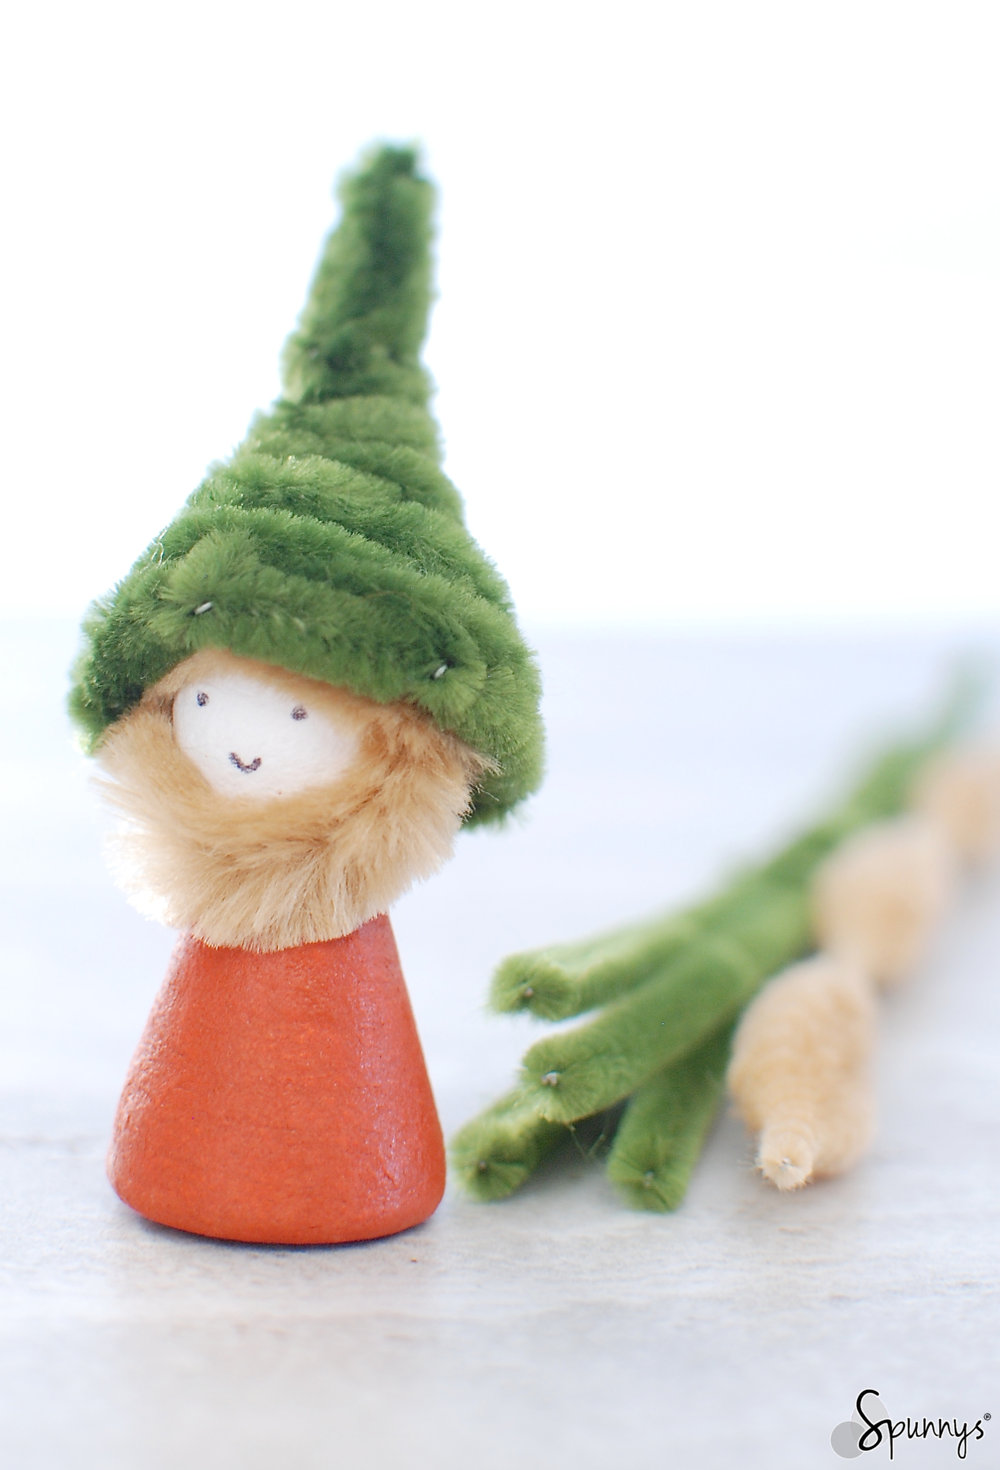
Forest gnome – 47 mm spun cotton peg doll

Vintage inspired bump chenille pipe clenaer Christmas ornaments

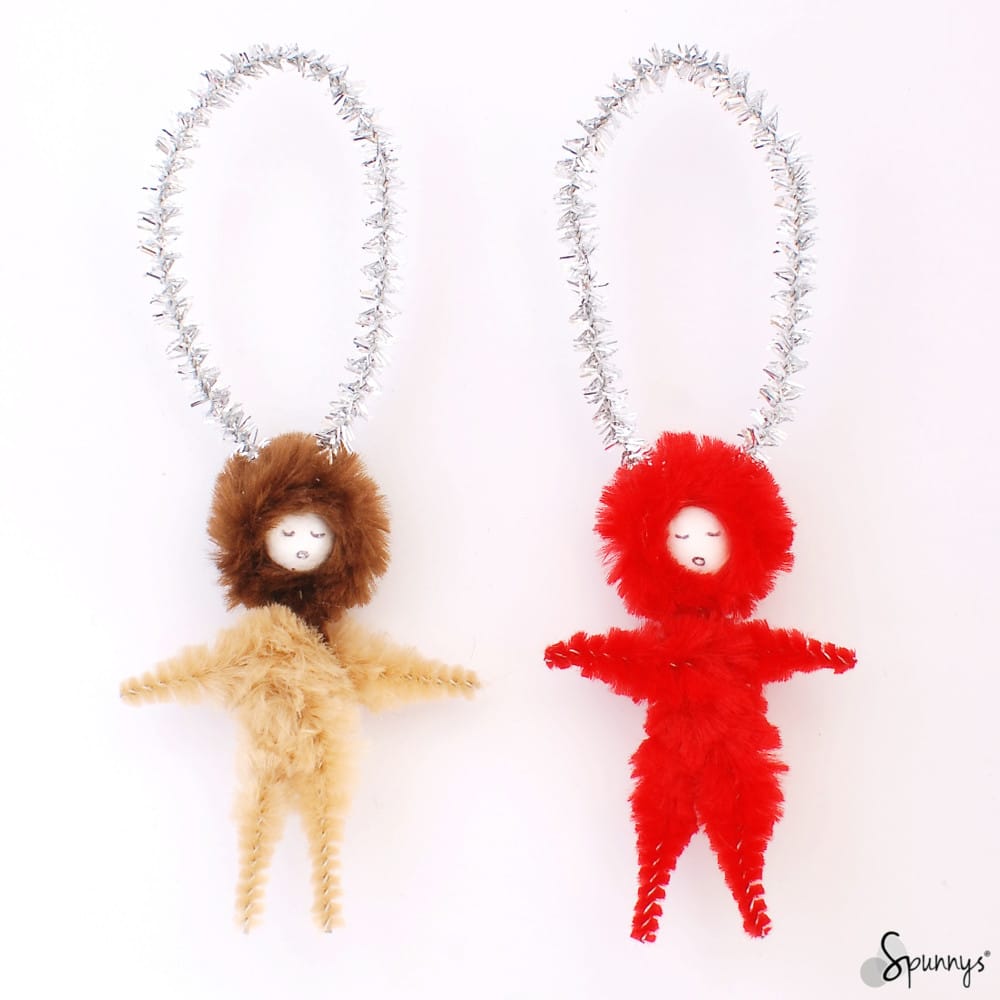
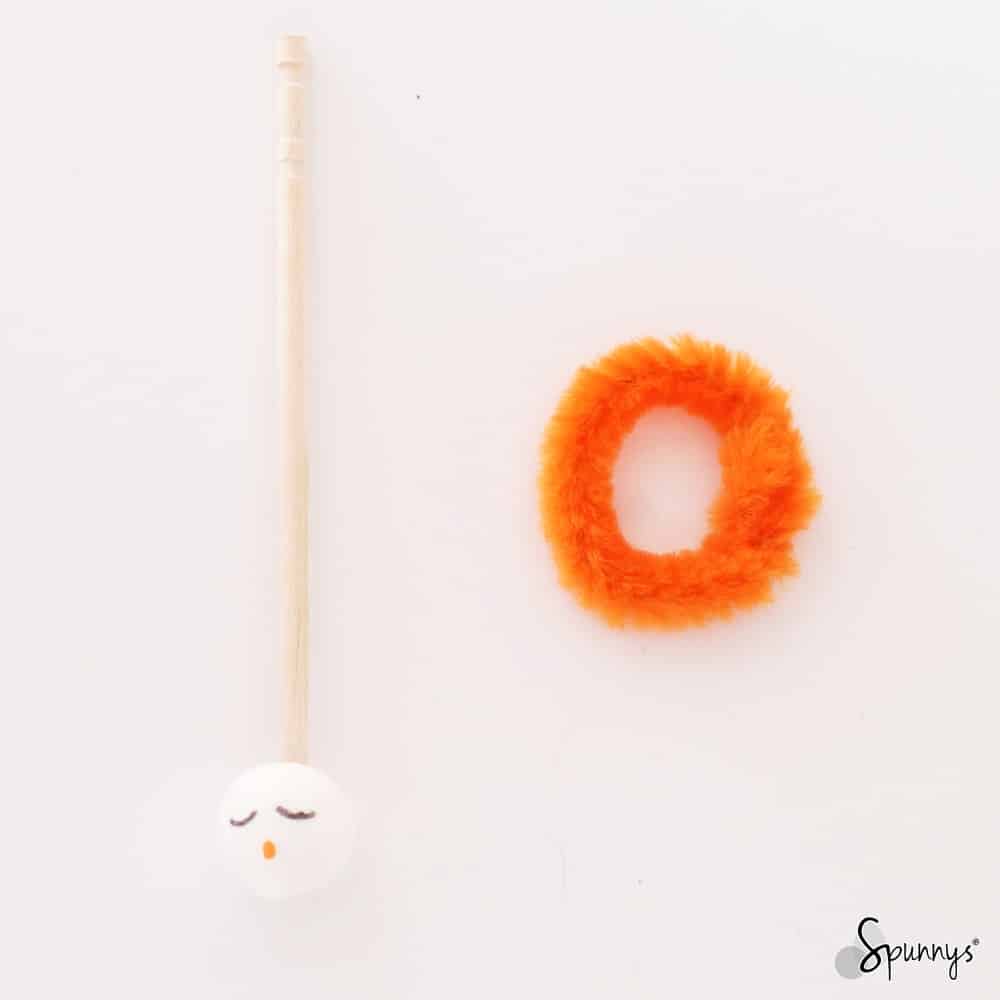
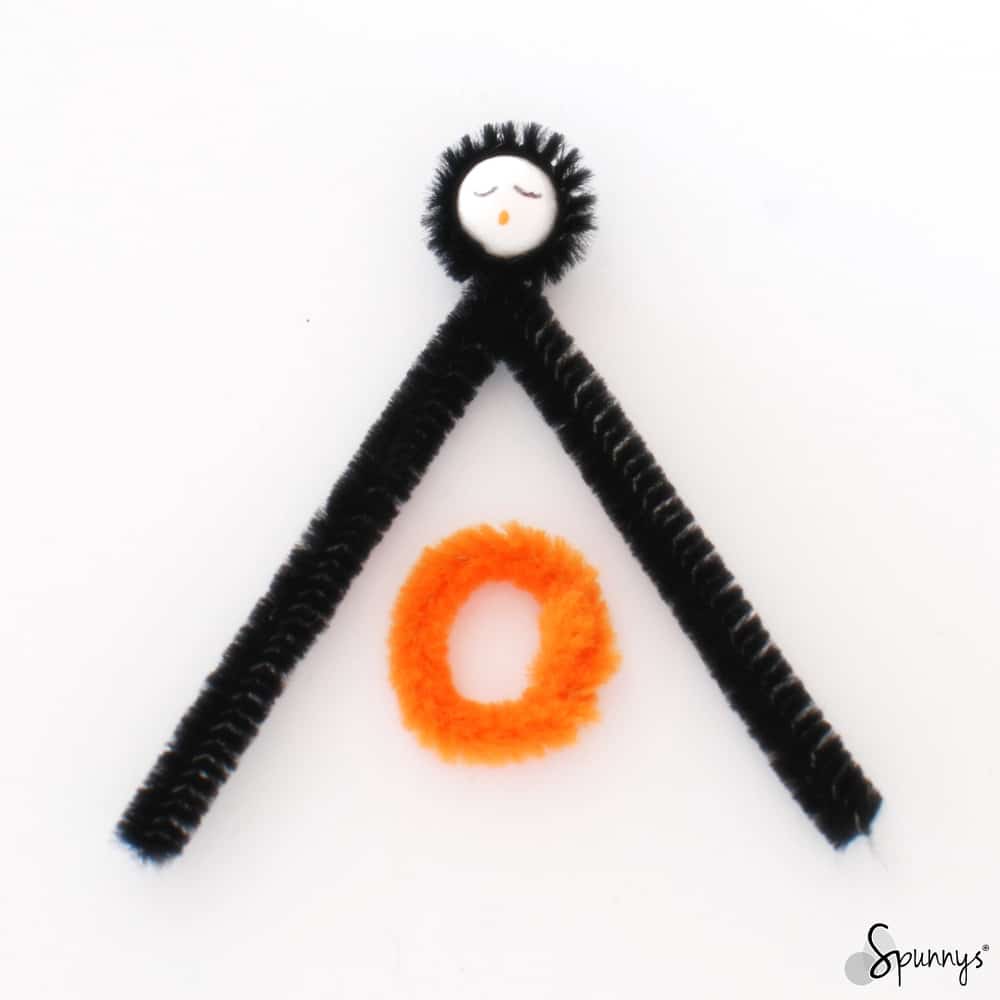
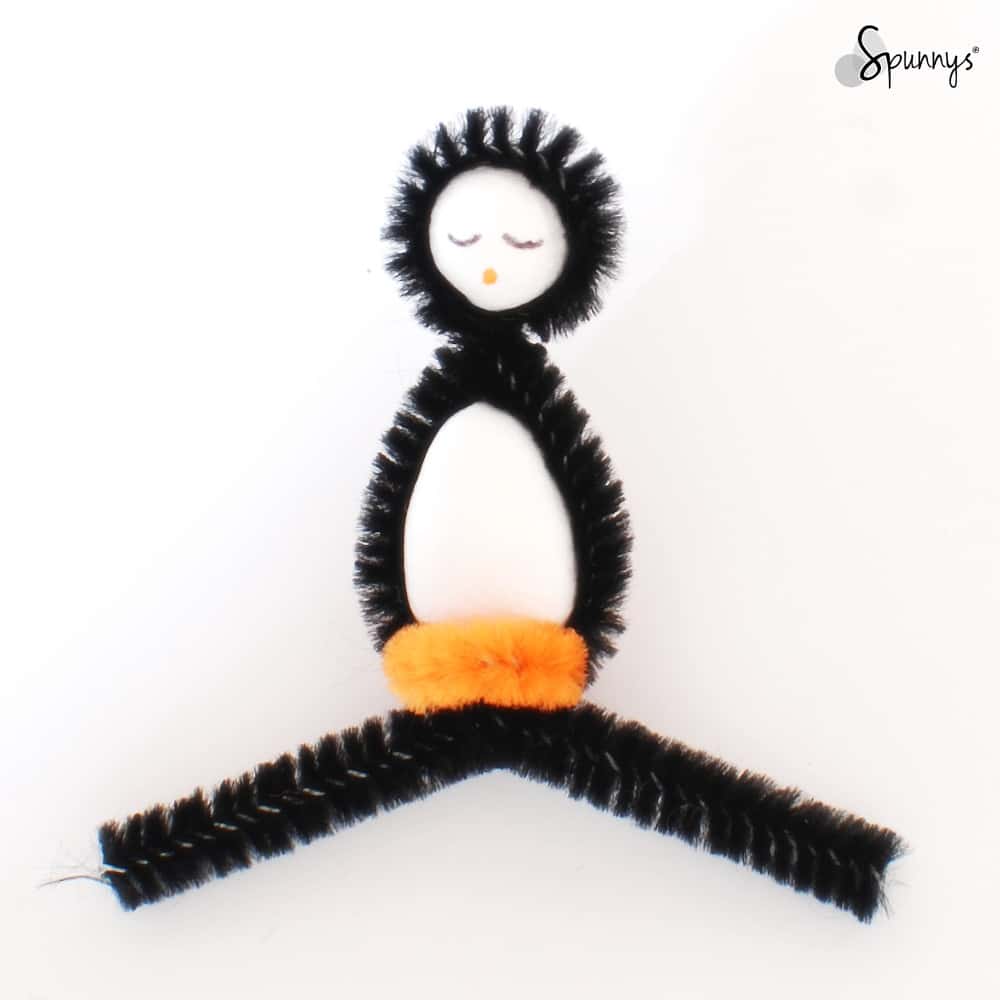
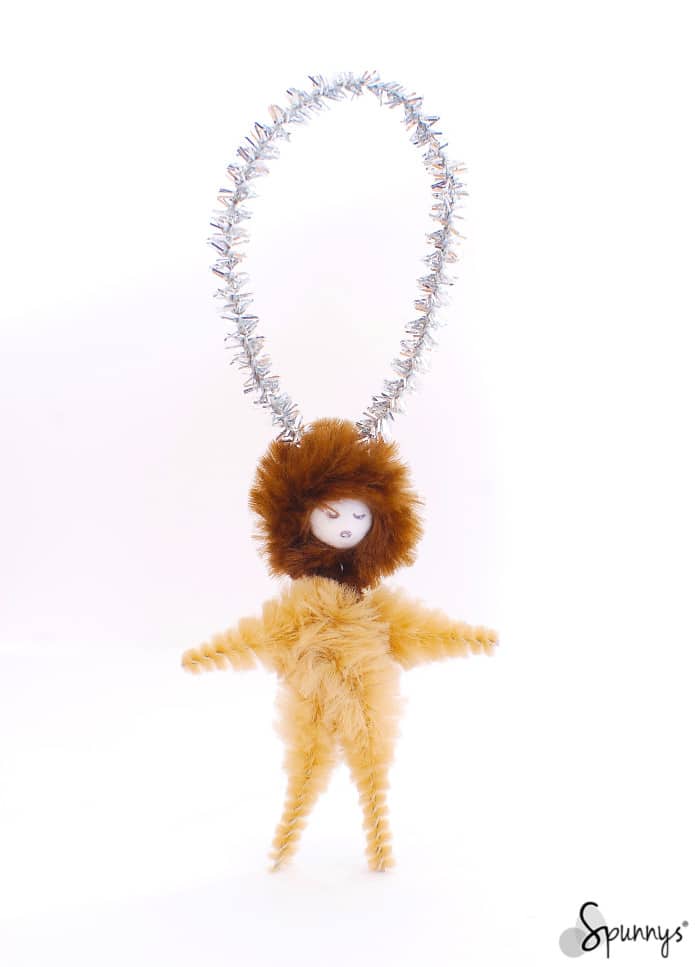
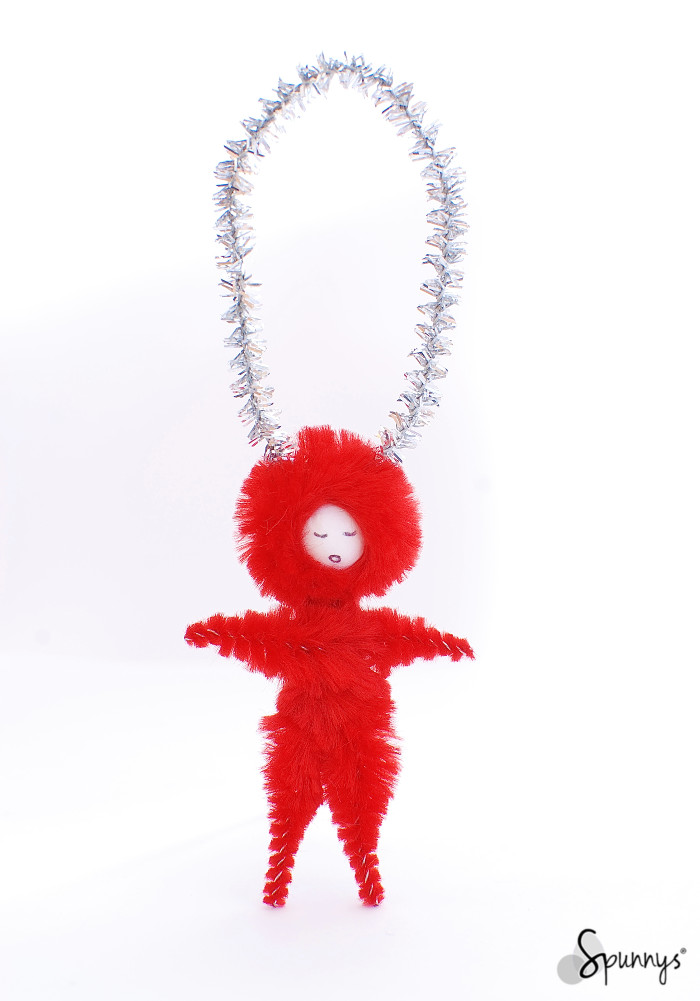
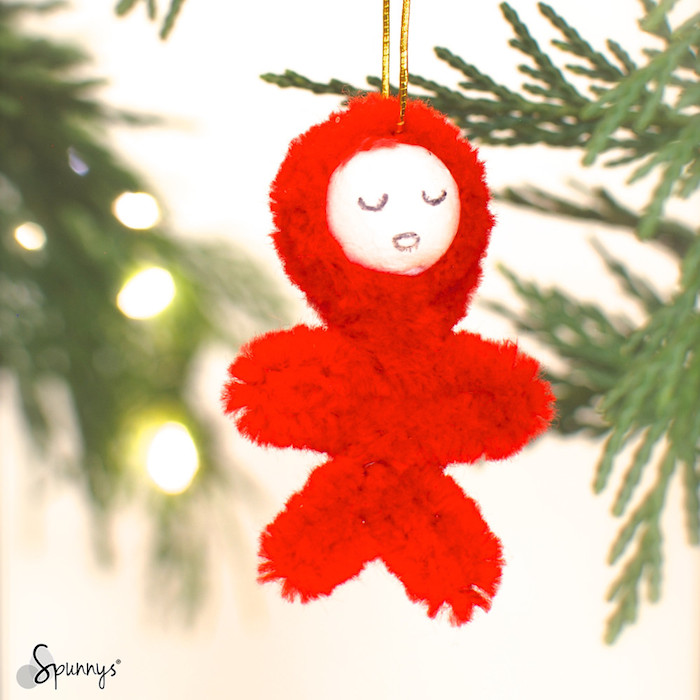
Vintage inspired Eskimo spun cotton ornaments

Christmas crafts pipe cleaner ornaments

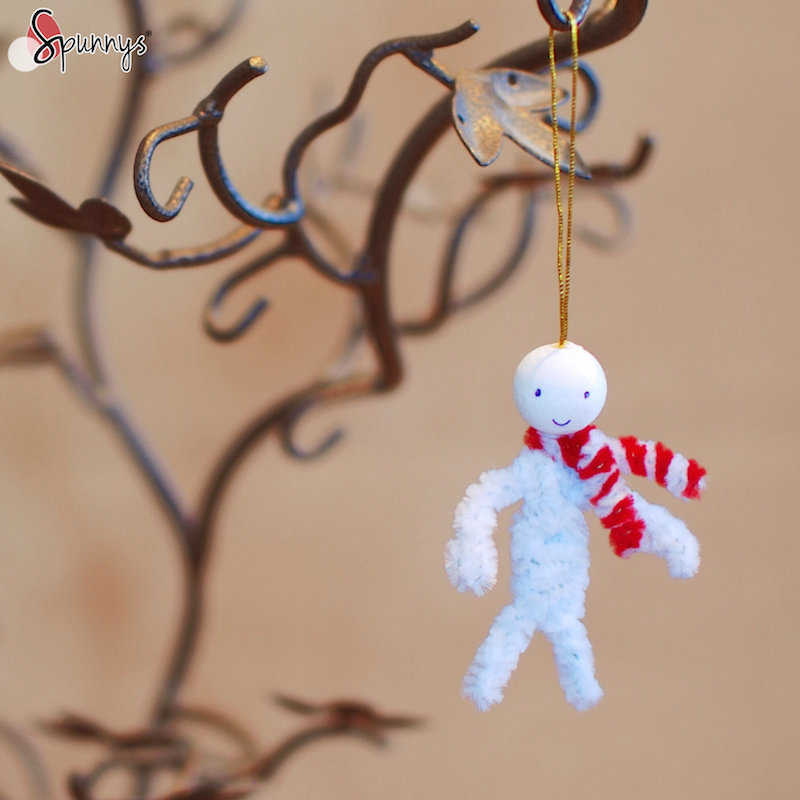
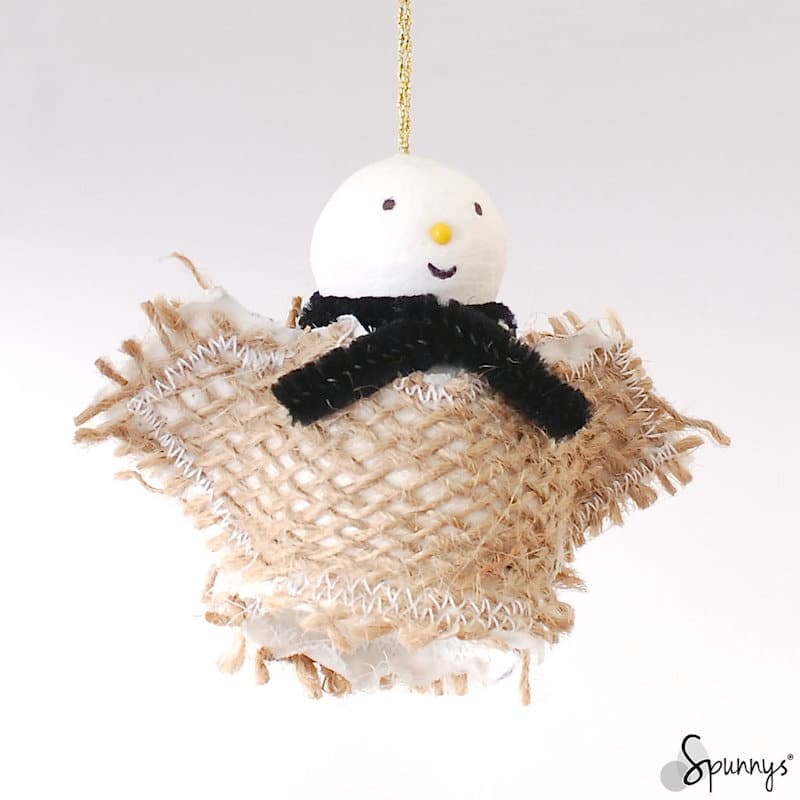
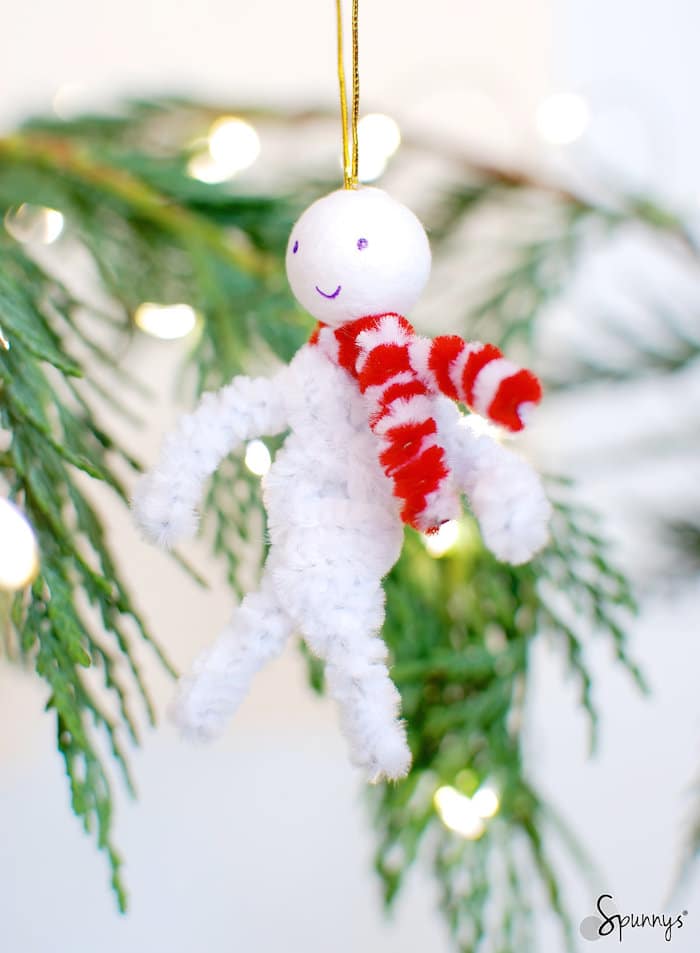
Snowman Christmas pipe cleaner ornament and candy cane scarf

arctic crafts pipe cleaner figure

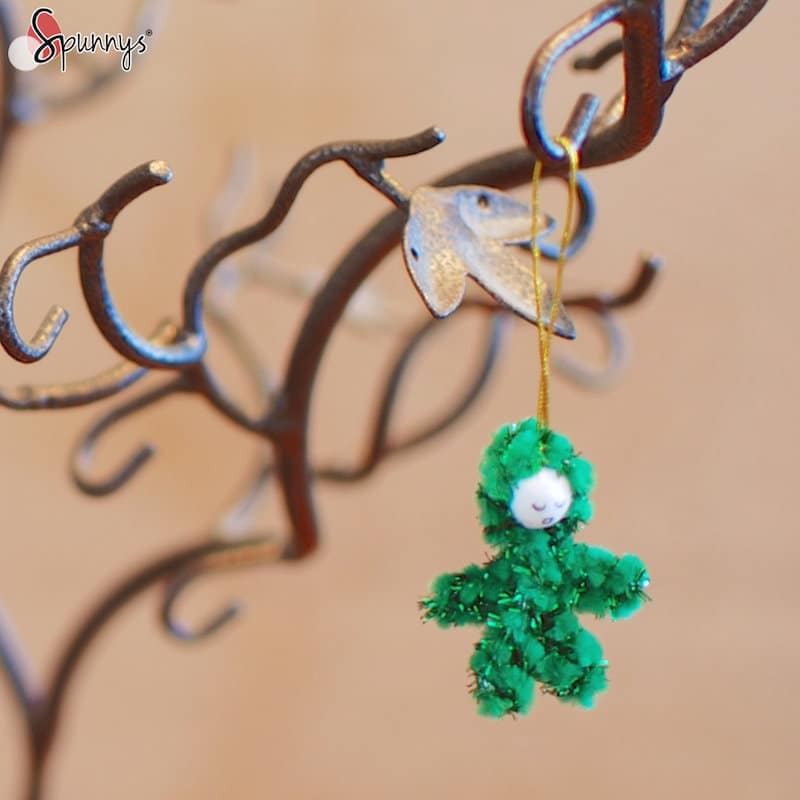
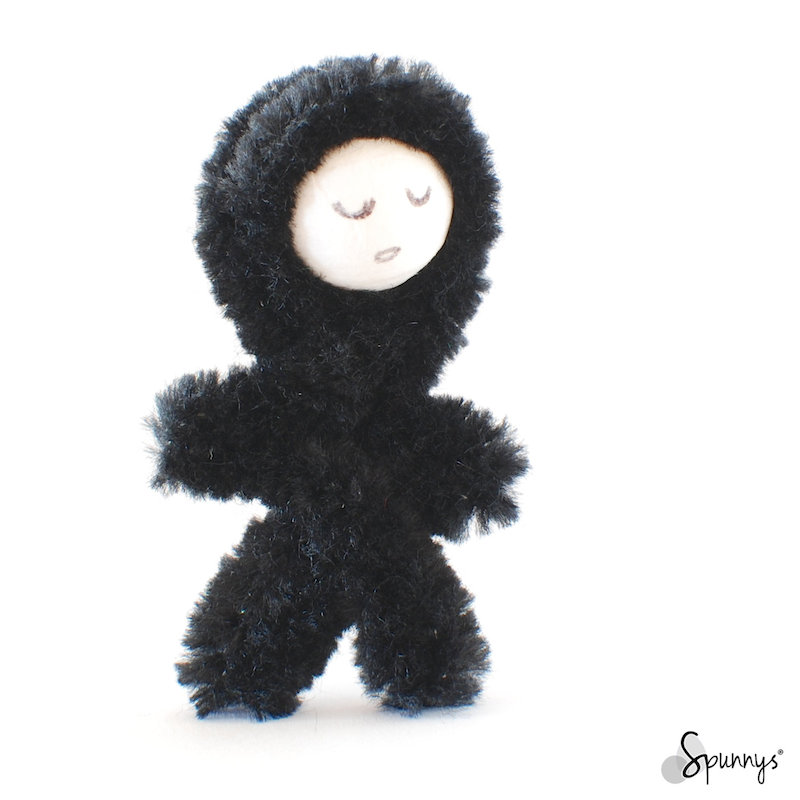
 Christmas pipe cleaner Eskimo ornament

Tips and tricks to make your own pipe cleaner Christmas ornaments:

pipe cleaner man candy cane scarf christmas ornament DIY

Tip #1: It’s ok if you don’t twist and bend your pipe cleaners in the exact same fashion as I did. Your christmas ornaments will look great no matter what.

Tip #2: To make your Christmas pipe cleaner ornaments even softer, you could use „plush“ pipe cleaners. It will make the ornaments soft and fluffy.

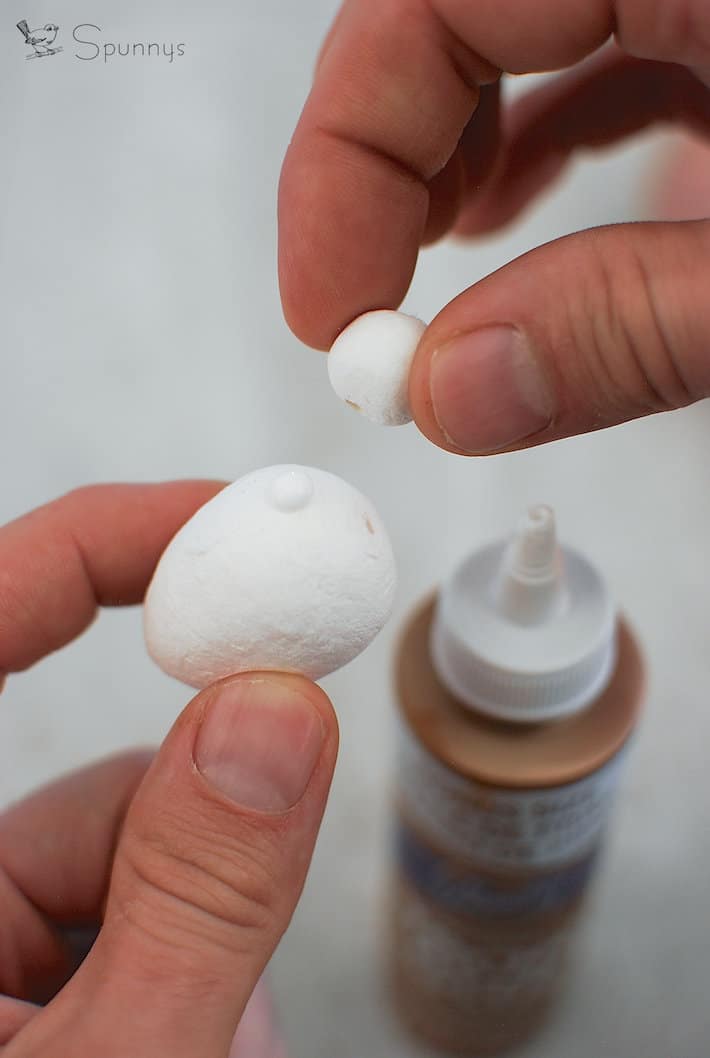
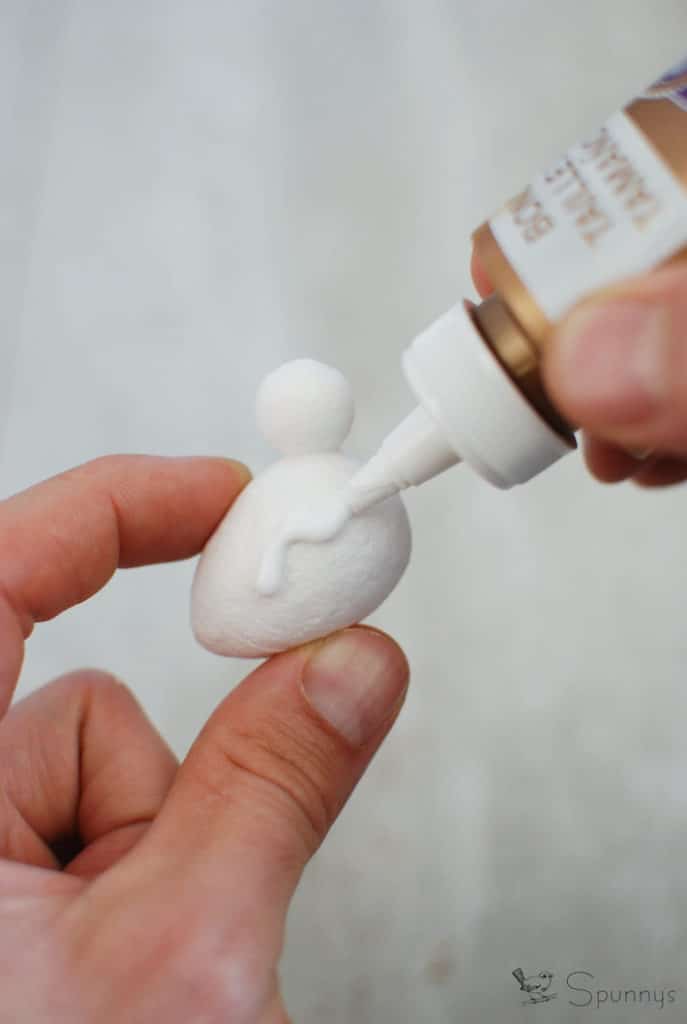
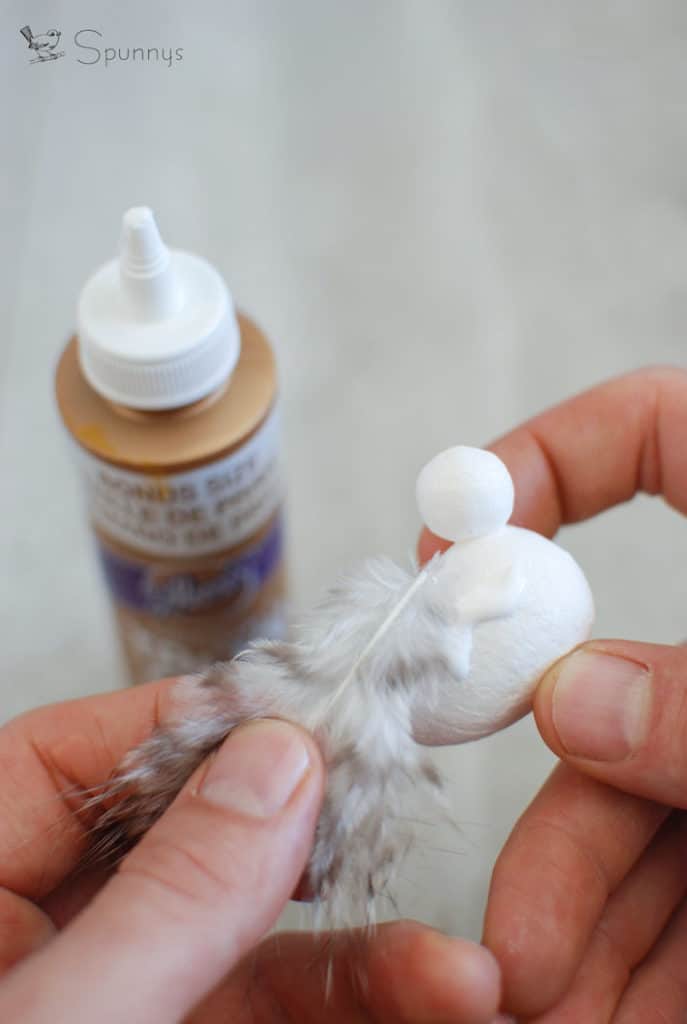
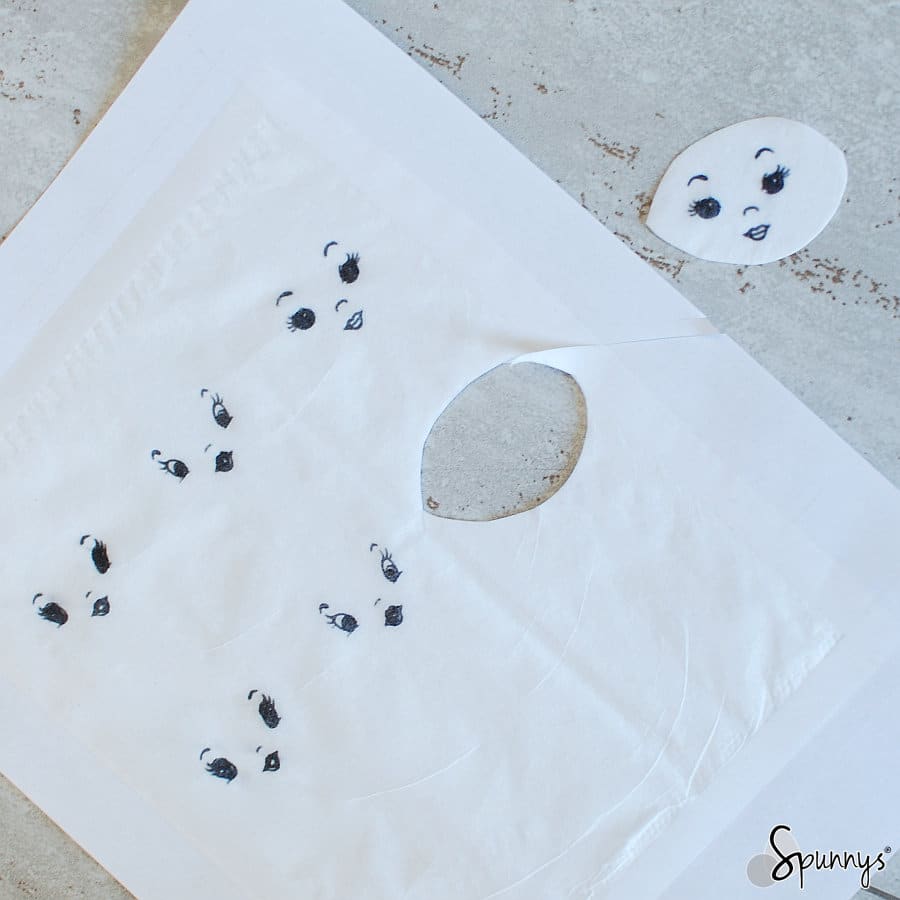
Tip #3: To make your ornaments look cute, one trick is to use small size spun cotton shapes. For the eskimos for example, I used 12mm spun cotton balls. I feel like miniature anything is almost always cute.

Tip #3: To make the candy cane and the scarf, all you have to do is twist two pipe cleaners into one.

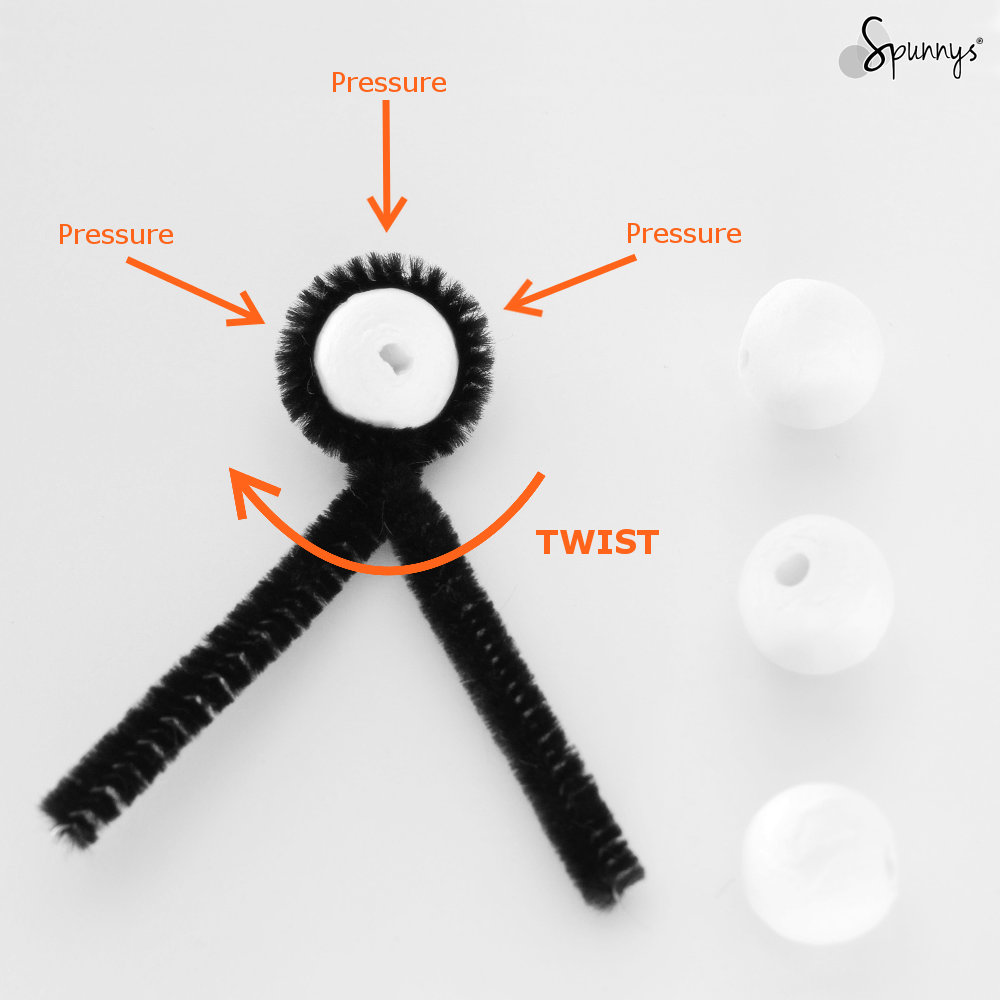
Tip #4: To twist pipe cleaners together, use a pair of pliers. It’s easier on the fingers. I like the round nose pliers because they are also useful to bend pipe cleaners into perfect loops.

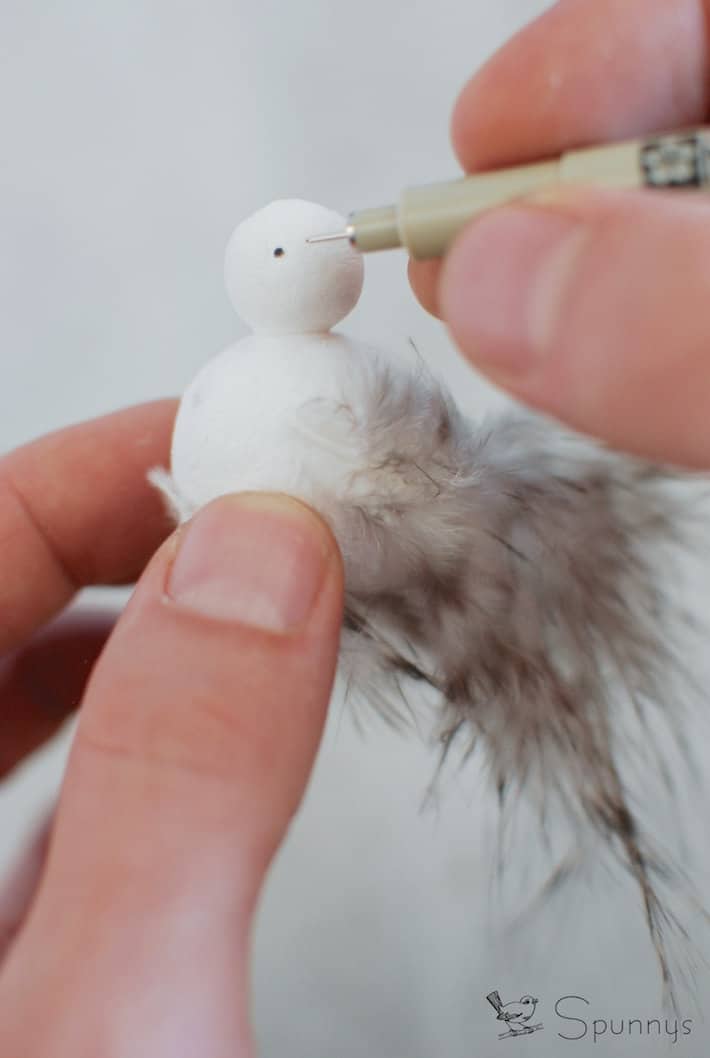
Tip #5: To draw the face of your Christmas pipe cleaner ornaments, a regular ball pen works great. There is no need for any special tool.

This is it. I hope you enjoy this page and that it motivated you to try making your own Christmas pipe cleaner figurines. As always, if you have any questions, do not hesitate to comment. Happy Crafting!

Veröffentlicht am Schreib einen Kommentar

How to make beautiful bird ornaments with feathers

bird ornament DIY simple

Follow our tutorial and learn how you can make beautiful bird ornaments simply by using a few feathers and a couple of spun cotton shapes. When creating this tutorial, we tried to come up with something easy, stylish, natural looking and that only requires a few materials. We hope you enjoy it.

Our bird ornament is mounted on a piece of floral stem so it looks like it’s floating. You can bend the floral stem different ways (see examples below) whether you prefer to display your bird in a floral arrangement or as a hanging ornament.

Feathered Bird Ornaments – Project materials:

spun cotton eggs blank small sizes

Spun cotton eggs : 12, 18, 20, 25, 30, and 40mm long

craft project balls

Spun cotton balls : 8, 10, 12, 15, 18, 20,25, and 30mm.

Spun cotton shapes are made of paper and can easily be glued to each other.  Notice how they all have a small hole on one side.

  • One strand of 18 gauge paper wrapped floral stem wire.
Use stem wire and spun cotton shapes together
  • A few feathers. We used three for this project. We wanted a bird project that makes conservative use of feathers but still looks great.
feather for feathered bird ornaments
  • A little bit of glue. We used regular white tacky glue. It works very well. It dries fairly fast and creates a strong bond.
  • A tiny fragment of a wood twig for the beak.
  • A black marker to draw the eyes.

Step by step tutorial:

1: The body

Glue together the spun cotton egg and the spun cotton ball

Spun cotton egg and ball
Step 1

2: Add the feathers

Glue the three feathers onto the spun cotton egg. One feather goes on each side and one feather goes on the bottom.  Just a little bit of glue is enough to make the feathers stick.

Notice the feathers are naturally curvy. Make sure the 3 feathers all point inward, not outward.

3: Draw the eyes

We recommend that you mark the position of the eyes with a pencil first. Make sure the pencil marks are at the same level on each side before going over them with a permanent marker.

bird ornament tutorial
Step 3

4: The beak

Cut the beak in a little piece of wood, such as a small twig. You can then use a pair of tweezers to glue it on. Note that there is no rule dictating how long the beak should be.

When done, finish by inserting a floral stem in the hole located in the front of the bird. You can bend the stem one of 2 ways: downward (so you can plant the stem into a vase) or upward (so you can hang the bird as an ornament). If you bend the stem upward, you can add a little 10mm spun cotton ball at the other end of the stem for style.

This is it! 

We hope you enjoyed this tutorial and found some inspiration and some motivation to get started with your own DIY bird ornaments. And as always, if you have any questions or if we can help you with anything, do not hesitate to leave a comment.

NOTE: A big thank you to our talented milliner friend Shelley at Chapeaux by Shelley who sent us the feathers.

Veröffentlicht am Schreib einen Kommentar

How to paint and decorate Spun Cotton Eggs

Easter egg ornaments pattern ideas

Check out our tutorial and learn how to paint and decorate Spun Cotton Eggs. We’ll also share with you some of our painting projects for inspiration purposes. Decorating eggs is a fun family friendly activity for Easter or anytime of the year.

Painting Spun Cotton Eggs – the basics

Spun Cotton Eggs are made of paper and are very easy to paint and decorate. You can use any acrylic paint that you find at craft stores.

Blank spun cotton egg ornaments

To paint a spun cotton egg, start with inserting a wooden pick (a bamboo skewer for example) at the bottom of the egg (they all have a small hole at the bottom). When this is done, simply hold the bamboo stick in one hand, and your paintbrush in the other hand. This way, you can paint the egg without getting paint on your fingers.

Spun cotton Easter egg ornaments

If you want to paint a straight line around the egg, simply spin the bamboo stick between your fingers while you hold the brush steady against the spun cotton egg.

You can also decorate the eggs with Glitter, trims of paper, Dresden… To do so, you can simply use regular white tacky glue, it works very well.

You can visit our online store Spun Cotton Egg Page to browse through our large collection of sizes and styles.

Project idea #1: Solid color Easter egg ornaments

These are the easiest of all Easter egg ornament projects. We used 60mm spun cotton blank eggs and covered them with one layer of regular acrylic paint. 60mm eggs are a popular size because they are the size of real eggs.

How to paint spun cotton eggs for Easter

Project Idea #2: Solid color eggs with patterns

Below are a few patterns that you can use for inspiration.  

Easter egg ornaments pattern ideas

Project Idea #3: Eggs tied in ribbons!

Easter egg ornaments can be decorated with almost anything: ribbon, paper, fabric, felt, crystals, beads, glitter. For the picture below, I used a simple red ribbon and tied it into a knot.

Easter egg ornaments craft ideas

Project idea #4: Eggs decorated with homemade decals

It is possible to make your own decal, with just a printer and a box of tissues.

Vintage spun cotton egg ornament DIY

Vintage Rabbit decal on 60mm Spun Cotton Egg

Here is the technique:

  • Search the internet for an illustration that you like. Make sure not to use any copyrighted work.
  • Open your image in an image editor. Adjust the size of your image so that it fits the size of your spun cotton egg. Verify that the size is right by printing the image and comparing it to the size of your egg.
  • Tape a tissue (the kind we blow our noses in) onto a piece of printing paper. It is important to use a thin type of tissue, like the ones that come in boxes. Feed this paper to your printer and print your illustration on the tissue side of the paper.
  • Cut out your illustration. To do so, just imagine an oval line going around your image and cut out along this line. Leave about 1/4″ between the edges of your image and the edges of your oval shape.
  • Only use the upper ply of your tissue (the one with the print on).
  • Brush mod podge or tacky glue over your spun cotton shape.
  • Gently lower your print onto the egg.
  • With a clean finger, tap around the print to make sure it is flush against the shape. Be careful not to tap on the ink or you may smear it.
  • Brush a little more mod podge or tacky glue over the tissue. Don’t brush directly onto the ink. It will smear.
  • Brush over the wrinkles to make them disappear.
  • When the mod podge or the glue are dry and clear, you will not see the tissue over the spun cotton egg anymore. Instead, it will look like a decal.

Note: The print transfer technique works with both color and black and white prints.

retro doll head egg spun cotton ornament DIY

Vintage Doll face Decal

Displaying your work of art

You could display your painted eggs in little nests made of straw or small twigs, hang them from a door handle or a kitchen hook, or display them in vases (picture below).

Easter egg ornaments display ideas

We hope you enjoyed this tutorial and found some ideas for your own projects.

Do you have any questions about this page? Please feel free to leave a comment below!

Veröffentlicht am Schreib einen Kommentar

How to make adorable penguin figurines – Winter DIY Crafts

penguin figurines

Check out our step by step tutorial and learn how to make adorable little penguin figurines from blank spun cotton shapes.

Penguin Figurines – project materials

The essentials

● 12mm spun cotton balls and 20mm spun cotton eggs.

Spun cotton balls bulk sizes.
Spun Cotton Balls
blank spun cotton eggs
Spun Cotton Eggs

● Some glue. You can use white tacky glue or a glue gun.
● Black paint and a paint brush. Acrylic word well and dries fast. It’s also fine to use a black marker.
● A little piece of orange foam pad for the beak and feet. A piece of cardboard or strong paper painted orange would work too.
● A pair of scissors.

Optional (nice to have but not necessary):

● Bamboo skewers or toothpicks. They make it easy to hold the spun cotton shapes during the painting process.
● A pencil (to outline before painting).
● A fine black marker (to paint the eyes).
● A clear varnish to protect your work. I like to use mod podge because it’s non-toxic.

Directions

1: Paint one ball and one egg with black paint. Leave the belly and face areas blank.

How to make a penguin ornament

It helps to use a toothpick to hold the spun cotton shapes. 

2: When the paint is dry, glue the ball on top of the egg.

3: Draw the eyes with the black pen

4: Cut the feet and the beak in the piece of orange foam and glue them on.

More Penguin Figurine DIY Craft ideas:

You can also use different type of spun cotton shapes or combine spun cotton shapes and pipe cleaners.

More Winter DIY craft ideas

You can also use spun cotton shapes to create Polar Bear Figurines. Here are a couple of ideas.

In the above right-side picture, the large penguin and bear are made with 45mm balls for the bodies and 30mm balls for the heads (and 15mm balls for the bear paws)

We hope you enjoyed these penguin craft ideas. As always, if you have any questions, do not hesitate to get in touch or to leave a comment. Happy crafting!

Veröffentlicht am Schreib einen Kommentar

How to make Pipe Cleaner Penguins – Winter DIY crafts

pipe cleaner penguins christmas craft ideas

Check out our easy tutorial and learn how to make these irresistible mini pipe cleaner penguins. They are great to decorate the house during the Holiday season and only require a few inexpensive materials.

Pipe cleaner penguins – List of materials needed

To make one pipe cleaner penguin, you will need:

1) One 10mm diameter Spun Cotton Ball and one 18mm Spun Cotton Egg. The resulting pipe cleaner penguin will be about 1.5 inches tall. For a bigger penguin, you can use larger balls and larger eggs.

2) One small strand of orange pipe cleaner and one small strand of black pipe cleaner.

3) A black ball pen, a dab of orange paint (acrylic is fine), and a very fine paint brush.

4) A pair of wire cutters and a pair of pliers.

The basic technique for this craft is to squeeze spun cotton shapes inside of pipe cleaner strands.

When a piece of pipe cleaner is twisted around a spun cotton shape, it creates pressure around the shape and locks it into place.

penguin winter craft ideas

Step by step instructions

1: Prepare the feet and the head.

For the feet, simply make a doughnut with a small piece of orange pipe cleaner.
For the head, grab a spun cotton ball and draw the eyes with the ball pen and paint a small nose with the orange paint. I used a toothpick to hold the ball.
IMPORTANT: Make sure the ball’s hole is on top of the head, not on the bottom.

spun cotton ball penguin

2: Tighten the pipe cleaner around the penguin’s head

Wrap the pipe cleaner around the head and give it 3 to 4 twists. Make sure the pipe cleaner is tight around the ball before you start twisting. You can use the pliers to help.

penguin figurine tutorial

3: Tighten the pipe cleaner around the penguin’s body and feet

With one hand, hold the feet and the body of your penguin together and with the other hand, twist and tighten the 2 strands of pipe cleaner around them.

TIP: position the portion of the feet where the two ends of the pipe cleaner meet towards the back where it doesn’t show.

penguin figurine DIY

4: Cut off the excess pipe cleaner.

You can also leave the two strands uncut and use them to display your penguin.

DIY pipe cleaner penguins

You are done :)

hope you enjoyed this tutorial. You can also use the pipe cleaner and spun cotton shape technique to create different pipe cleaner animals such as rabbits or bears – the possibilities are endless.

Thank you for reading, good luck with your penguin projects, and happy crafting!

Veröffentlicht am Schreib einen Kommentar

How to make Halloween Ghost Ornaments – Spooky DIY Crafts

Halloween ghost ornaments DIY

In this tutorial, learn how to make spooky little ghost ornaments that you can hang anywhere around the house for Halloween.

Ghost ornaments – Materials

  • Your choice of spun cotton balls or spun cotton eggs. I used 45 mm spun cotton balls for the pillowcases and crepe streamer ghosts and a 60mm tall spun cotton egg for the cheese cloth ghost ornament.
  • Depending on which ghost(s) you want to make, your choice of white fabric (old T-shirt, old pillow case), cheesecloth, or crepe streamer.
  • Black marker and pencil.
  • Mod podge or similar.
  • A few feet of fishing line.
  • A glue gun or some regular white craft glue.
  • A good pair of scissors.
  • A rubber band (for the cheesecloth ghost).
ghost craft ornaments materials

Step by step directions

The first 2 steps are the identical for the three projects.

  1. Insert one end of the fishing line in the spun cotton shape holes and pour hot glue. You could also use regular white craft glue but it would take much longer to dry.
  2. Draw a spooky ghost face onto the shapes with the black marker.
homemade ghost monster skull ornament tutorial DIY

Halloween Pillowcase Ghost Ornament

Pillowcase ghost ornament Halloween DIY craft ideas tutorial
  1. Make a tiny hole in the corner of an old pillowcase and thread the fishing line through until the pillowcase covers the ball.
  2. Cut the pillowcase to the desired length.
  3. Make two holes in the fabric for the eyes. To do so, mark the location of the eyes on the pillowcase with a pencil, remove the pillowcase completely and cut two little holes with a pair of scissors.
  4. Before putting the pillowcase back on the ball, brush a little mod podge over the ball, put the pillowcase back on and make sure the eyes are aligned with the holes. Let dry.
  5. Style the bottom of the the pillowcase by cutting off long triangle pieces.

Cheese Cloth Ghost Ornament

Cheesecloth ghost craft ideas Halloween ornaments
  1. Cut the cheesecloth into two 2 ft x 1 ft rectangles. Cover the ball with the cheesecloth pieces and wrap a rubber band around the ball to keep the cheesecloth in place. The fishing line goes through the middle of each piece of cheesecloth. Brush mod podge over the cheesecloth pieces. When dry, remove the rubber band.
  2. Style the bottom of  the cheesecloth by cutting off long triangle pieces.
  3. If the eyes don’t show through the cheesecloth (because they are covered with mod podge), you can re-draw them with the black marker over the cheesecloth

Crepe Streamer Ghost Ornament

crepe streamers ghost ornament Halloween craft ideas
  1. Cut 6 stripes of crepe paper, about 2 feet long. Make a tiny hole in the center of each of them for the fishing line to go through.
  2. Brush a little mod podge on the top half of the ghost’s head. Slide a stripe of crepe streamer down the line until it sits on the ghost head.  Brush a little mod podge over the piece of crepe streamer.  Repeat with the 5 other pieces.  Make sure each piece sits at a different angle.
  3. Re-draw the mouth and eyes with the black marker over the crepe streamer pieces.
  4. Style the bottom of the crepe streamers by cutting off long triangle pieces.

You are done :) I hope you enjoyed this tutorial and as always if you would like to share your ideas or ask questions, do not hesitate to use the comment section below. Happy crafting and Happy Halloween!

A few more Halloween Craft Ideas.

For these projects, we used blank spun cotton peg doll  shapes.

Veröffentlicht am Schreib einen Kommentar

How to make a Spun Cotton Easter Bunny Figurine – DIY Easter Crafts

spun cotton easter bunny figurine DIY

Check out our detailed, step by step tutorial and learn how you can make a Spun Cotton Easter Bunny figurine from spun cotton shapes.

Spun Cotton Easter Bunny Figurine – DIY Project Materials:

  • One 45mm (1 – 3/4 inches) Spun Cotton Ball for the body.
  • Two 15mm (19/32 inch) Spun Cotton Balls for the two paws.
  • One 36mm Spun Cotton Egg for the head. You could also use a 38mm egg, a 40mm egg, or even a 30mm ball. Each style egg has a different style (more pointy, or more round)
  • Craft acrylic paint (grey, red, and white).
  • Paint brushes: one large one, one thin one.
  • A glue gun or white tacky glue.
  • A small piece of paper, about 2″ x 5″, for the ears.
  • A thin black marker to draw the eyes and the mouth.
  • A pencil to outline.
  • A good pair of scissors.
Easter bunny crafts materials

Optional materials:

  • A little piece of cardboard to build a pedestal for the bunny so it can stand on its own. I used cardboard from the flap of a shipping box. A drink coaster or a cereal box would work too.
  • A few bamboo skewers. They are handy to paint the shapes and let them dry.
Spun cotton balls bamboo skewers

Step by Step Directions:

STEP 1: body painting

With the gray paint, paint the large ball, the egg, and a small 2-inch long portion of the piece of paper (on the two sides). Rest everything in a cup or a jar to let the paint dry.

With the white paint, paint the top of the little piece of cardboard.

Spun cotton balls painting

STEP 2: Outline the facial features, the ears, and the pedestal

When the paint is dry, use a pencil or a thin black marker to:

– Outline the ears on the piece of paper. Draw them about 2 inches long and 3/4 inch wide (at the widest point).

– Outline the face of the bunny on the spun cotton egg: the eyes, the nose, and the mouth.

– Draw a circle on the piece of cardboard. You can use a glass or a cup as a guide.

Easter bunny crafts for kids

STEP 3: Precision painting

Mix red and white paint to make pink and paint the nose and the inside part of the ears. Let dry.

Easter bunny arts and crafts

STEP 4: Cut out the different elements

With a good pair of scissors, cut out the pedestal in the cardboard and cut out the ears in the paper

Easter bunny crafts scissor cutouts

STEP 5: Glue all the pieces together.

I use a healthy amount of glue to make sure the figurine is sturdy. The glue marks can then be hidden by painting over them.

Easter bunny crafts glue gun

To give your figurine a little bit of character, bend the ears slightly forward. 

Rabbit peg doll side view

Congratulations you are done :) I hope you enjoyed this craft and I hope it inspired you. You can also experiment with different colors and different shape combinations. For example in the picture below, I used 30mm spun cotton balls for the bunny heads.

easter bunny figurines craft ideas

As usual, do not hesitate to send us your questions. Happy Crafting!