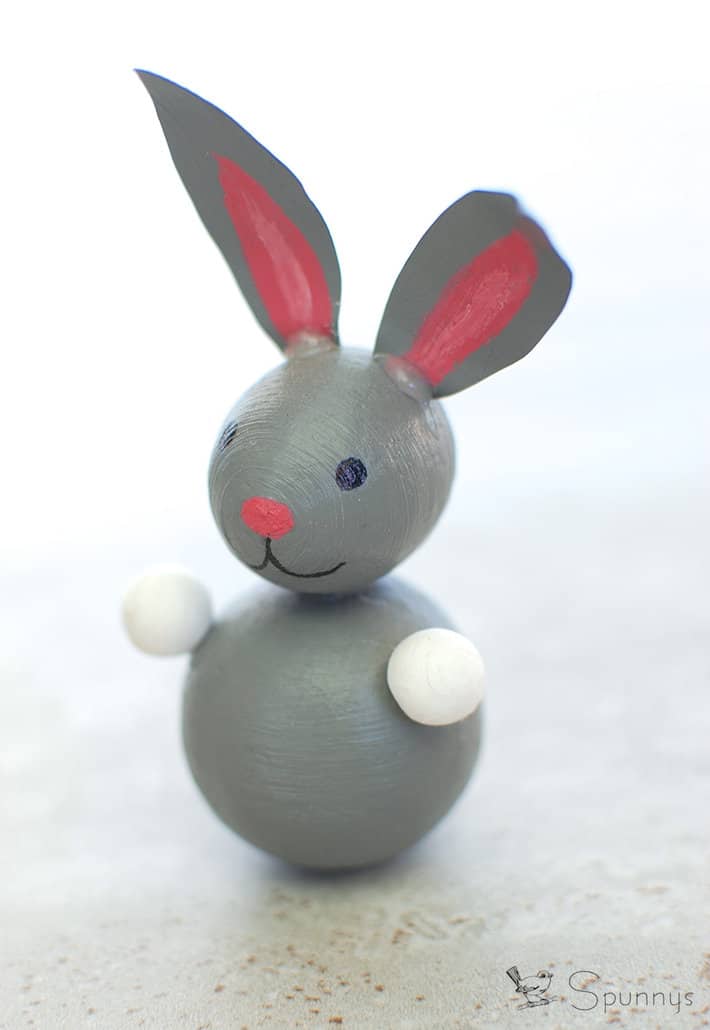
Check out our detailed, step by step tutorial and learn how you can make a Spun Cotton Easter Bunny figurine from spun cotton shapes.
Spun Cotton Easter Bunny Figurine – DIY Project Materials:
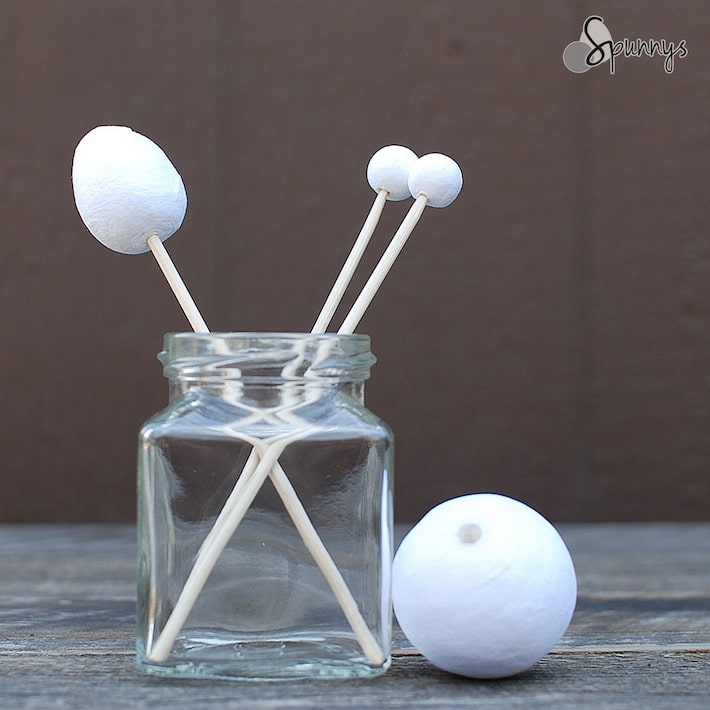
- One 45mm (1 – 3/4 inches) Spun Cotton Ball for the body.
- Two 15mm (19/32 inch) Spun Cotton Balls for the two paws.
- One 36mm Spun Cotton Egg for the head. You could also use a 38mm egg, a 40mm egg, or even a 30mm ball. Each style egg has a different style (more pointy, or more round)
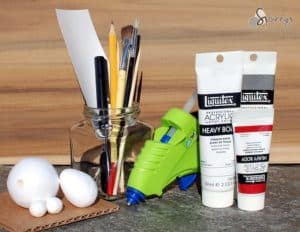
- Craft acrylic paint (grey, red, and white).
- Paint brushes: one large one, one thin one.
- A glue gun or white tacky glue.
- A small piece of paper, about 2″ x 5″, for the ears.
- A thin black marker to draw the eyes and the mouth.
- A pencil to outline.
- A good pair of scissors.
Optional materials:
- A little piece of cardboard to build a pedestal for the bunny so it can stand on its own. I used cardboard from the flap of a shipping box. A drink coaster or a cereal box would work too.
- A few bamboo skewers. They are handy to paint the shapes and let them dry.
Step by Step Directions:
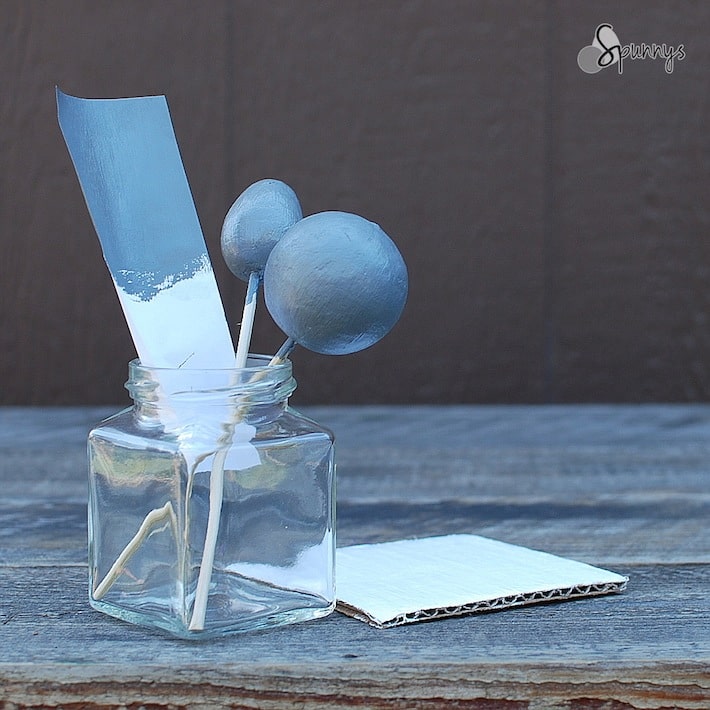
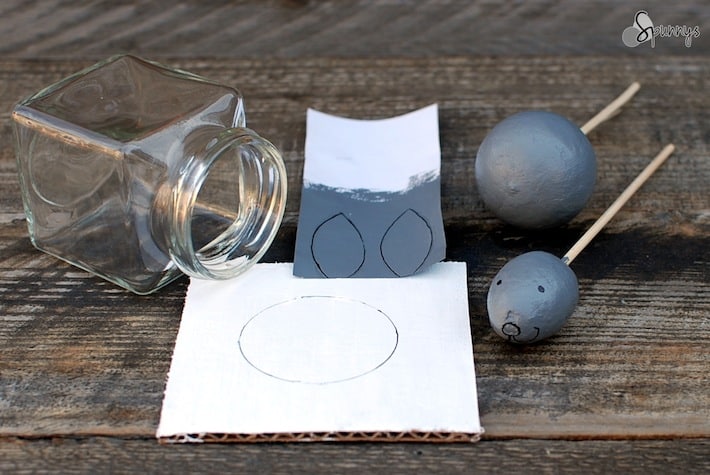
STEP 1: body painting
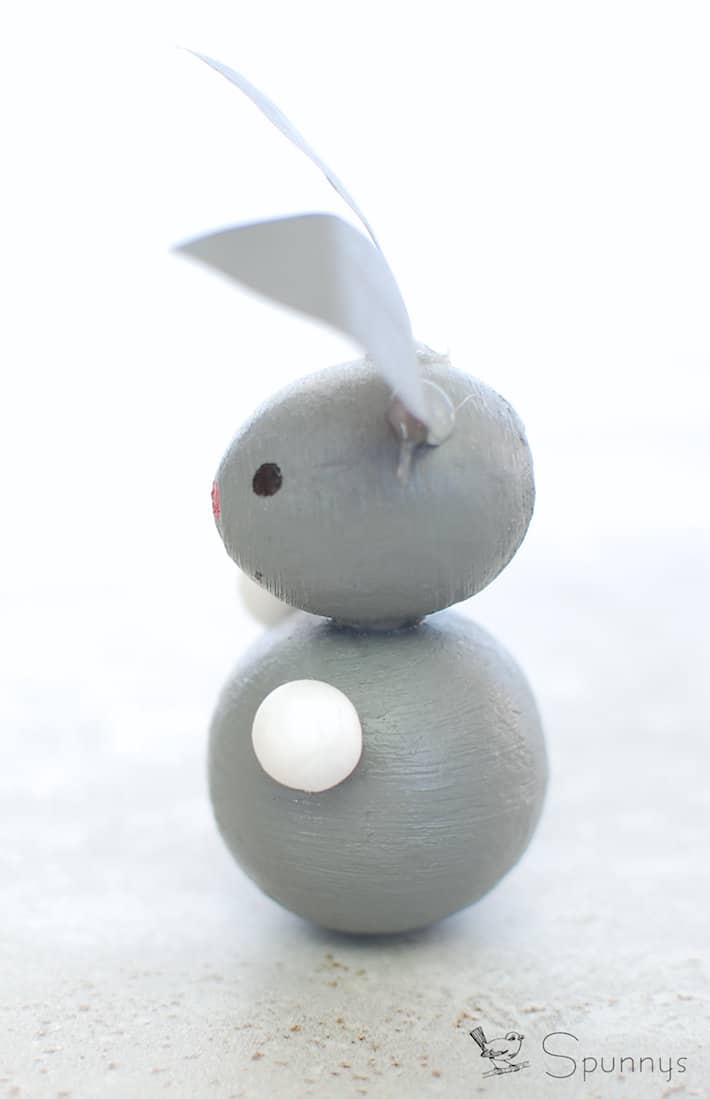
With the gray paint, paint the large ball, the egg, and a small 2-inch long portion of the piece of paper (on the two sides). Rest everything in a cup or a jar to let the paint dry.
With the white paint, paint the top of the little piece of cardboard.
STEP 2: Outline the facial features, the ears, and the pedestal
When the paint is dry, use a pencil or a thin black marker to:
– Outline the ears on the piece of paper. Draw them about 2 inches long and 3/4 inch wide (at the widest point).
– Outline the face of the bunny on the spun cotton egg: the eyes, the nose, and the mouth.
– Draw a circle on the piece of cardboard. You can use a glass or a cup as a guide.
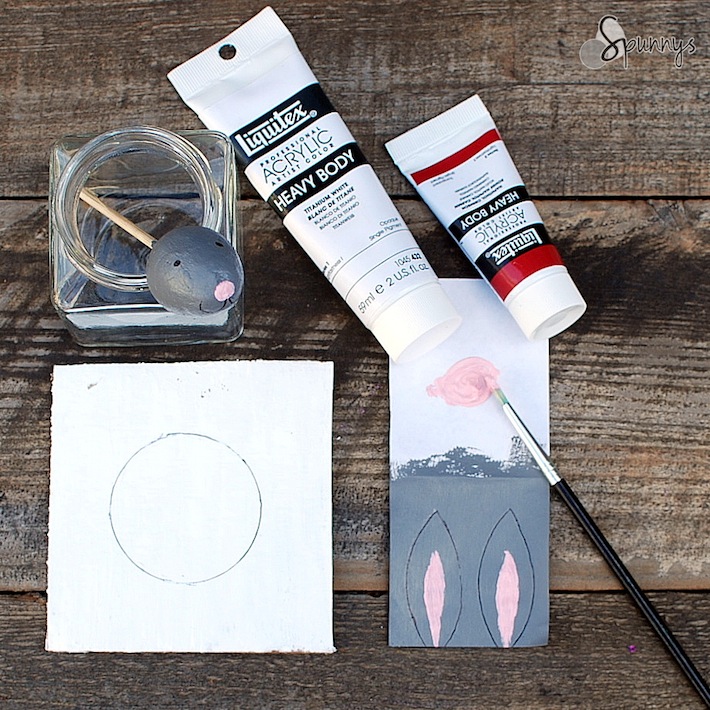
STEP 3: Precision painting
Mix red and white paint to make pink and paint the nose and the inside part of the ears. Let dry.
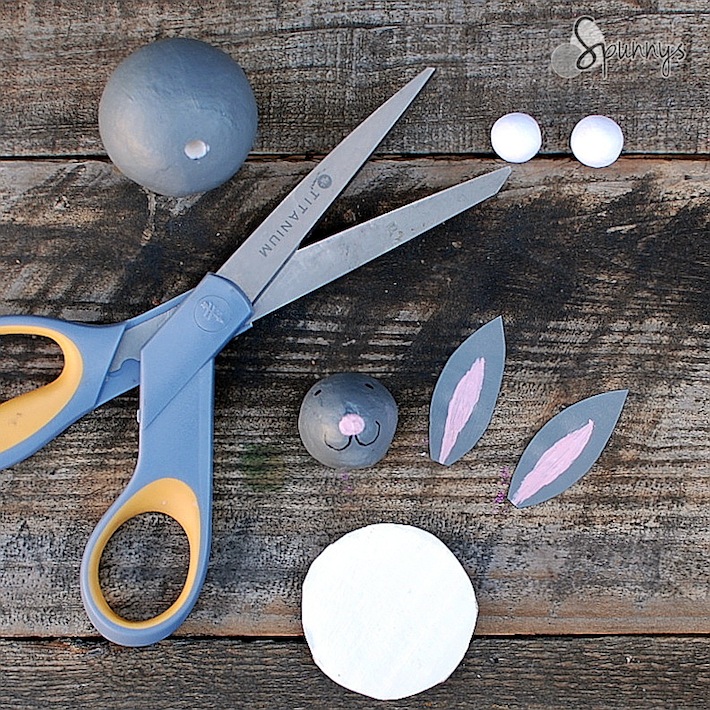
STEP 4: Cut out the different elements
With a good pair of scissors, cut out the pedestal in the cardboard and cut out the ears in the paper
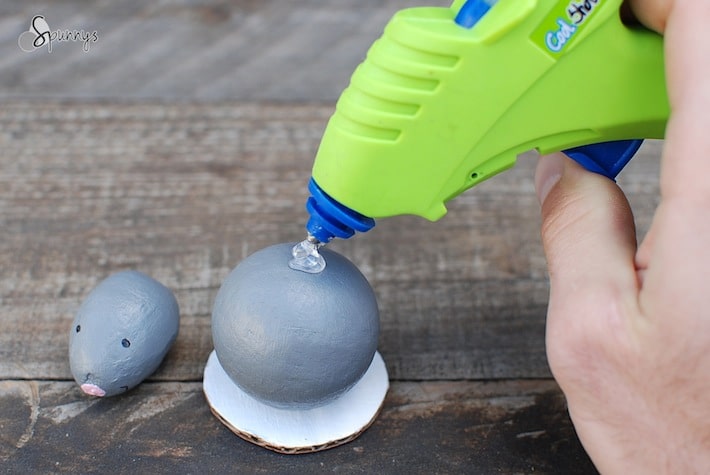
STEP 5: Glue all the pieces together.
I use a healthy amount of glue to make sure the figurine is sturdy. The glue marks can then be hidden by painting over them.
To give your figurine a little bit of character, bend the ears slightly forward.
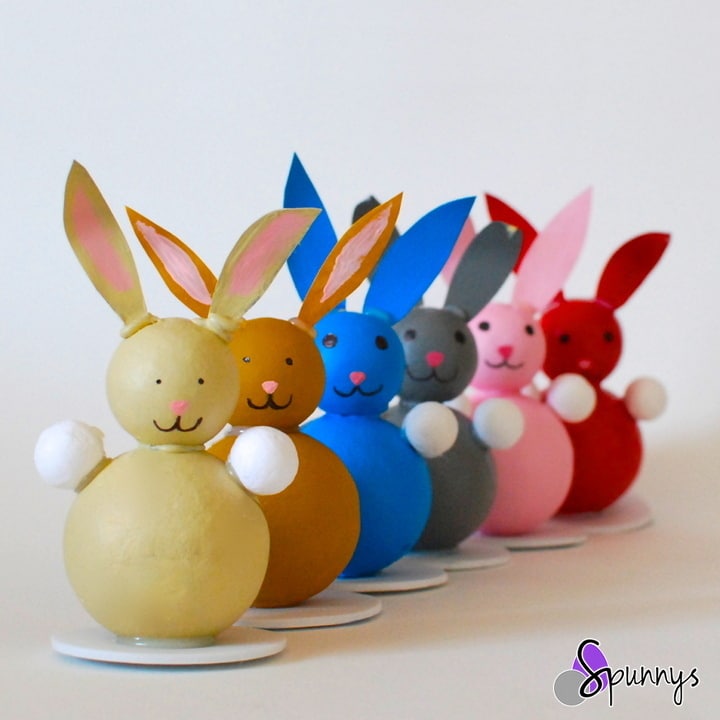
Congratulations you are done :) I hope you enjoyed this craft and I hope it inspired you. You can also experiment with different colors and different shape combinations. For example in the picture below, I used 30mm spun cotton balls for the bunny heads.
As usual, do not hesitate to send us your questions. Happy Crafting!