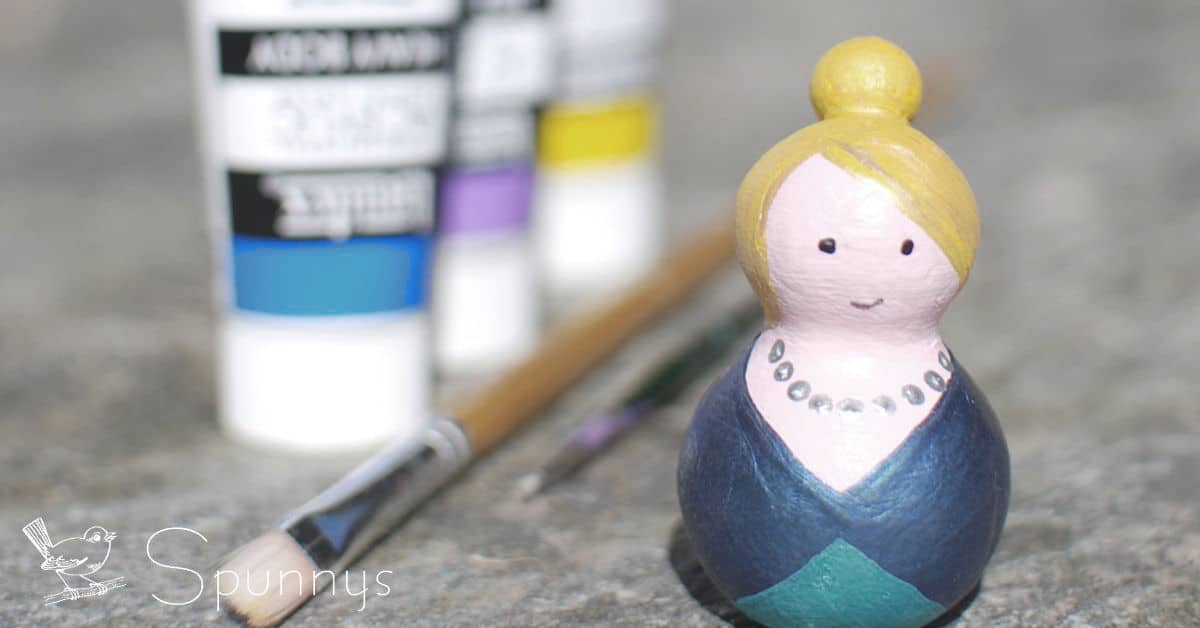
Painting peg dolls is fun and addictive. Check out our list of tips, tricks and advice and learn how you can paint beautiful peg doll people. All of our tips apply to both wooden peg dolls and spun cotton.
Peg dolls can be painted after family members, pets, super heroes, school teachers….The sky is the limit. Peg dolls can also be accessorized with materials such as felt, pipe cleaners, fabric…
How to paint peg dolls – our best tips, tricks and advice
1: Have faith in yourself, it’s much easier than you think
There is no need for fancy paint, fancy brushes, and there is certainly no need to be an artist. Actually I know several people who are famous for their work with peg dolls and who were not artists in the first place. The learning curve is fast. And there is no shortage of ideas out there to get inspired. So trust in yourself, you will do awesome!
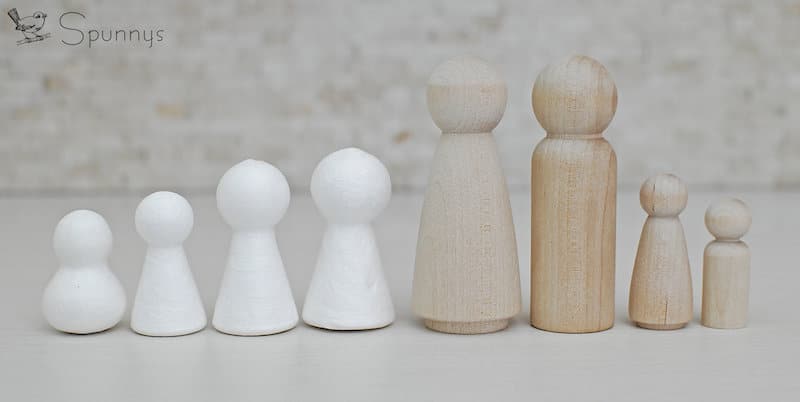
2: Know what doll shapes are out there.
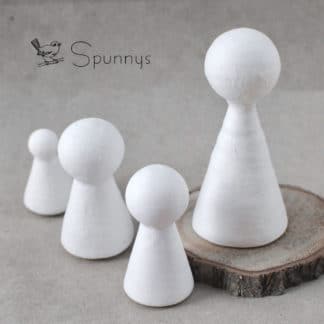
There are many different shapes and sizes out there so make sure to use the ones that fit your project the best. You will find female shapes, man shapes, shapes with a large head, shapes with a small head, shapes with rounded bodies, shapes with slender bodies….If for example you are painting peg dolls after your family, make sure to use different size peg dolls to differentiate between adults and children.
3: Prep your doll shapes.
If you are painting a wooden doll, make sure it is smooth. You may have to sand it a little bit. Always sand in the direction of the wood grain.
4: It’s much easier to outline first.
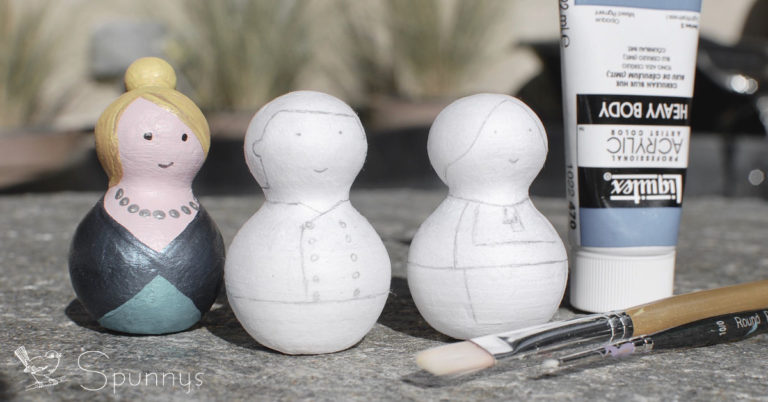
I have painted hundreds of dolls but I still use a pencil to outline things like the eyes, the mouth, the clothes, the details..You can use a pencil eraser directly onto a wooden peg doll or a paper peg doll. If you don’t outline and make a mistake while painting, it will take a long time to correct this mistake.
5: How to make peg doll hair buns
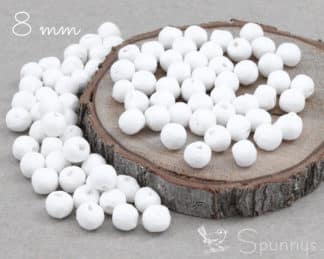
You have several options. I recommend spun cotton balls (ø8, 10 or 12 mm). Use tacky glue to fix the balls to your dolls (wooden or spun cotton), it works very well. You can also gently squeeze the balls to flatten them a little and make the bun more of an oval.
The other way to make hair buns is to use wooden balls. However it’s not as easy because you will have to drill a hole in the wooden ball, a hole in the doll head, and join them together with a toothpick and wood glue.
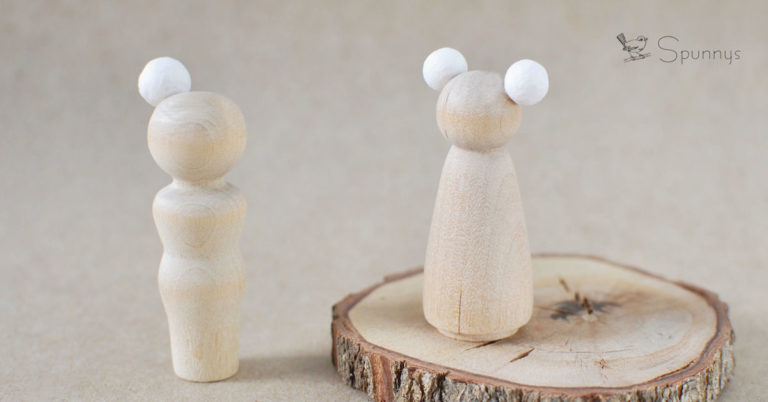
Peg doll on left is 2″1/4 tall, Peg doll on right is 2″ tall.
SHOP AT SPUNNYS
-
Pack of 100 spun cotton balls ø 8 mm$ 7.00
-
Spun Cotton Peg Dolls and Figurines$ 0.20 – $ 2.00
6: Learn to position your facial features.
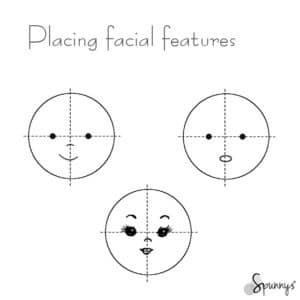
Too often the eyes are positioned too high on a peg doll face. To help you position all the facial features where they belong, there is a simple trick. Just imagine (or draw with a pencil) two intersecting lines dividing the peg doll’s head in 4 equal parts. Position the eyes on the horizontal line. Then, use the vertical line to position the nose and the mouth. That’s it. The eyes may seem too low this way but they aren’t. After you draw the hair or add a hat to your doll, your peg doll will look perfectly normal and well proportioned.
7: Small details are better achieved with a small brush.
This sounds obvious but it is so true. You got to have the right tools. I made a $5 investment 2 years ago in a tiny size #10/0 round brush and today I cannot imagine myself without it. I use it for almost all my peg doll projects. You can also make a small brush by cutting the bristles of a small round brush.
8: Save money. You don’t have to buy too many paint tubes.
If you are on a budget, it’s much better to buy only a few tubes of high quality paint than to buy many tubes of low quality paint. High quality paint is easier to work with (creamier), makes for a more even coverage, and will look much better once the paint is dry. I like to use acrylic paint. I was once told that the following eight colors are enough for most purposes: yellow ochre, gamboge, light red, crimson lake (carmine), Van Dyke brown, ultramarine blue, Hooker’s green, and Payne’s gray. I would definitely add white to this list.
9: Watch your paint consistency.
Paints that are too thick in consistency may be very difficult to work with, especially when painting details, or when painting a clean border between 2 colors. Acrylic paint for example can get thicker with age. I notice this with some of my old tubes. You can use a little water on your brush to thin it and make it more workable.
10: To paint small dots, you can use a tooth pick.
Dip the tip of a toothpick in a small amount of paint and gently dab a dot onto your doll. Bamboo skewers and pencils also work great. Pencils are actually my favorite tools to make eyes. To make eyes, I use the lead tip of a pencil that has a slightly worn out tip. If the pencil was freshly sharpened, it wouldn’t work as well, the dots would be too small.
11: Paint clothes in a logical order.
It’s easier to paint clothes that are closest to the body first (shirt before jacket). And if you paint your shirt before your jacket, your final project will also look better this way. It’s also easier to paint light colors before dark colors.
12: Keep it simple.
Often, simple just looks better. Add too many details or try to be too realistic and you may lose this little something special that make painted peg dolls look so adorable. For example, consider Waldorf inspired peg dolls. Their appearance is intentionally simple. It makes for a cute look and fosters creativity.
13: Keep your brushes clean.
Don’t let the paint dry up on your brushes or they will be harder to clean later. Keep a paper towel and a cup of water handy.
14: Protect your finished dolls.
Finish your project with a clear coat varnish. This will protect it from finger prints and prevent the paint from chipping. You can choose to use a glossy or matte varnish.
How to paint peg dolls – from theory to practice
Follow our step by step tutorial and learn how you can easily paint your own peg doll. We’ll use a princess as an example. You can use wooden peg dolls or spun cotton peg dolls.
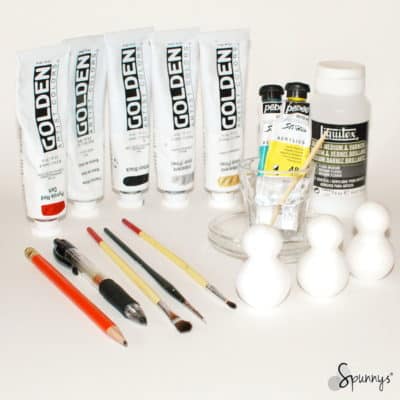
Step 1 – Gather your materials. Acrylic paint works great for both wooden peg dolls and spun cotton peg dolls. I also always have a pencil handy. It’s useful to outline but also to dab little dots of paint (to paint the eyes for examples).
Step 2 – Paint the skin color first. When dry, outline the dress, the face (the eyes and mouth), and the hair with a pencil
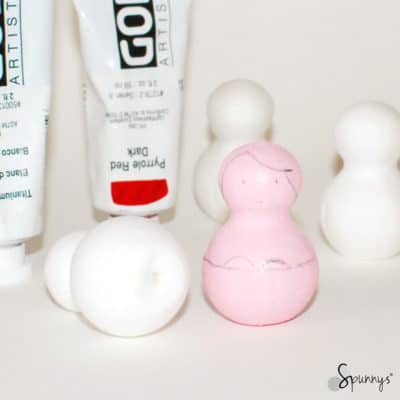
Step 3 – Paint the hair (you can hold your peg doll by its body while you paint the hair). When you are done, paint the eyes and draw the mouth. To paint the eyes, you can dip the tip of a pencil into black paint and gently dabbed little dots onto the doll. To draw the mouth, I simply used a black ball pen. Let dry. When the hair and the face are dry, paint the dress. To paint the dress, you can hold the doll by its head.
Step 4 – Outline and paint the accessories: hair band and necklace. To paint the necklace dots, I used the same technique as the one I used for the eyes (the pencil technique).
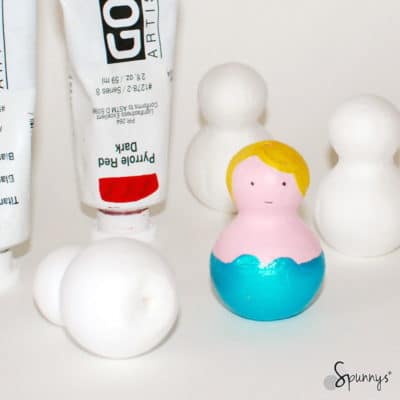
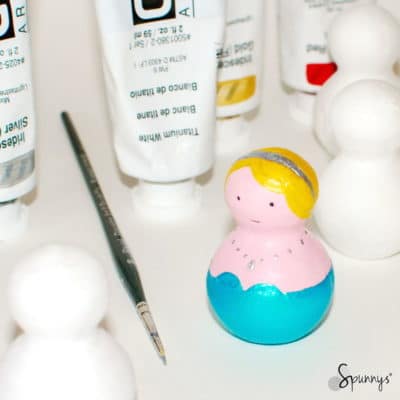
You are done :)
Don’t worry if your first painted peg dolls don’t look all perfect, the learning curve is quick and your next dolls will look fantastic. Thank you for reading and I hope you enjoyed this page. As always, if you have any questions, do not hesitate to get in touch.
What do you use to varnish it with? What brand?
Hi Marika, I like Mod Podge products because they are water-based and non toxic. They come in different level of gloss, and there are spray versions. Note that I don’t get paid by mod podge :)
Hi Nicholas, Thank you so very much for these straightforward directions for beginners! You have made a somewhat daunting task into something to look forward too.
Thank you Angela! This put a smile on my face!
I would suggest a correction, when you said it is not necessary to paint a “skin color” when using a wooden peg doll, it makes it seem like light wood is a perfect skin color match for everyone. You left this as a “Note” under “Step One” and I’d just love to see this worded to be more inclusive. :)
Hi Kayla, you are 100% right, thank you for bringing this up to my attention!!
Hello! About to embark in peg dolls painting! Do I need a primer or can I paint directly on the peg dolls with acrylic paint?
Hi Ximena, Whether you use wooden or spun cotton peg dolls, you can paint them directly without a primer. However when you are finished, we recommend that you varnish them.
Good luck and have fun!
Thank you for this easy to understand step by step. I went from not knowing where to start, to having my list made & off to Hobby Lobby to get supplies & start practicing! This was very helpful. I am excited! Thanks again, Cindy
It warms my heart, thank you Cindy.
Thank you for these simple to follow instructions, you have made a task that seemed impossible, more possible. I have all the tools apart from the varnish at home so will get started soon.
Just one question, can you use marker pens to mark out details on clothes etc or would you suggest just sticking to acrylic paint?
Many thanks again
Hi Radhika, Thank you so much. I think marker pens would work great for details! I’d definitely use them. Happy painting!!
I’ve already bought some acrylic paint gloss, but someone told me I should use matt cos it’s easier to use as gloss can be gloopy. Should I buy some more or is gloss OK – thanks
Hi Christine, I wouldn’t worry too much and stay with the gloss :) I haven’t really encountered any gloopy gloss paint nor do I find it particularly difficult to use. I say go with what you like!
Great information. Have been collecting supplies and ideas for a while. You are the inspiration I needed to start creating. Thank you for sharing your time and talents.
Thank you Mary, this is very kind. I hope you have a great time painting peg dolls.
Hi there! I was wondering if you could use a permanent marker, like sharpie markers, to create details? If so, will they run when using sealer like modpoge? Would I use a spray sealer instead? Thank you for your help!
Hi Lisa. You can use a permanent marker on wooden or paper peg dolls, and follow up with regular liquid mod podge, no need to buy spray. It will not run. Happy Crafting :)
Thank you for the instructions. How do you attach things like ears for animals, do you use card and glue and then paint after?
Thanks
Hi Vicky, yes this is exactly what I do. I use a small bead of glue (from a glue gun) and paint over the glue after :)
This is very helpful. Thank you. I only wish I had read it before I started lol
Hi…I”m totally confused! Do you paint the doll first and then finish with the glossy mod podge? Do you recommend acrylic for all the nice bright colors?
Hi Patricia,
Yes, you paint the dolls first and then finish with mod podge. The glossy mod podge has 2 benefits : it protects your projects and make them look nice and shiny. We recommend acrylic for all colors. Happy peg doll painting!
Thank you for the wonderful advice. My pegs arrived today and I can’t wait to get started.
Thank you Tracey and feel free to share your pics :)
Hi, I created some wooden peg keychains and used the clear varnish but they are scratching and scuffing already after a day on someone’s keychain. Do you know or have any other suggestions as to what I can put on them to secure their integrity. Thanks! 😊
Hi Sarah,
What Varnish did you use ? I unfortunately don’t have an answer for you but maybe somebody reading this will ? Maybe some type of epoxy coating ?
I always use Zinsser Bulls Eye Shellac (clear kind, the yellow bottle). I do three coats, about 1 hour apart and then let them dry overnight. I get it as a spray can. It works great!
This is a great idea Aimee, thank you for sharing. And Shellac is a natural, non toxic product, so it doesn’t get any better.
Thanks!
Hi, thanks for your advice. You’ve made painting peg dolls a lot easier than I thought.
I’m wondering if you need to paint hare wooden dolls first with some kind of undercoat before painting it in acrylic colours?
Thank you Mali, it goes straight to my heart :) I don’t use primer on wooden dolls, and never had issues. I think keeping it simple is fine :)
What brand peg dolls do you recommend? Which are of the best quality and have a variety of shapes and sizes?
… Spunnys ? :)