Nicolas Cocquerelle is the owner and creator of the Spunnys brand and website.
An avid craft enthusiast, he was first introduced to spun cotton shapes through his grandfather, when he was just a kid.
"With Spunnys.com, my goal is to popularize the joy and ease of crafting with spun cotton shapes".
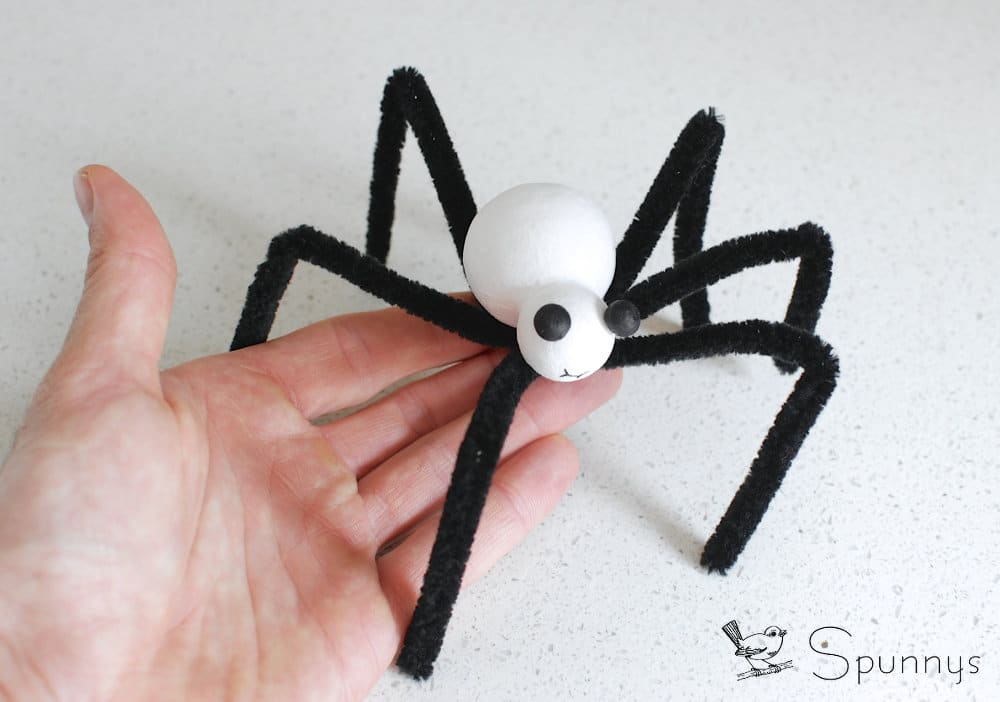
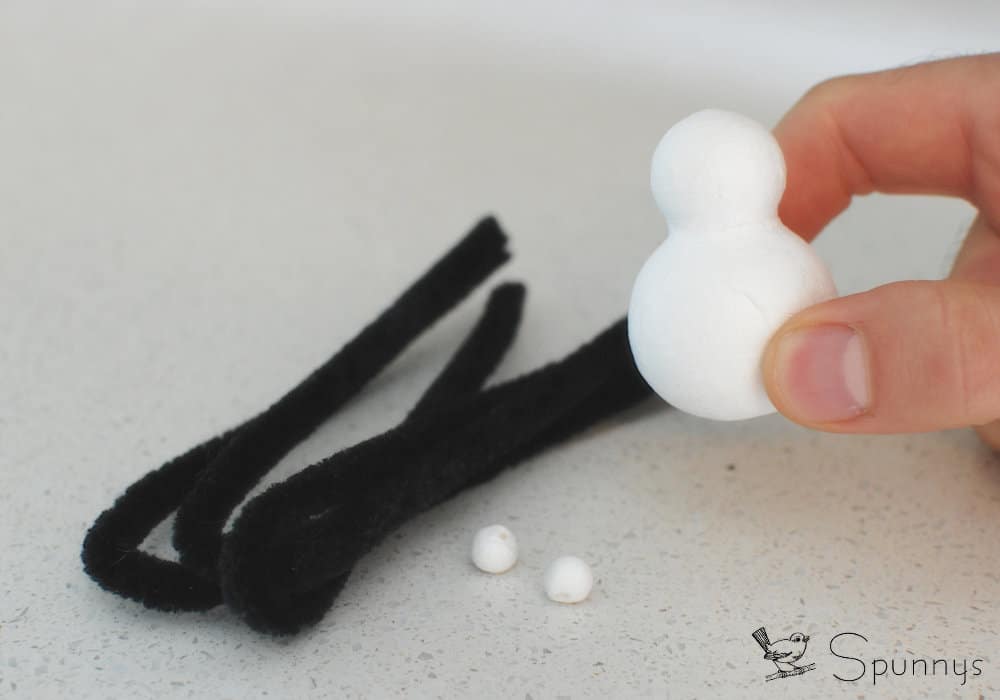
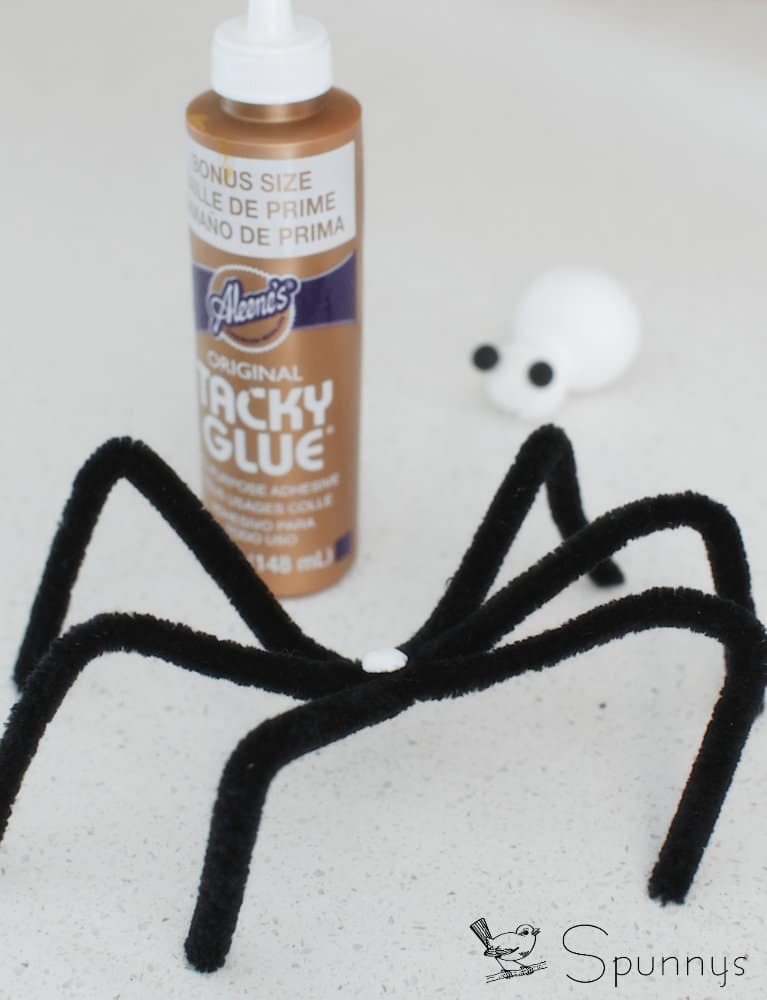
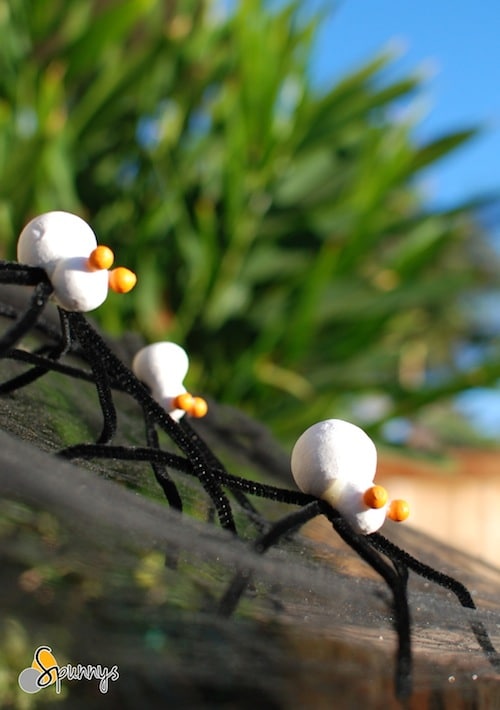
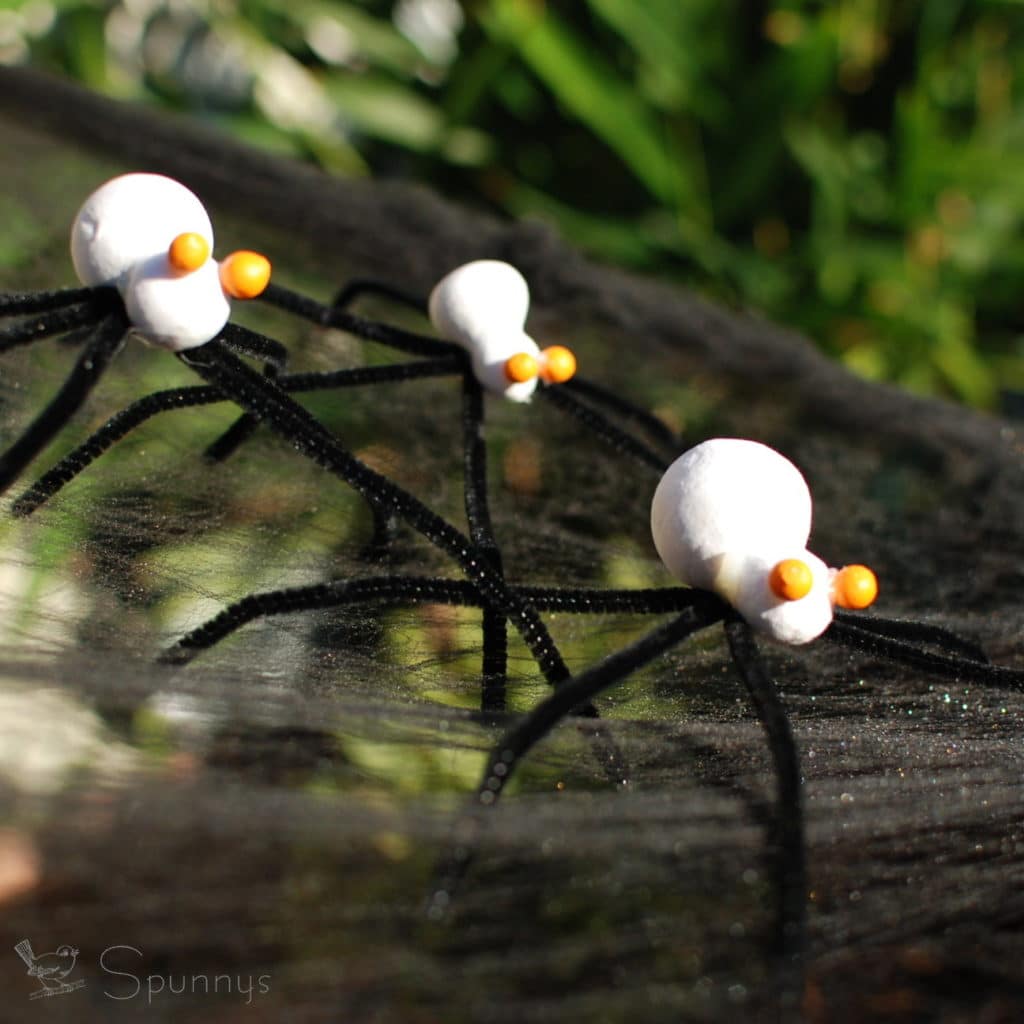
Black pipe cleaner strands (chenille). Three per spider.
Acrylic paint for the eyes. Your choice of color.
A paint brush
A glue gun or tacky glue.
Step by step directions
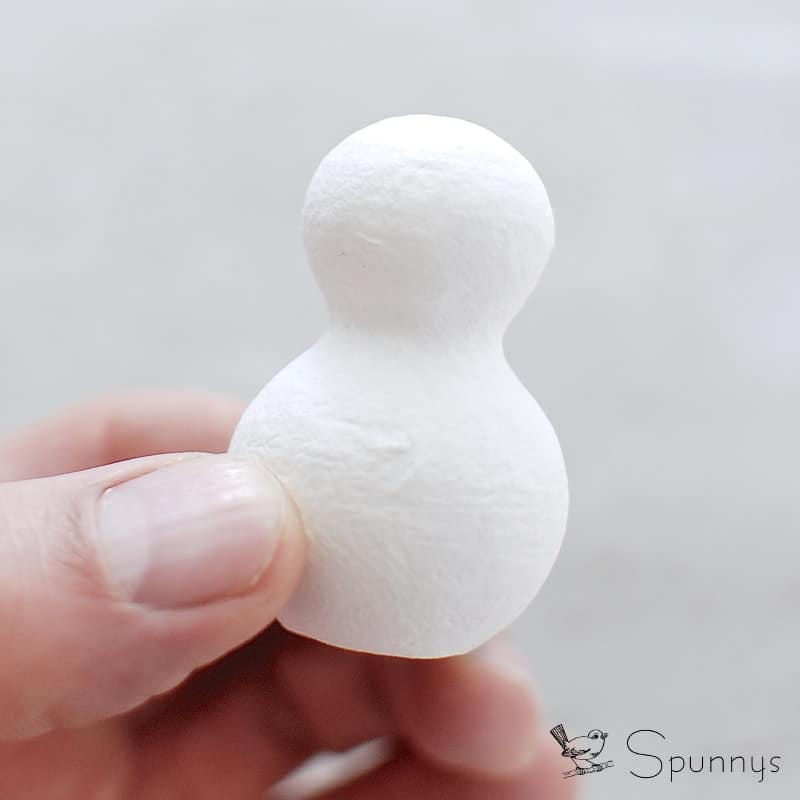
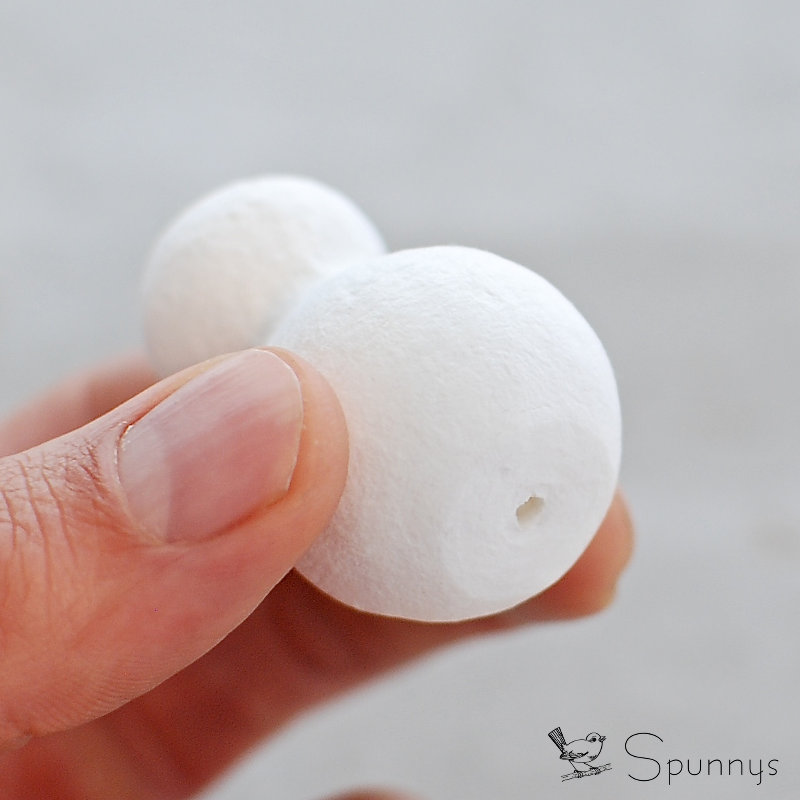
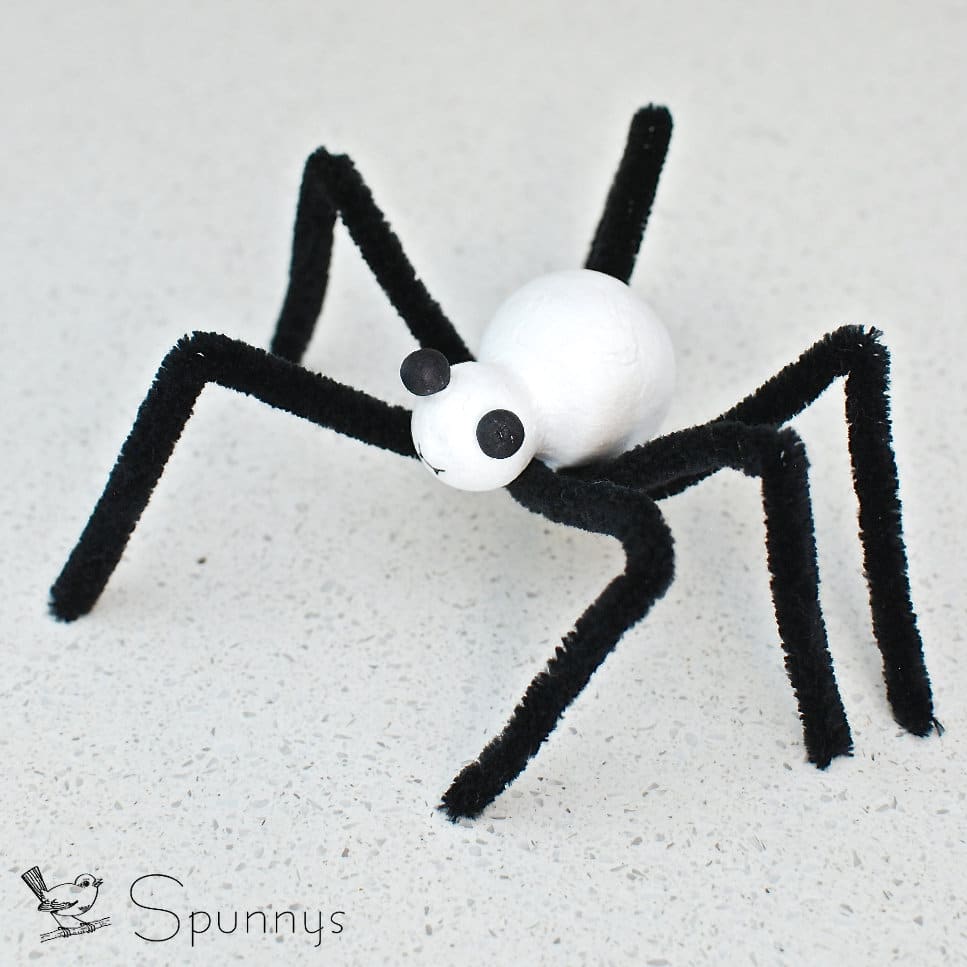
Start with the eyes and paint all the balls. You can use bamboo skewers to hold the balls while you paint them. When you are done, you can rest the skewers in a container while the paint dries.
Make the legs. Grab three chenille stems, hold them together as one, and twist them a few times in the middle.
Glue everything together.
You are already done :)
“If you want to live and thrive, let the spider run alive” – Spanish proverb
I hope you enjoyed this tutorial. As always, do not hesitate to send us your questions.
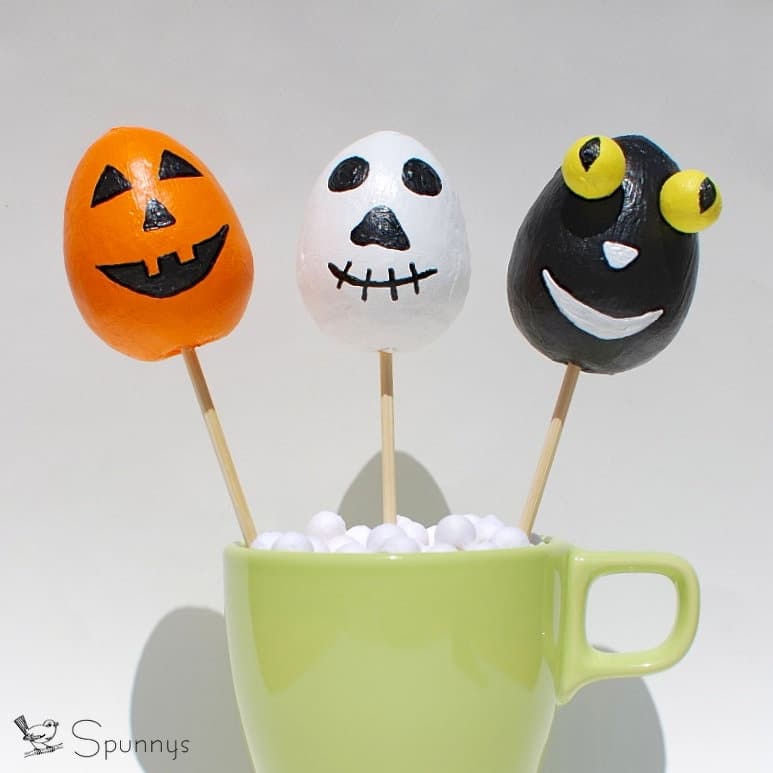
How about painting eggs for Halloween? This is a fast and simple DIY that only requires a few materials. These eggs could be displayed on sticks (see the picture below), or they could be glued onto cardboard pieces so that they stand up on their own, or they could even be hung from the ceiling.
Project Materials
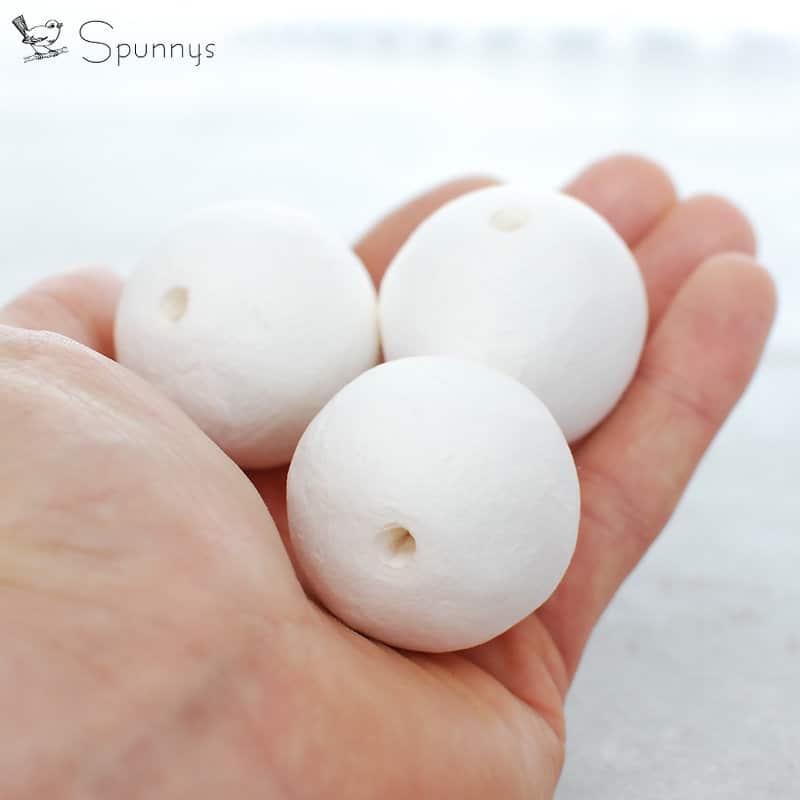
– Spun cotton eggs. They come in several sizes. I am using the 60mm eggs. They are made of paper which makes them very easy to paint. – Paint and brushes – Bamboo skewers
Spun cotton eggs are easy to paint and come in many sizes. They also all have a hole at the bottom which makes them easy to hang.
Painting the eggs.
Almost any paint will work. If it works on paper, it works on spun cotton. I like acrylic because it dries fast and once dry, it helps to waterproof the egg a little.
Instead of using your fingers to hold the eggs while painting them, you can use a bamboo skewer. Every spun cotton egg has a little hole on the bottom.
Once you are done painting, you can rest the stick in a container to let the paint dry. A tall glass or a mug works great. Because spun cotton shapes are very absorbent, paint dries very fast. 10 minutes should suffice.
The easiest way to paint spun cotton eggs is to mount them on sticks.
Going one step further
If this seems a little too basic, there are many ways to make this DIY a little more complex.
– Little accessories could be added to the eggs. A scarf could be made of paper, clothes could be made of fabric and glued on…
– The eggs could be decorated with glitter or sequin.
– Other spun cotton shapes could be glued onto the eggs. For example, spun cotton balls could be used to make little eyes.
There are many ways to get creative. I probably only scratched the surface but hopefully it will give you some ideas already. I hope you enjoyed this page and if you have any questions, do not hesitate to leave a comment. Happy crafting!
Spunnys practice golf ball are made of paper. Fun, sturdy, and lightweight, they are eco-responsible alternatives to foam and plastic golf balls.
Introducing golf ball size paper balls
SPUNNYS is the first company to manufacture paper balls in golf ball size.
Note: The diameter of an American golf ball is 42.7mm. However this is a precision that is illusionary to achieve with paper. Therefore, we advertise the diameter of our paper golf balls as 43mm.
Why use paper golf balls ?
Practice safely outdoors or in your backyard.
Play chipping target golf without the risk of breaking anything.
Have fun with friends.
Leave no plastic behind.
The advantages of paper over plastic practice balls:
First and foremost: paper balls are a lot more fun to hit than plastic balls. They have a solid core. Hitting them feels closer to the real thing than hitting plastic does.
Paper balls are also more environmentally responsible than plastic. Suppose you leave a paper ball behind in a field, it will eventually disintegrate just like regular paper would. Plastic on the other hand will take decades to disappear and may end up in our oceans.
Paper balls can also be very easily decorated. Paint, markers and pencils can all be used on paper balls. Sign your name on them, write numbers, paint them different colors, draw faces…you can get creative.
The limits of paper practice golf balls
They are not designed for putting. Paper balls will never be as perfectly round as real golf balls and may not roll in perfect straight lines. They are made to be swung at.
Also, if you swing really hard, you may not be able to use the ball again as it will lose its shape.
How much do paper balls weigh?
About 10.4 grams each (roughly 3/8th of an ounce). In other words, they are very lightweight.
Conclusion
The key word is “fun”. Practice paper balls are simply a lot of fun.
Spunnys practice golf balls made of paper are available in our online store:
Interested in the product but not sure about committing yet? We’d be happy to send you a small box with a few sample golf balls. Please feel free to send us an email.
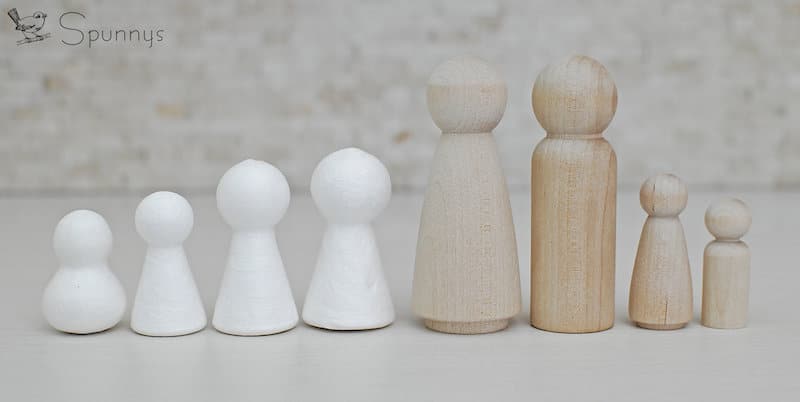
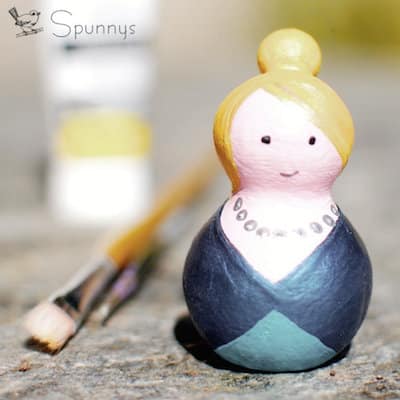
Peg dolls are great. They are a fun way to express one’s creativity. They can be painted into almost anything: people, animals, famous characters, monsters, princesses, elfs, fairies… They can be used as ornaments, decorations for the house, art pieces, chess pieces… And they are relatively inexpensive.
Peg dolls are most often made of wood. But other types of peg dolls do exist. Some are made of paper, plastic, resin…
In this quick study, you will learn how wooden peg dolls compare to paper peg dolls (also known as spun cotton peg dolls).
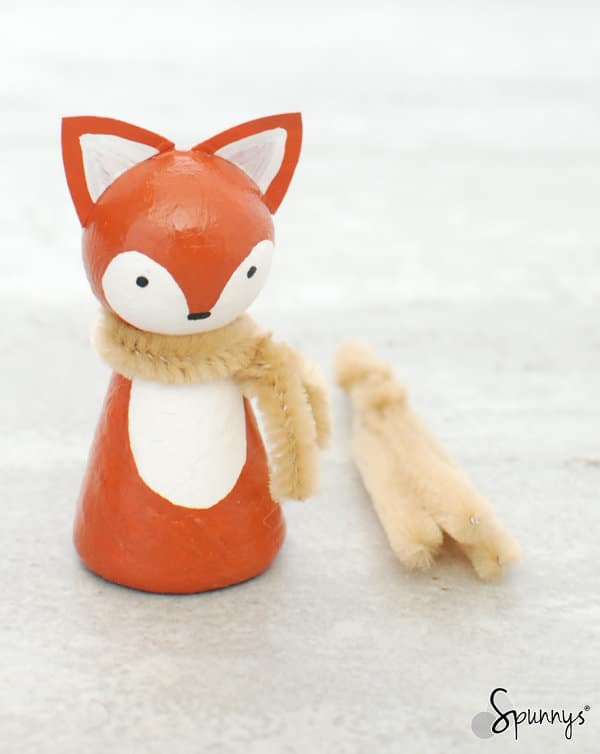
Paper peg doll fox (left) vs Wooden peg doll fox (right)
STURDINESS
Winner: wooden peg doll.
Although paper peg dolls are surprisingly sturdy, they are not as sturdy as wood. There is little contest here between the two.
Paper peg dolls (also known as spun cotton peg dolls) are made with a soft type of paper that resembles tissue paper. This paper is rolled very tight into a doll shape and sealed.
EASE OF PAINTING:
Wooden peg doll
Paper peg doll
There is no hole at the bottom of a wooden peg doll
Winner: paper peg doll.
I find that paper peg dolls are easier to paint. For two main reasons:
1- Paper peg dolls have a hole in the bottom. Therefore they can be held with a wooden stick (a bamboo skewer works great). This makes painting paper peg dolls fast and easy. For example, I can paint an entire paper paper peg doll with one solid color in less than 30 seconds without having to touch it with my fingers.
2- Paint dries faster on paper than on wood. Painting peg dolls can be time consuming. There often is a need to wait for color to dry before applying the next one.
ACCESSORIZING:
Winner: paper peg doll.
You may want to add miniature clothes made of felt or fabric to your peg dolls. You may also want to cut out animal ears in a piece of paper and glue them onto your peg doll. Or you may want to make a little scarf out of a piece of pipe cleaner and fold it around your peg doll. It’s nice to be able to accessorize.
I find that wooden peg dolls are a little more tricky to accessorize. For example, if you make a hat for your peg doll and the fit is a little too tight, you can still make it fit onto a paper peg doll. But you couldn’t make it fit onto a wooden peg doll.
Let’s use another example. Let’s imagine you want to add little animal ears to your peg doll (animal ears can be cut out in a piece of strong paper). With a wooden peg doll, your only solution would be to glue these ears to your doll. But with a paper peg doll, you can make a little incision into the doll with a blade and slide the ears in. The ears would be anchored much more solidly this way. You can then paint around the ears to hide the cut marks.
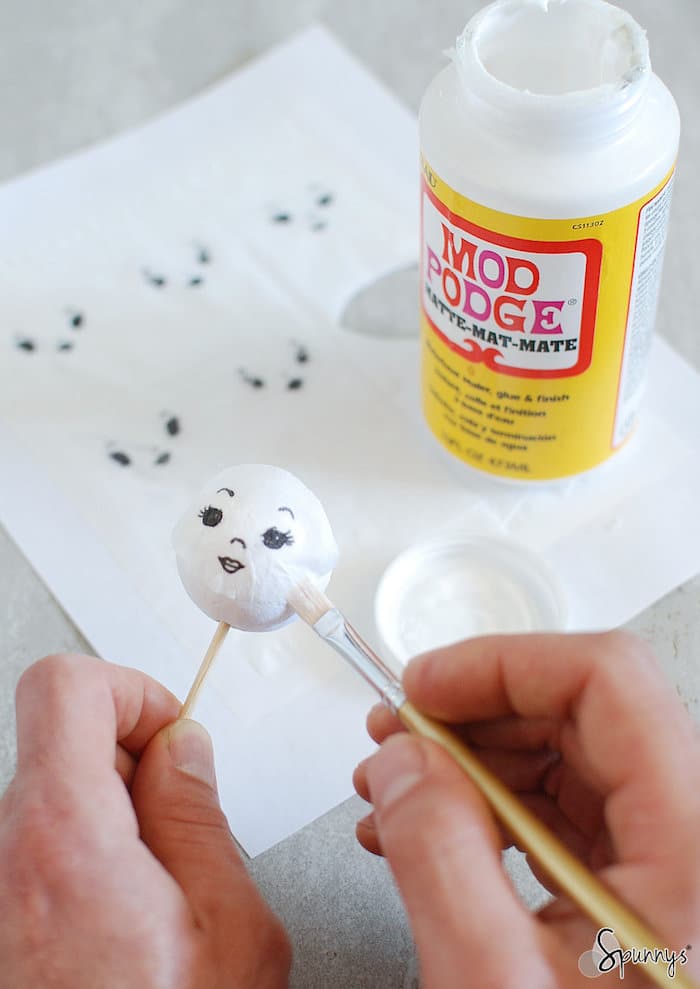
TRANSFERRING A PRINTED IMAGE TO A PEG DOLL:
Winner: paper peg doll.
Did you know that it is possible to transfer an image to a peg doll? This is a great idea if for example you have little faith into your artistic capabilities :)
The technique is different for a wooden peg doll and for a paper peg doll.
For a wooden peg doll, the technique involves printing the image on a piece of wax paper (or a piece of label paper with the labels removed), and then pressing this piece of paper onto the wood.
For a paper peg doll, the technique involves printing the image on a tissue, and then mod podging the piece of tissue onto the paper peg doll.
The problem with the wood transfer technique is that it is designed to work on flat wood surfaces (cylindrical surfaces are ok too). Therefore, it would be very challenging to transfer a print to the head of a wooden peg doll.
On the other hand, the tissue transfer technique can work on flat and spherical surfaces. It can be used for facial features.
IN CONCLUSION:
At the end of the day, peg dolls are wonderful products whatever they are made of. Which ever kind of peg doll you use, you are the real winner, because you will have a chance to work on your creativity skills, have fun, and end up with something beautiful.
Foam balls and spun cotton balls are both very useful when it comes to arts, crafts and decorations. But which ones should you use?
In this quick study, we will try to get some answers. We will put them to the test by painting them, drawing on them, and gluing them.
A mix of foam balls and spun cotton balls
Quick definitions:
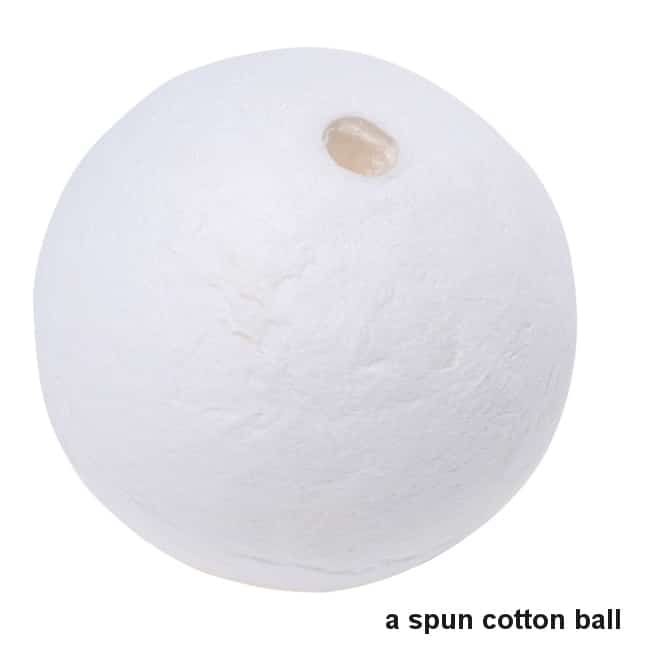
Foam Balls: balls made with polystyrene (styrene), a light and porous material. Spun cotton balls: balls made of paper. The paper used is soft like tissue paper, but the actual balls feel sturdy. [/box]
Foam balls vs spun cotton balls – FIRST IMPRESSIONS:
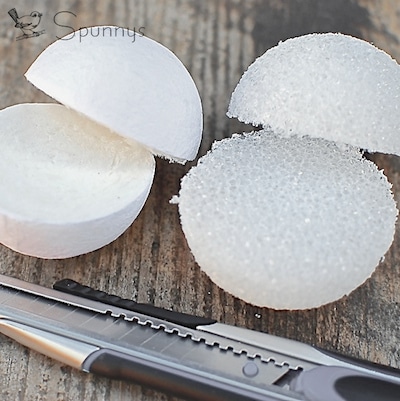
A spun cotton ball and a foam ball cut in half
Color: Almost identical. Spun cotton balls are a little more snow-white while foam balls are a little more off-white.
Texture: Spun cotton balls have a smooth fiber-like surface texture that is very similar to the texture of paper. On the other hand, foam balls have a rough, crater-like surface. When handling foam balls, they also tend to shed a little, which is not the case with spun cotton balls.
Shape: Foam balls have a perfectly round shape. On the other hand, spun cotton balls may carry slight imperfections. Some may be a little more round than some others. It is also worth mentioning that large size spun cotton balls are made by hand and are more prone to imperfections than small size spun cotton balls.
Weight: Foam balls are ultralight. Spun cotton balls are not quite as light but they are still very light.
Cutting through: Foam balls can easily be cut in half with a snap blade utility knife. It takes a little more effort to cut through a spun cotton ball and I wouldn’t recommend doing this. For those in need of half sphere spun cotton shapes, spun cotton hemispheres can be purchased instead.
Waterproofness: Spun cotton balls should not be used in water or dunked in water. Since they are made of paper, they would get soggy and lose their shape. On the other hand, foam balls float and will not get damaged by water.
[divider_flat]
Foam balls vs spun cotton balls – PAINTING:
Painting is an essential part of a craft project. So I thought it would be critical to see how well each kind of balls take paint. Are they easy to paint? Do they look good painted? Does paint adhere well or does it look like it will be prone to flaking over time?
I experimented with three types of paint:
Glitter spray paint (purple)
Acrylic paint (blue)
Watercolor paint (yellow)
I am using bamboo skewers because it is much easier to paint the balls this way. Also, once the balls are painted, you can stake the skewers in a planter or rest them in a container until the paint is dry. Spun cotton balls all have a little hole in which a bamboo skewer can easily be inserted.
Spray painting (purple):
Spray painting the balls was very fast and very easy. It’s a messy process though so I went outside to do it.
Both the spun cotton and the foam balls took spray paint very well. However it was easier to achieve a nice and even paint job on the styrofoam ball. With spun cotton balls, spray paint needs to be applied very carefully to obtain a nice even coverage. The danger is over-applying the paint. On the other hand, styrofoam balls are much more forgiving.
The one thing spun cotton balls have going for themselves though is how fast paint dries on them.
As far as longevity, it doesn’t look like paint will eventually flake on any of the balls. On the foam ball, paint is solidly anchored to all the little craters. And on the spun cotton ball, paint is solidly anchored to the fibrous texture of the ball.
Acrylic (blue) and watercolors (yellow):
Unlike spray painting, traditional painting (with a brush) of the spun cotton balls and foam balls were two very different experiences. It was much easier and much faster to paint on spun cotton than to paint on foam.
Painting on foam takes more time because all the little cavities need to be filled. It also consumes a lot of paint. On the other hand, painting on spun cotton balls feels like painting on paper. It was quick, easy, and paint efficient.
Just like with spray paint, traditional paint dries significantly faster on spun cotton than on foam and it doesn’t look like paint will eventually flake on any of the two surfaces.
Note that if you were interested in giving the foam balls a smooth appearance, the brand who sells the foam balls also sells a smoothing paste that can be applied to the spheres prior to painting.
Foam balls vs spun cotton balls – DRAWING:
There is little contest between foam and spun cotton when it comes to drawing.
Drawing on spun cotton is pleasant and feels just like drawing on paper. However, drawing on foam doesn’t work very well, the foam surface is too uneven.
Any marker, crayon, pencil, ball-pen or glue-pen that works on paper would also work on a spun cotton ball. Note that when drawing with a permanent marker, it is always a good idea to outline with a pencil first.
Foam balls vs spun cotton balls – GLUING:
Any glue works great on both spun cotton balls and foam balls because of their fibrous and rough textures.
I like to use a glue gun because the glue hardens very rapidly and allows to work fast
However, it is important to use a low-temperature glue-gun on foam. Regular glue-guns would melt the foam and it may be unhealthy to breathe melting plastic vapors.
Foam balls are prone to melting
[box size=”large” border=”full”]
CONCLUSION:
Spun cotton balls and foam balls both excel at different things and there isn’t one type of ball that can do it all.
FOAM BALLS
PROS: Perfectly round. Excellent surface for spray painting. Waterproof. CONS: Paint takes a long time to dry. Poor surface for drawing. Sheds a little bit. TARGET APPLICATIONS: Foam balls have many great decorative uses. For example, spray painted foam balls look great as vase fillers, or as ornaments. They can be used to decorate the house, decorate an outdoor party, decorate a wedding…. Foam balls are also convenient when it comes to science crafts. Because it’s easy to go through a foam ball with a bamboo skewer, foam balls are a good choice to quickly build planet models or molecular models.
SPUN COTTON BALLS
PROS: Excellent surface to draw on and to brush paint on. An all natural product. Fast drying. CONS: Not water proof, not always perfectly round. TARGET APPLICATIONS: Spun cotton balls are a wonderful product for arts and crafts. They are made of paper and are very easy to paint and to draw on. Use them to make jewelry, cake toppers, ornaments…
Note: Neither foam balls nor spun cotton balls should be given to children. They are art products, not toys.
[/box]
I hope you enjoyed this page and that you found some inspiration for your next craft projects. As always, let me know if you have any questions.
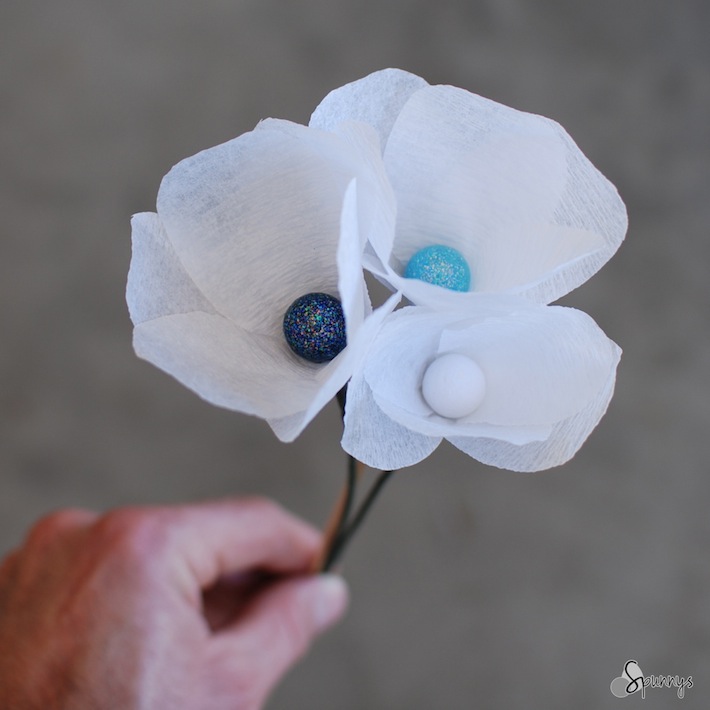
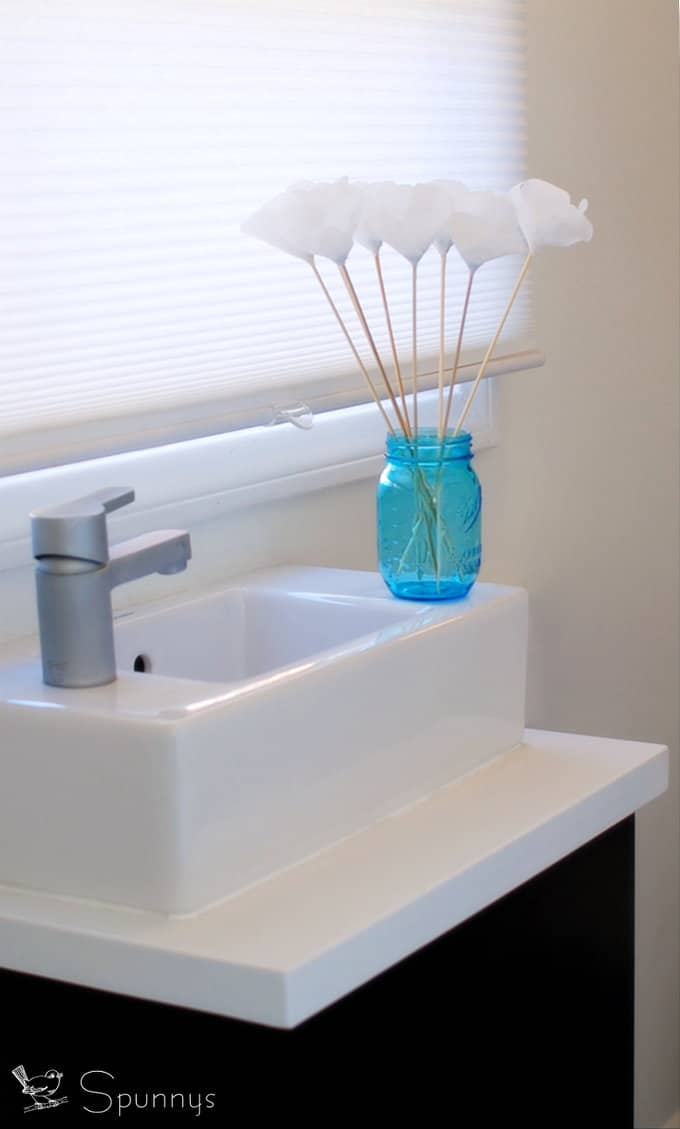
In this tutorial, learn how you can make flower stamens from small size spun cotton balls. You can use these faux stamens to make artificial flowers such as paper flowers or fabric flowers.
paper flower stamens – the basic technique
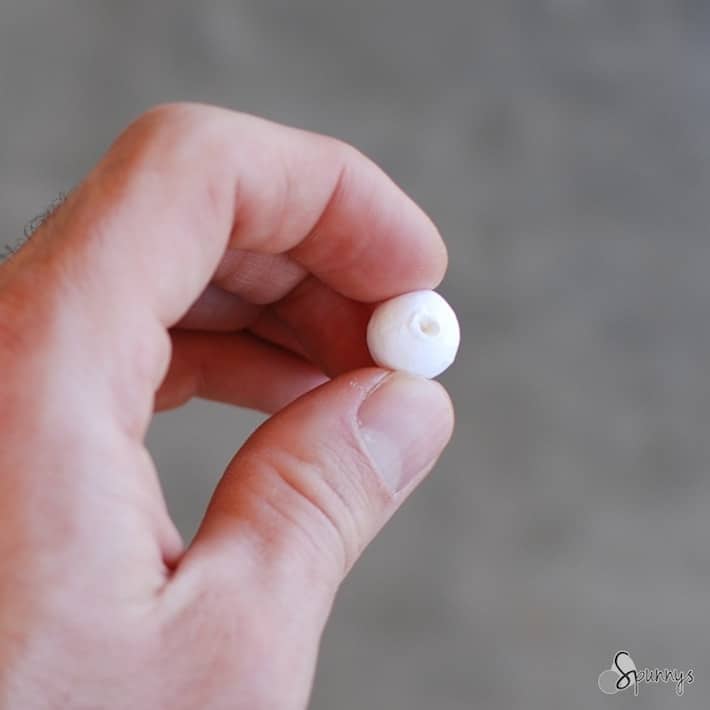
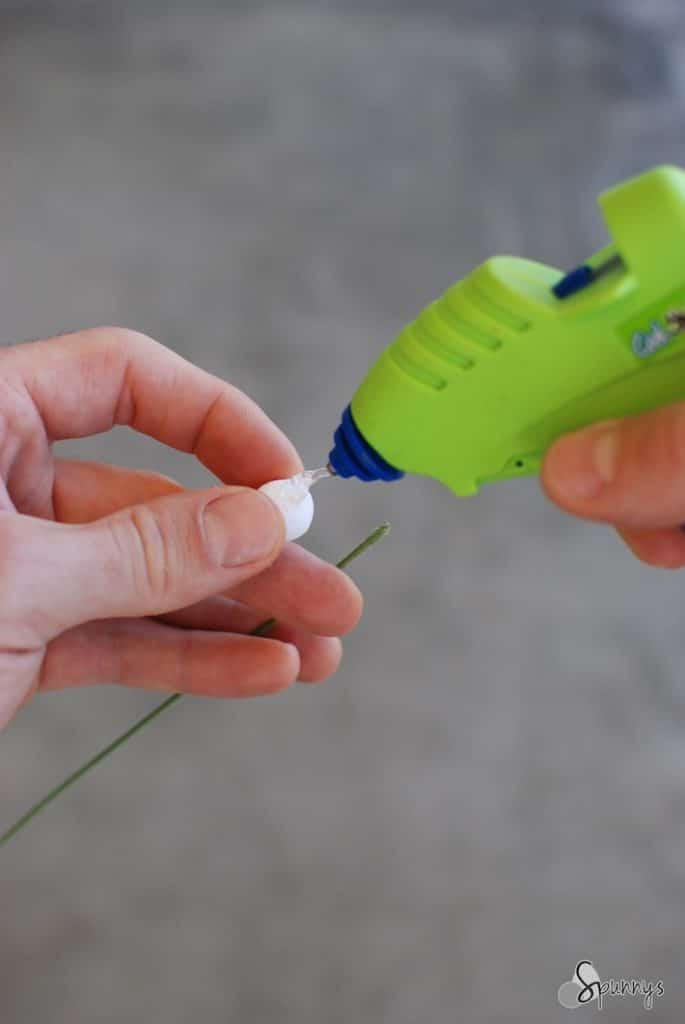
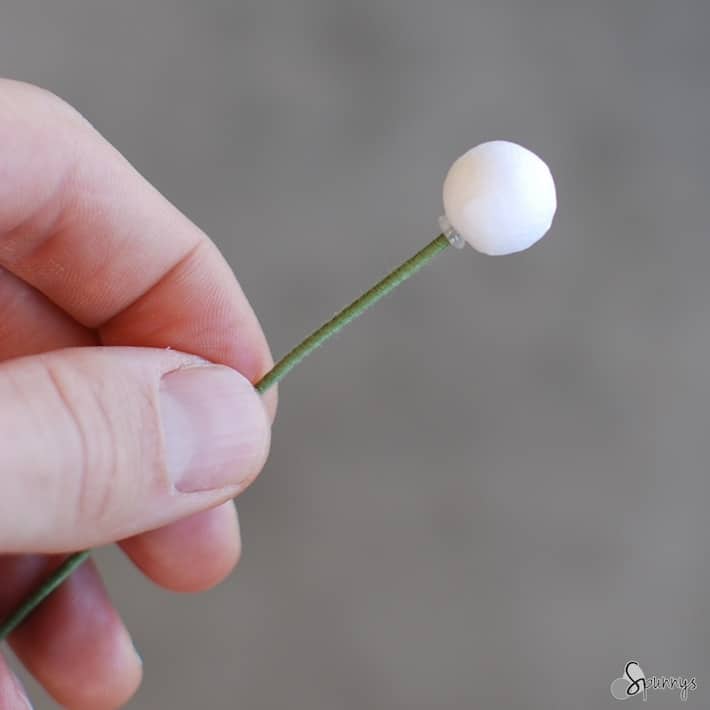
1. Grab a 15mm small spun cotton ball (you can also use smaller size balls).
2. Pour a little glue into the hole.
3. Insert a flower stem wire and wait a few seconds until the glue solidifies.
1
2
3
You are already done :)
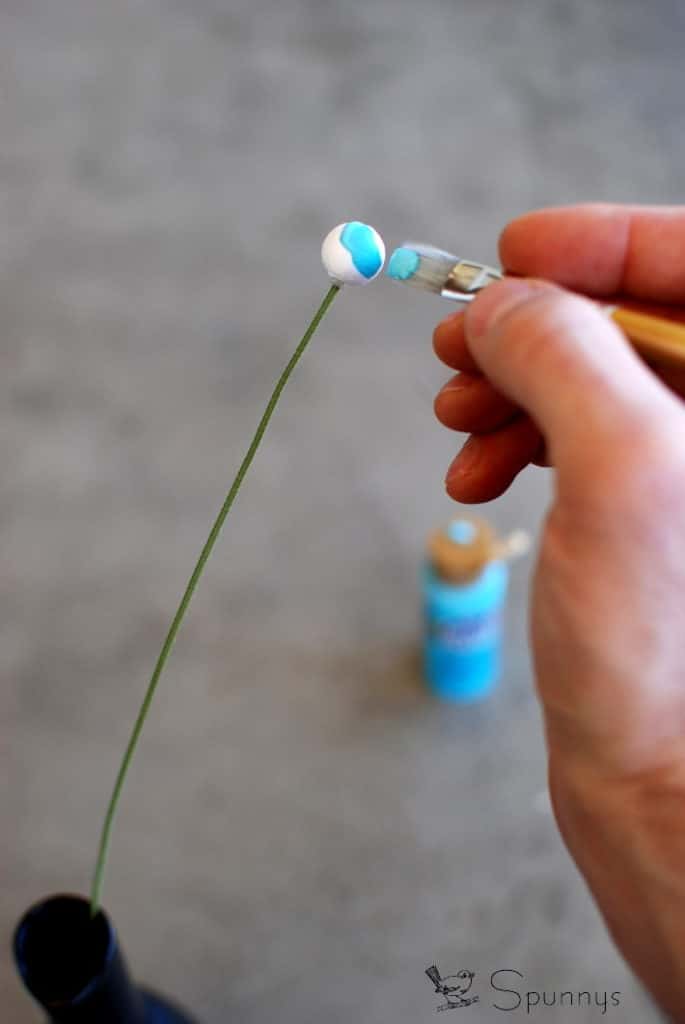
Adding color or glitter
You can paint spun cotton balls with acrylic paint to make colored stamens.
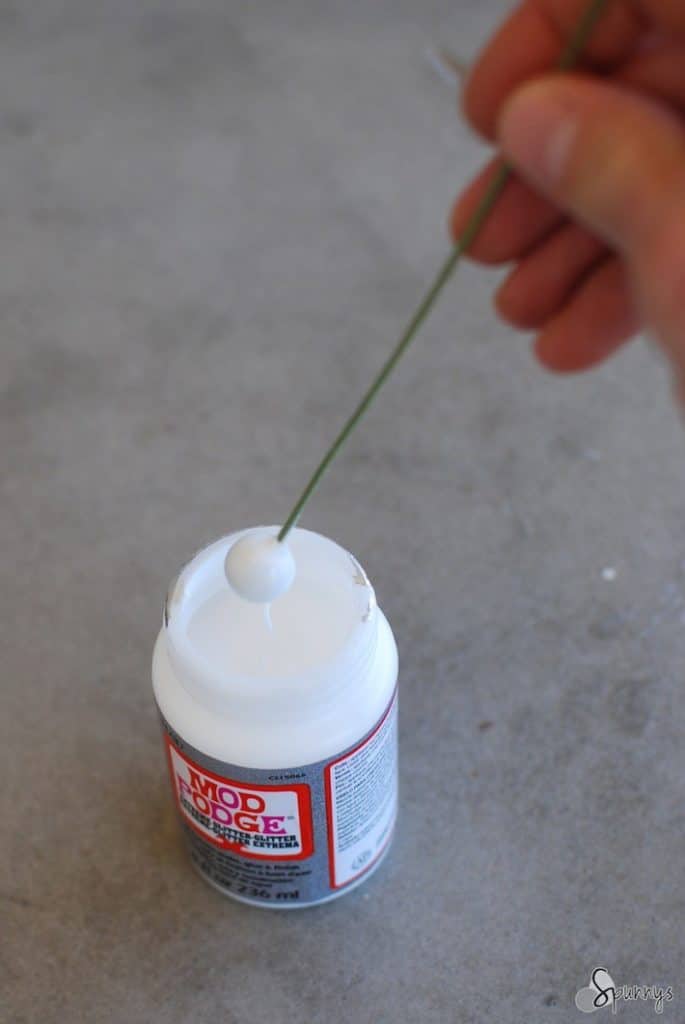
You can also add glitter to the stamens by dipping the balls directly into glittered mod podge. Another way of adding glitter would be to brush the balls with tacky glue and sprinkle glitter over the glue. The tacky glue will harden to a clear finish and let the glitter shine.
Tips and tricks
You can use a small spun cotton egg instead of a spun cotton ball for a pointier style stamen.
You do not necessarily need to paint or glitter the stamens. The artificial flower can still look beautiful with an unpainted stamen.
If you do no have any floral wire to make the stems you can use bamboo skewer sticks for a modern minimalist look.
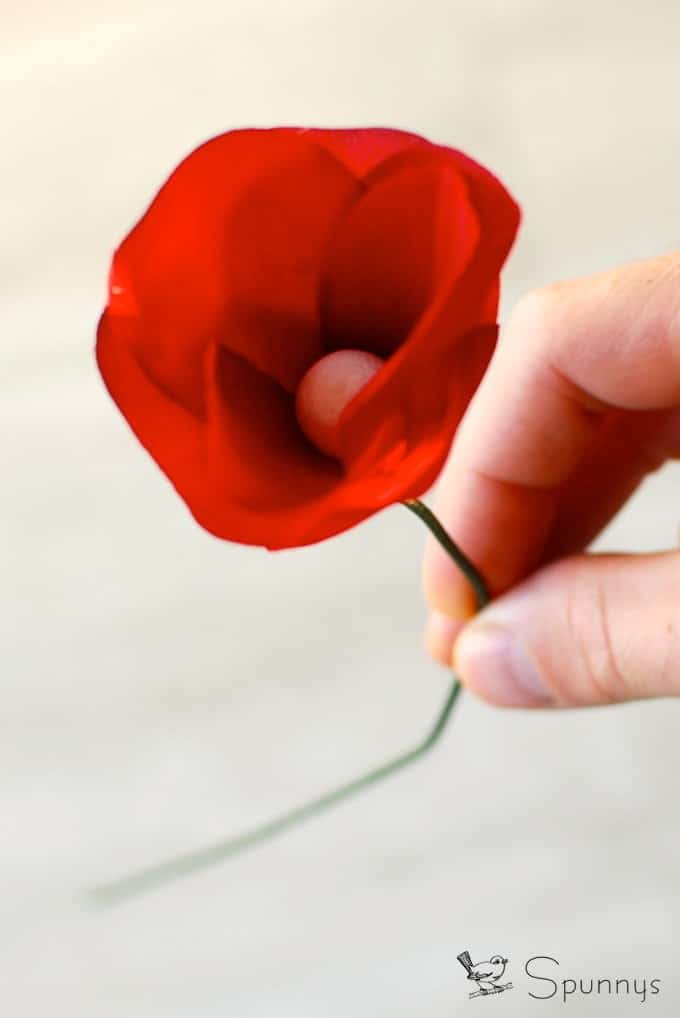
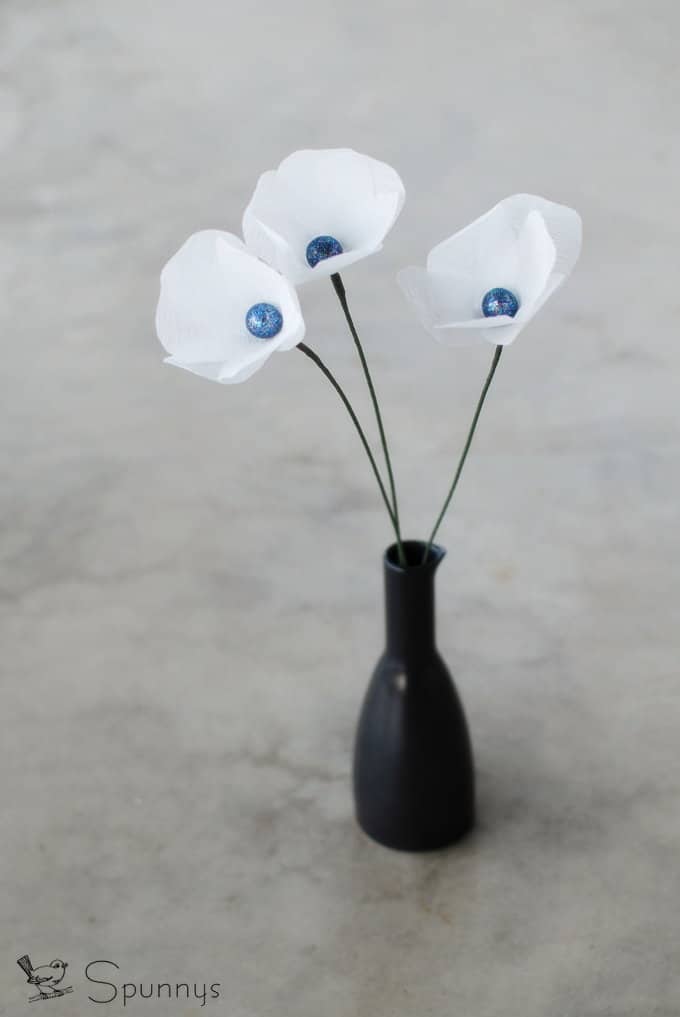
From paper stamens to faux flowers
Here are a few faux flowers fashioned with spun cotton balls stamen.
Artificial paper flower
Artificial fabric flower
If you would like to learn to make your own artificial flowers, you can check out our tutorial: how to make paper flowers.
I hope you enjoyed this tutorial. As always, if you have any questions, do not hesitate to get in touch via the comments section below. Happy crafting!
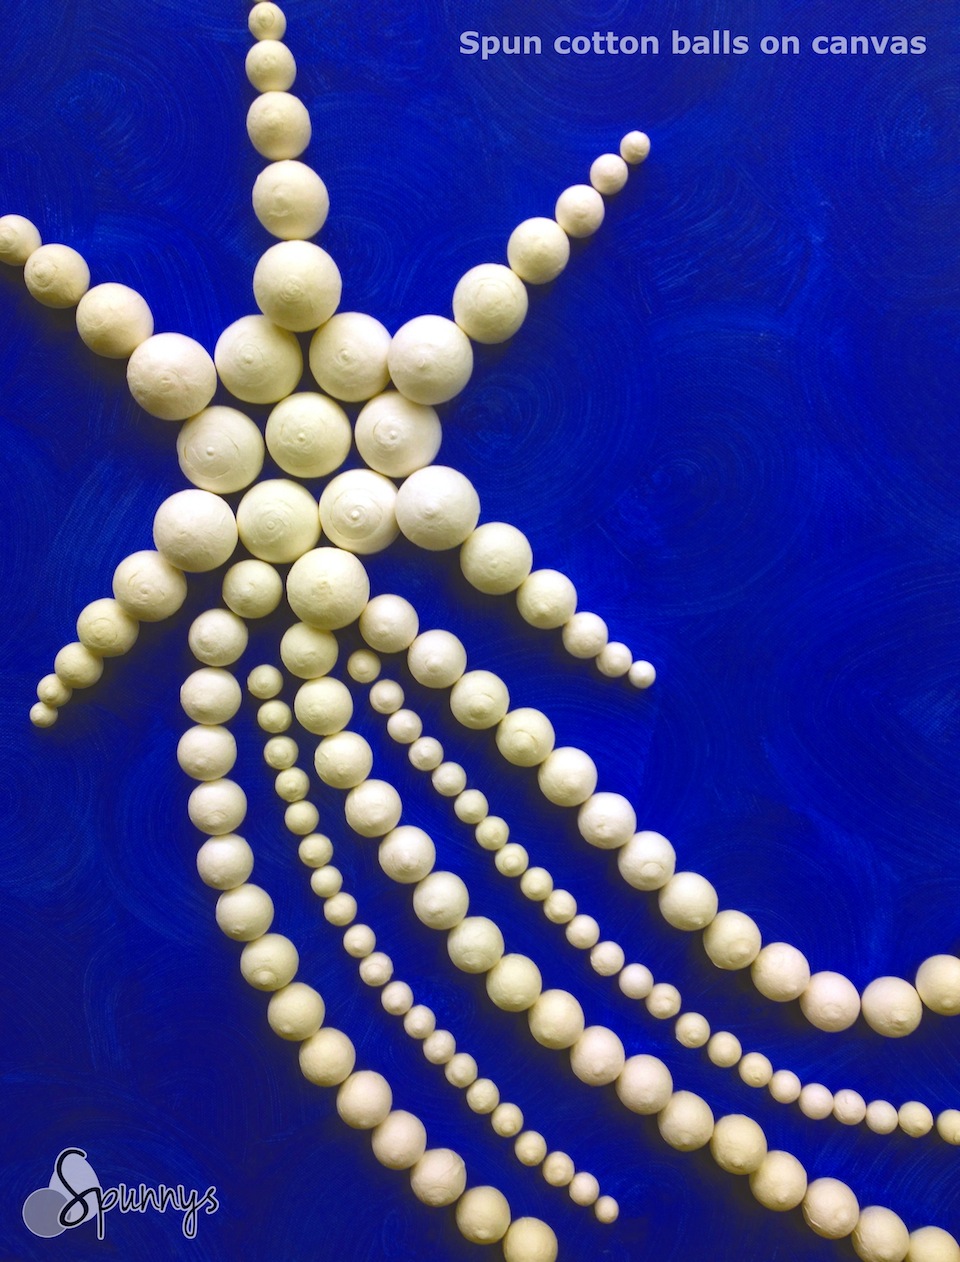
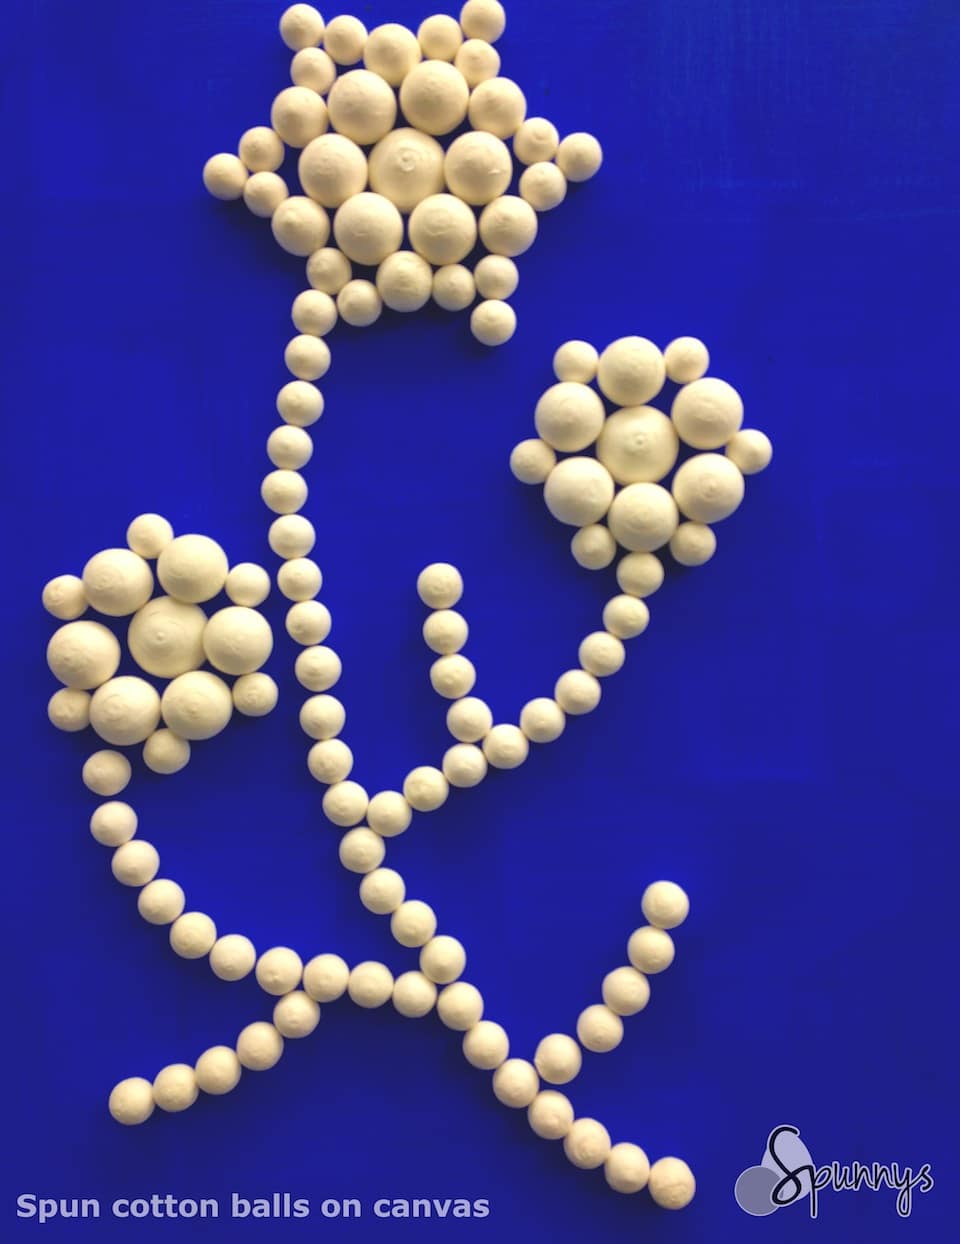
Check out our tutorial and learn how you can make beautiful 3D wall art with spun cotton balls.
Spun cotton balls are great wall art materials
They are inexpensive
They are very lightweight
They come in over a dozen different sizes
They adhere very strongly to glue (tacky glue works fine)
They are eco-friendly and plastic free.
I would like to give credit to my sister who fashioned all the projects on this page. She painted three large canvasses with blue acrylic paint, let them dry, and then glued on the spun cotton balls.
Project Materials :
Spun cotton balls. They come in many sizes. Spun cotton half balls are another option.
A glue gun.
A pencil to mark the position of the balls.
Optional:
A canvas if you prefer not to glue directly onto the wall.
Paint. Acrylic is good because it dries fast.
Brushes.
Directions :
1. If you are using a canvas, start with painting your canvas any color you like. Try to create interesting brush stroke patterns. Let dry.
2. Use a pencil and outline your project.
3. If you want, you can paint the spun cotton balls prior to gluing them.
4. Glue all the paper balls on the canvas or directly onto the wall.
You are done. Creating wall art with spun cotton balls is quick, easy, and a lot of fun.
I hope you enjoyed this tutorial and got some inspiration for your next projects. As always, do not hesitate to send us any of your questions or feel fee to leave a comment.
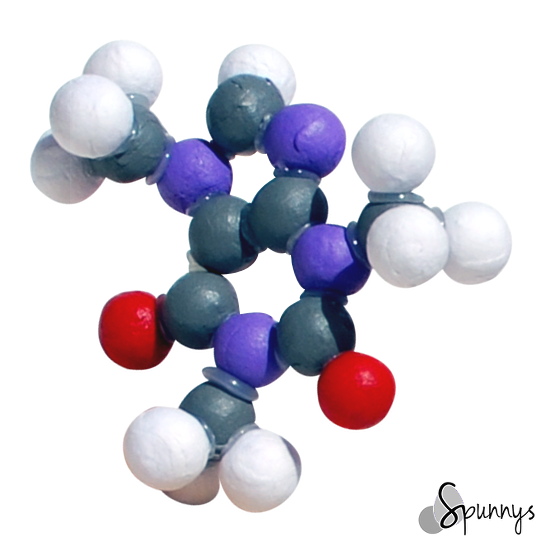
Check out our tutorial and learn how you can build beautiful and inexpensive molecular models with spun cotton balls. We will use a caffeine molecule as an example.
Molecular models – materials:
CAUTION: this is not a craft idea for children as it requires the use of a glue gun.
Spun cotton balls. They come in many sizes from about a quarter inch to almost three inches. You can use smaller size balls for smaller atoms such as hydrogen and larger size balls for larger atoms such as carbon and oxygen. For the caffeine molecule, we used 15mm diameter spun cotton balls (about .6 inches in diameter).
Acrylic paint and paint brush (spun cotton balls are sold white, unpainted).
A glue gun.
Directions:
1. Paint the balls. You can insert a bamboo skewer in the balls to hold them. You can then rest the bamboo sticks in a container while the paint dries.
2. When the paint is dry, glue the spheres together into the shape of a molecule. With the glue gun it only takes a few seconds for each connection.
You are done :) To display your molecules, you can glue them onto a nice wooden pedestal, or just glue them onto a piece of cardboard. You can start with simple molecules and work your way up to complex molecular models such as DNA models.
I hope you enjoyed this tutorial. As always, if you have any questions, do not hesitate to get in touch via the comment section below. We are always here to help. Happy crafting!
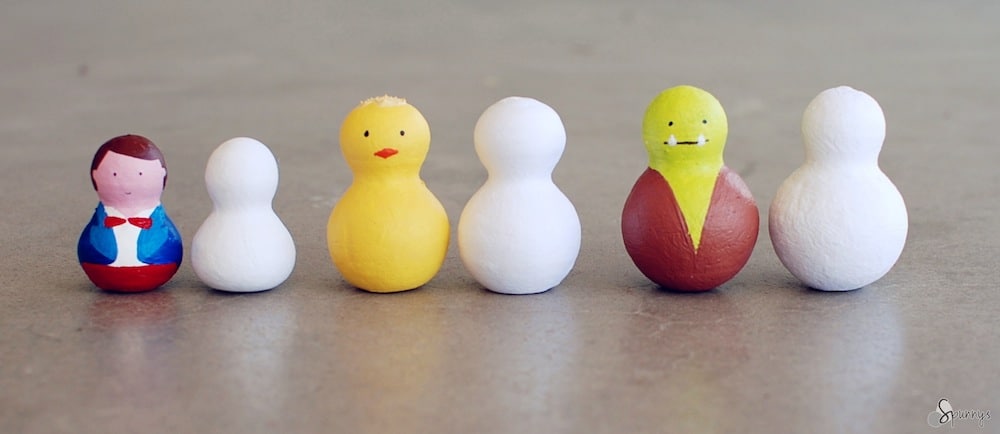
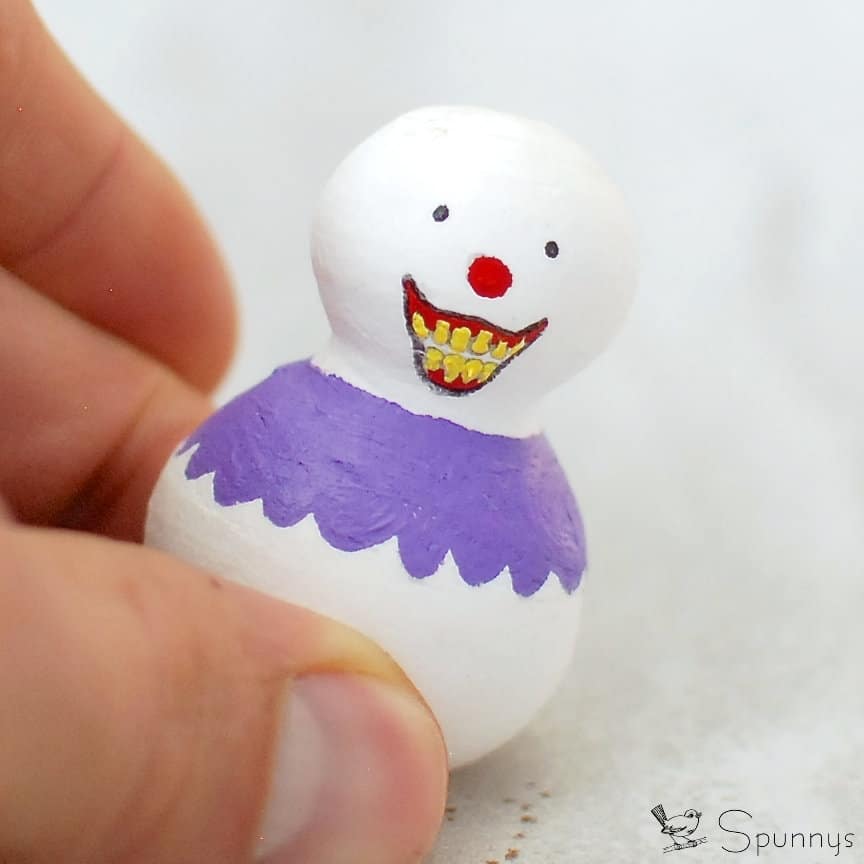
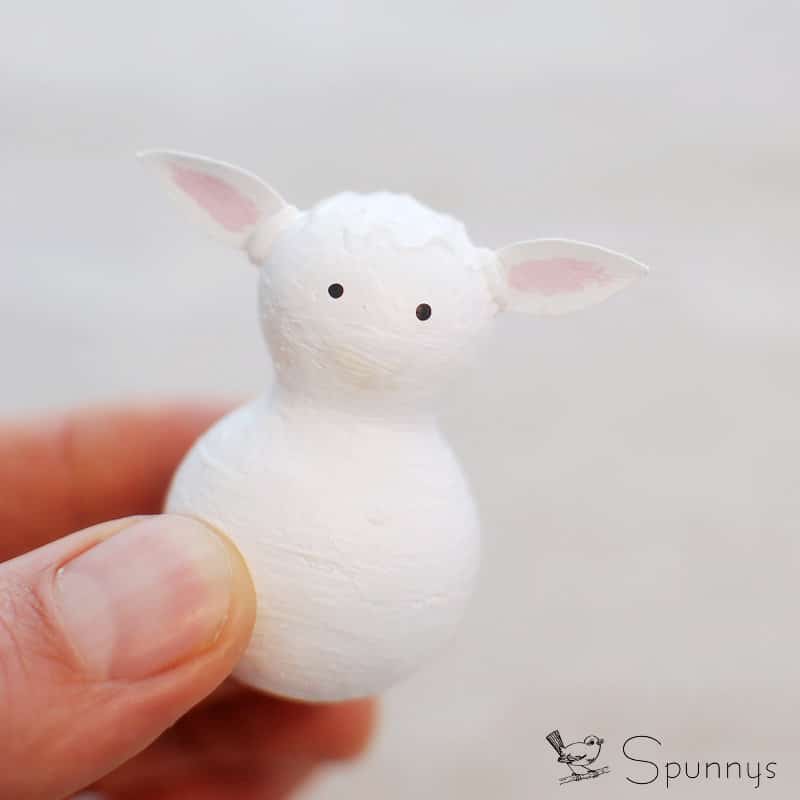
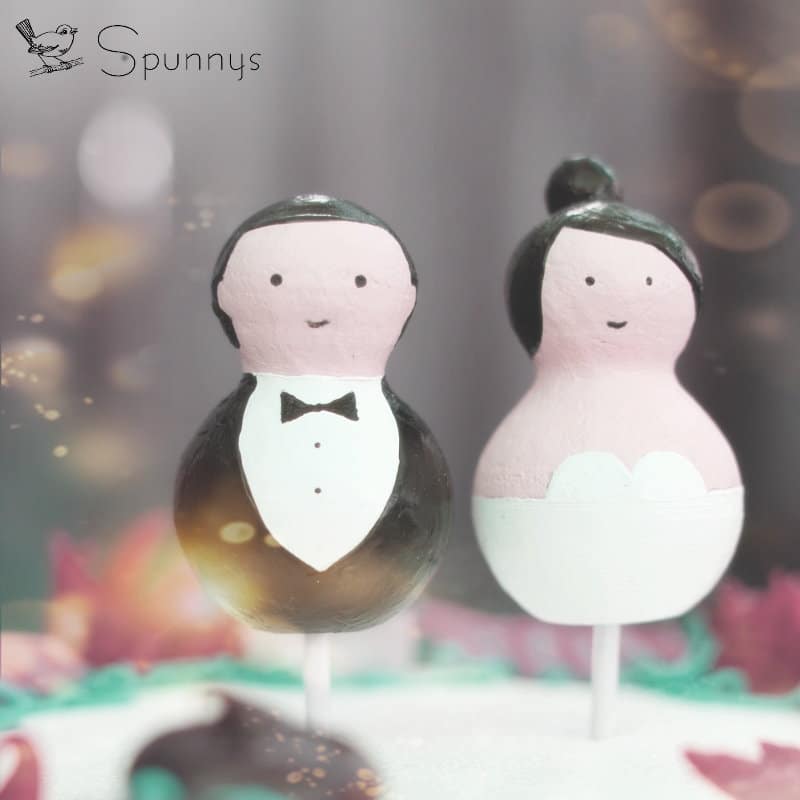
Spunnys ready to paint figurines and dolls are plastic free alternatives to styrofoam products. They are completely made of paper and are very easy to paint and decorate. You can use any type of paint, crayons, markers, and even pencils.
Several sizes and body types to choose from
To see our wide selection of dolls and figurines, please visit our online store.
Our ready to paint figurines come in several sizes and shapes. The shortest one is about 1.5″. The tallest one is about 2.5″.
Note that each blank figurine has a flat bottom and can stand up on its own without a pedestal.
Also, each figurine has a little hole at the bottom. This makes painting them very convenient as they can be mounted on wooden picks, so you don’t risk getting paint on your fingers.
SPUNNYS ready to paint figurines – how to use
SPUNNYS blank figurines are like miniature 3D blank canvasses. Any paint, color markers or drawing supplies that work on paper will also work on spun cotton. And because they are very absorbent, paint dries fast, which make them very quick and fun to decorate.
Craft materials such as paper, cardboard, felt, fabric, and pipe cleaners can also be used.
Finally, all of Spunnys blank paintable figurines have a little hole at the bottom. This is a nifty feature because you can mount them on picks and hold on to the picks while you work on them. This way you will not get paint on your fingers.
Project examples
Spunnys ready to paint paper figurines have very simple lines and are very versatile. You can easily turn them into miniature people, mini animals, little snowmen ornaments, birds, monsters, fairies, princesses, super-heroes…They are great at fostering creativity
The last picture shows how you can use the figurines as cake toppers as well. To do so, simply insert a toothpick in the bottom home of the figurine.
If you have any questions about Spunnys blank figures, please do not hesitate to let us know. We always love to hear from you.